Let me tell you, the sizzling aroma of seasoned ground beef mingling with melted cheese and zesty salsa is enough to make anyone’s mouth water. The first time I set up a Flavorful Walking Taco Bar at a family picnic, I was instantly hooked—the kind of moment where you pause, take a deep breath, and just smile because you know you’re onto something truly special. There’s just something about grabbing a crunchy bag of chips, piling on savory toppings, and eating it all without a plate that feels downright fun and comforting.
Years ago, when I was knee-high to a grasshopper, my grandma used to make taco nights a big deal, but they were always traditional sit-down affairs. I stumbled upon the walking taco concept on a rainy weekend when I wanted a casual, no-mess meal for a bunch of hungry kids and adults. Honestly, I wish I had discovered this dangerously easy, crowd-pleasing setup years ago—it’s pure, nostalgic comfort in a portable package.
My family couldn’t stop sneaking handfuls off the buffet (and I can’t really blame them). Whether it’s a potluck, game day, or a last-minute dinner, this Flavorful Walking Taco Bar recipe brings everyone together with minimal fuss and maximum flavor. You know what? You’re going to want to bookmark this one for all those gatherings where you want to impress without the stress. Tested multiple times in the name of research, of course, this has become a staple for family get-togethers and gifting taco night vibes.
Why You’ll Love This Recipe
Honestly, this Flavorful Walking Taco Bar hits all the right notes, and here’s why you’re going to love it:
- Quick & Easy: Comes together in under 30 minutes, perfect for busy weeknights or last-minute cravings.
- Simple Ingredients: No fancy grocery trips needed—you likely have everything in your pantry or fridge already.
- Perfect for Gatherings: Great for potlucks, backyard parties, or even casual weekday dinners.
- Crowd-Pleaser: Always gets rave reviews from kids and adults alike—because who doesn’t love a customizable taco?
- Unbelievably Delicious: The combo of seasoned meat, crunchy chips, and fresh toppings is next-level comfort food.
This isn’t just another taco bar—you’re getting my personal twist with homemade seasoning blends, a luscious creamy topping, and fresh, zesty salsas. I’ve played around with the ratios until the flavors hit that perfect balance—spicy, tangy, and just a little smoky. Plus, the toppings are all easy to prep ahead, so you can set it up in a snap and let everyone build their own masterpiece.
After the very first bite, you’ll understand why this recipe isn’t just good—it’s the kind that makes you close your eyes and savor every mouthful. It’s comfort food reimagined—faster, fresher, but still packing that soul-soothing punch. Whether you’re impressing guests or turning a simple meal into a memory, this walking taco bar hits the spot every time.
What Ingredients You Will Need
This Flavorful Walking Taco Bar recipe uses simple, wholesome ingredients to deliver bold flavor and satisfying texture without the fuss. Most are pantry staples, but a few fresh toppings really bring it to life.
For the Taco Meat
- 1 lb (450 g) ground beef (85% lean for juiciness)
- 1 small onion, finely chopped (adds sweetness and texture)
- 2 cloves garlic, minced (for aromatic depth)
- 1 tbsp chili powder (I love McCormick’s for consistent flavor)
- 1 tsp cumin (earthy warmth)
- 1/2 tsp smoked paprika (adds subtle smokiness)
- 1/4 tsp cayenne pepper (adjust for heat preference)
- Salt and black pepper to taste
- 1/2 cup (120 ml) beef broth or water (keeps meat juicy)
For the Walking Taco Base

- Individual-sized bags of sturdy corn chips or Fritos (classic choice for walking tacos)
Toppings
- Shredded sharp cheddar cheese (about 2 cups / 200 g)
- Shredded lettuce, finely chopped (adds crunch and freshness)
- Diced tomatoes (ripe and juicy)
- Sliced jalapeños or pickled peppers (optional, for heat)
- Chopped green onions or fresh cilantro (bright herbal notes)
- Homemade guacamole or sliced avocado (creamy richness)
- Sour cream or Greek yogurt (for tang and cooling effect)
- Salsa verde or your favorite salsa (adds zest and moisture)
Optional Extras: Black beans for added protein, corn kernels for sweetness, or pickled red onions for a tangy crunch. You can swap ground beef with ground turkey or plant-based crumbles to suit your crowd.
Equipment Needed
- Large skillet or sauté pan (preferably non-stick)
- Wooden spoon or spatula for stirring
- Sharp knife and cutting board (for chopping toppings)
- Measuring spoons and cups
- Serving bowls for toppings (small to medium size works best)
- Optional: Slow cooker if you want to keep meat warm for hours
If you don’t have a non-stick skillet, a well-seasoned cast iron pan works wonders for browning the meat. For chopping, a good chef’s knife makes all the difference—I swear by mine from a local kitchen store. Setting up your toppings in colorful bowls makes the whole experience more inviting and keeps things organized. On a budget? You can even serve toppings in mason jars or small bowls from your cupboard.
Preparation Method
- Prepare the taco meat: Heat your skillet over medium heat. Add the chopped onion and sauté for 3-4 minutes until translucent and soft, stirring occasionally so they don’t burn.
- Add the minced garlic and cook for another 30 seconds until fragrant—don’t let it brown or it’ll get bitter.
- Increase heat to medium-high and add the ground beef. Break it apart with your spoon and cook until browned all over, about 6-8 minutes.
- Drain excess fat if needed (unless you like it rich and juicy, then leave a little bit in).
- Sprinkle in chili powder, cumin, smoked paprika, cayenne, salt, and black pepper. Stir well to coat the meat evenly.
- Pour in the beef broth or water, lower heat to medium-low, and let the mixture simmer gently for 5-7 minutes, stirring occasionally. This keeps the meat tender and helps the spices blend.
- While the meat simmers, prep your toppings: shred the cheese, chop lettuce, dice tomatoes, slice jalapeños, and get your guacamole and sour cream ready.
- Once the meat is ready and most of the liquid has evaporated, taste and adjust seasoning if needed.
- Set up your walking taco bar: open individual chip bags, spoon in a generous portion of seasoned meat, then pile on your favorite toppings.
- Serve immediately so the chips stay crunchy, or cover the bar with foil if you’re waiting for guests.
Pro tip: If you want to prep ahead, cook the meat and store it in the fridge covered. Reheat gently on the stove with a splash of broth before serving to keep it moist. Also, chopping toppings the day before can save you a bunch of time when you’re ready to party.
Cooking Tips & Techniques
Seasoning your meat just right is the heart of this Flavorful Walking Taco Bar. You want a balanced blend that’s not too salty, but packs a punch of flavor. I’ve learned that toasting spices in the pan for a minute before adding the meat really wakes them up—try it once and you’ll notice the difference.
One common mistake is overcooking the ground beef. If you cook it too long, it can get dry and crumbly, which is no fun when you want juicy, tender bites. Keeping a bit of broth handy helps prevent that dryness and keeps the texture just right.
When it comes to toppings, timing is everything. Chop fresh veggies as close to serving time as possible for crispness. And if you’re prepping salsa or guacamole, a squeeze of lime juice not only brightens flavors but also keeps them from browning too fast.
Multitasking tip: While your meat simmers, prep all your toppings and set out bowls. This way, you can assemble the walking tacos quickly and avoid any hangry moments!
Variations & Adaptations
This recipe is super flexible, so feel free to make it your own:
- Vegetarian/Vegan: Swap the ground beef for seasoned black beans, lentils, or plant-based crumbles. Use vegan cheese and dairy-free sour cream or guacamole.
- Seasonal Twists: In summer, add grilled corn and fresh mango salsa for a sweet contrast. In winter, warm up with a spicy chipotle seasoning blend.
- Low-Carb/Keto: Skip the chips and serve the taco meat and toppings in lettuce cups or low-carb tortillas.
- Different Cooking Methods: Slow cook the meat with spices for even deeper flavor, or use an Instant Pot for quick pressure-cooked meat.
Personally, I once swapped in ground turkey and added a smoky chipotle powder when I was short on beef—it was a hit and a nice twist for a lighter version. Don’t be shy about mixing and matching toppings to suit your taste buds or dietary needs.
Serving & Storage Suggestions
Serve your walking tacos immediately for the best crunch and freshest flavor. If you want to fancy it up a bit, add lime wedges on the side and a sprinkle of fresh cilantro. Pair this with a cold Mexican beer, a crisp margarita, or a sparkling agua fresca for a refreshing combo.
Leftovers? No problem. Store the cooked meat in an airtight container in the fridge for up to 3 days. Keep toppings separate to avoid sogginess. Reheat the meat gently in a skillet or microwave with a splash of broth to keep it juicy. Chips are best fresh, but if you have extras, toast them briefly in the oven to bring back crunch.
Flavors actually deepen if you let the meat sit for a few hours in the fridge, making this a great make-ahead option for busy days or meal prep. Just keep fresh toppings ready to go, and you’re golden.
Nutritional Information & Benefits
Each serving of this Flavorful Walking Taco Bar provides a balanced mix of protein, fats, and carbohydrates, making it a satisfying meal. Ground beef is a great source of iron and B vitamins, helping keep energy levels steady. Fresh veggies add fiber and essential vitamins like C and K.
If you opt for leaner meats or plant-based proteins, you can reduce saturated fat while keeping the flavor profile intact. Using Greek yogurt instead of sour cream adds a protein boost and probiotics, which are great for digestion.
Keep an eye on chip portions if you’re watching carbs, or swap for low-carb alternatives to make this recipe friendly for gluten-free or keto diets. This taco bar is allergen-friendly with a few simple swaps—just watch out for dairy if you need to avoid it.
Conclusion
This Flavorful Walking Taco Bar recipe is worth every minute you spend making it. It’s fun, flexible, and downright delicious—perfect for feeding a crowd or treating yourself on a busy night. The best part? You can customize it endlessly to fit your taste buds or dietary needs.
Honestly, I love how it brings my family together—everyone building their own taco just the way they like it. It’s a hands-on meal that feels casual but packed with flavor and personality. I’d love to hear how you put your own spin on it, so don’t be shy to comment or share your toppings ideas!
Give this recipe a try and watch it become a go-to for your next gathering or simple dinner. You’re going to feel like a taco bar pro in no time!
FAQs
What chips work best for a walking taco bar?
Sturdy corn chips or Fritos hold up best to toppings without getting soggy too fast. Avoid thin, delicate chips as they might break easily.
Can I make the taco meat ahead of time?
Absolutely! Cook the meat and store it in the fridge. Reheat gently with a little broth before serving to keep it juicy and flavorful.
What are some good vegetarian topping options?
Beans, grilled veggies, guacamole, diced avocado, and plant-based cheeses all work wonderfully. You can also add pickled jalapeños or fresh herbs for extra zing.
How do I keep the chips from getting soggy?
Serve chips in individual bags or bowls and add toppings just before eating. Keeping wet ingredients separate until the last minute helps maintain the crunch.
Can I use ground turkey or chicken instead of beef?
Yes! Ground turkey or chicken make great lean alternatives. Just adjust your seasoning slightly to complement the milder flavor of the poultry.
Pin This Recipe!
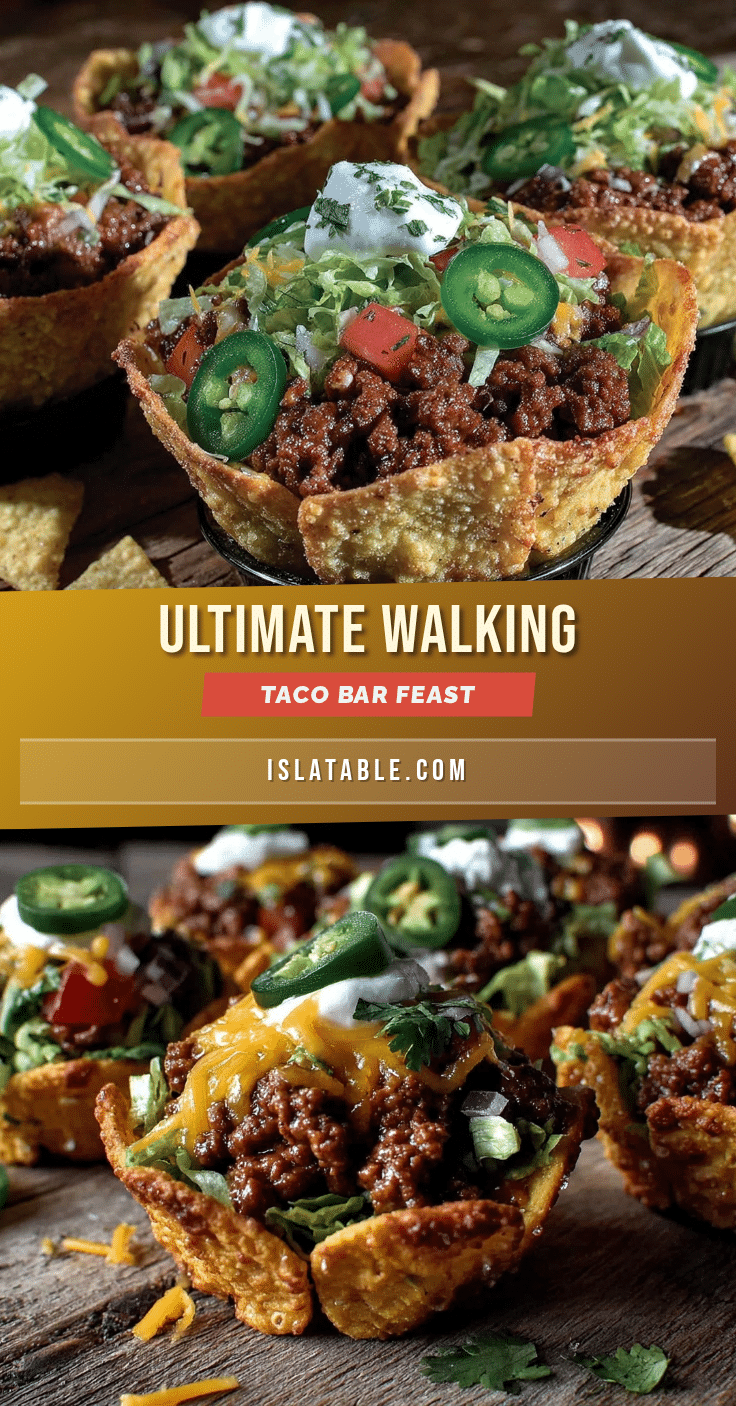
Flavorful Walking Taco Bar Recipe with Easy Homemade Toppings Guide

A quick and easy walking taco bar featuring seasoned ground beef, crunchy chips, and fresh homemade toppings, perfect for gatherings and casual meals.
- Prep Time: 15 minutes
- Cook Time: 15 minutes
- Total Time: 30 minutes
- Yield: 6 servings 1x
- Category: Main Course
- Cuisine: Mexican
Ingredients
- 1 lb (450 g) ground beef (85% lean for juiciness)
- 1 small onion, finely chopped
- 2 cloves garlic, minced
- 1 tbsp chili powder
- 1 tsp cumin
- 1/2 tsp smoked paprika
- 1/4 tsp cayenne pepper
- Salt and black pepper to taste
- 1/2 cup (120 ml) beef broth or water
- Individual-sized bags of sturdy corn chips or Fritos
- 2 cups (200 g) shredded sharp cheddar cheese
- Shredded lettuce, finely chopped
- Diced tomatoes
- Sliced jalapeños or pickled peppers (optional)
- Chopped green onions or fresh cilantro
- Homemade guacamole or sliced avocado
- Sour cream or Greek yogurt
- Salsa verde or your favorite salsa
- Optional extras: black beans, corn kernels, pickled red onions
Instructions
- Heat a large skillet over medium heat. Add the chopped onion and sauté for 3-4 minutes until translucent and soft, stirring occasionally.
- Add the minced garlic and cook for another 30 seconds until fragrant, avoiding browning.
- Increase heat to medium-high and add the ground beef. Break it apart and cook until browned all over, about 6-8 minutes.
- Drain excess fat if desired, leaving a little for juiciness if preferred.
- Sprinkle chili powder, cumin, smoked paprika, cayenne, salt, and black pepper over the meat. Stir well to coat evenly.
- Pour in beef broth or water, reduce heat to medium-low, and simmer gently for 5-7 minutes, stirring occasionally.
- While the meat simmers, prepare toppings: shred cheese, chop lettuce, dice tomatoes, slice jalapeños, and prepare guacamole and sour cream.
- Taste the meat and adjust seasoning if needed once most liquid has evaporated.
- Set up the walking taco bar: open individual chip bags, spoon in seasoned meat, and pile on desired toppings.
- Serve immediately to keep chips crunchy or cover with foil if waiting for guests.
Notes
Toast spices in the pan before adding meat to enhance flavor. Avoid overcooking ground beef to keep it juicy. Prep toppings close to serving time for freshness. Cook meat ahead and reheat gently with broth to maintain moisture. Serve chips in individual bags to prevent sogginess.
Nutrition
- Serving Size: 1 walking taco (1 ch
- Calories: 450
- Sugar: 3
- Sodium: 600
- Fat: 28
- Saturated Fat: 11
- Carbohydrates: 28
- Fiber: 3
- Protein: 25
Keywords: walking taco, taco bar, ground beef tacos, easy taco recipe, party food, crowd-pleaser, homemade toppings