January, and the house is quiet except for the hum of the refrigerator and the occasional creak of settling wood. Outside, the wind rattles the windowpanes with a persistent, icy finger, reminding you that winter has truly settled in for the long haul. The only thing I want is a cup of coffee that tastes like a warm hug, something that bridges the gap between the bitter reality of early mornings and the sweet promise of the holidays still lingering in the air. I don’t want to go out into that biting cold to buy another overpriced syrup from a chain store that tastes like artificial candy and regret. Instead, I stand at my counter, watching the steam rise from a small saucepan, waiting for the peppermint and chocolate to marry into something rich and aromatic. It’s a small ritual, really. Just me, the dark roast beans, and the slow melt of chocolate into sweetened condensed milk. There is a specific kind of peace in stirring that mixture, knowing that within ten minutes, the whole kitchen will smell like a high-end café, but without the pretentious price tag. You know how it gets by February, when the novelty of the season fades and you just need a little comfort? This syrup becomes that comfort. It stays in the fridge, a little jar of liquid warmth that makes even the grayest Tuesday feel a bit more special. It’s not about impressing anyone. It’s about making your own morning feel like a gift you gave yourself.
Why You’ll Love This Recipe
Let’s face it, most store-bought syrups are just sugar water with a drop of flavoring and a bunch of preservatives you can’t pronounce. I tried making this cozy peppermint mocha syrup after a particularly rough week, and honestly, the difference was night and day. The texture is thicker, the flavor is deeper, and it doesn’t leave that weird chemical aftertaste in your throat. I’ve tested this recipe at least a dozen times, tweaking the ratio of chocolate to mint until it hit that sweet spot where you taste the coffee just as much as the treat. It’s not just a sweetener; it’s a complete flavor experience. Here is why this stuff is going to become your new best friend:
- Quick & Easy: You can have this ready in under 10 minutes. Seriously. If you can boil water and stir, you can make this. It’s perfect for when you’re rushing out the door or just want an instant upgrade to your morning brew.
- Simple Ingredients: You don’t need a specialty grocery store run. You likely already have chocolate chips, peppermint extract, and some form of sweetener in your pantry. No fancy, hard-to-find items here.
- Perfect for Coffee Bars: Whether you have a dedicated coffee station or just a corner of the counter with your machine, this bottle looks professional and inviting. It turns a simple mug into a little indulgence.
- Crowd-Pleaser: Kids love the chocolate, adults love the coffee kick, and everyone loves the mint. It’s a safe bet for guests who have “strong” opinions about their caffeine.
- Unbelievably Delicious: The combo of rich cocoa and cool peppermint is next-level. It hits that nostalgic spot but feels sophisticated enough for a dinner party.
What makes this different? A lot of recipes just mix syrup with extract. That’s a mistake. By heating the chocolate into the sweet base, you create an emulsion that actually clings to the coffee rather than floating on top. It integrates the flavors so deeply that every sip tastes consistent. It’s the kind of recipe that makes you close your eyes after the first sip because the warmth spreads through your chest. It’s comfort food reimagined—fast, manageable, but with the same soul-soothing satisfaction as a homemade dessert. Plus, it’s way easier than making a latte art masterpiece, and frankly, my latte art is tragic.
What Ingredients You Will Need
This recipe relies on a few key components that work together to create that thick, pourable consistency you see in cafes. You don’t need exotic spices or rare ingredients. The magic here is in the simplicity and the quality of what you put in. I like to keep it straightforward so you can tweak it to your taste without a chemistry degree. Most of these items are pantry staples, which is the best kind of ingredient.
- Sweetened Condensed Milk: This is the base. It adds that creamy, rich texture and sweetness all at once. I recommend the standard canned variety; it has the right viscosity. If you need a dairy-free option, you can use coconut milk condensed, but the texture might be slightly thinner. Look for a brand with no palm oil if you can find it.
- Dark Chocolate Chips: Use semi-sweet or dark chocolate chips. Milk chocolate works too, but it will be sweeter and less complex. I prefer a 60% cocoa content because it balances the mint well. Avoid the cheap baking chips that have a waxy melt; they don’t blend as smoothly.
- Strong Brewed Coffee: You need a concentrated coffee to give it that mocha kick. Use a dark roast or an espresso. If you don’t have a coffee maker, instant espresso powder dissolved in a little hot water works in a pinch. The coffee flavor needs to be strong enough to stand up to the sugar and mint.
- Peppermint Extract: This is non-negotiable. Do not use peppermint oil unless you are very careful, as it is much stronger and can taste medicinal. Use a high-quality peppermint extract. A little goes a long way, so buy the good stuff. You want that cool, clean mint flavor, not the candy-cane artificial taste.
- Vanilla Extract: Just a teaspoon to round out the flavors. It adds depth and makes the chocolate taste more like chocolate. It’s a subtle note, but you’ll miss it if it’s not there.
- Water: A small amount to help dissolve the chocolate and adjust the thickness. You can add more or less depending on how thick you like your syrup.
If you are watching your sugar intake, you can swap the condensed milk for a sugar-free version, though the texture will change. You might need to add a thickener like xanthan gum, but honestly, the real stuff just tastes better. For the chocolate, if you don’t have chips, you can chop up a chocolate bar, but watch it closely because bars melt faster than chips.
Equipment Needed
You don’t need much for this, which is part of the appeal. The most important piece of equipment is a small saucepan. I use a 1-quart stainless steel saucepan because it heats evenly and doesn’t have hot spots that might burn the chocolate. If you don’t have one, a small heavy-bottomed pot works too. Avoid non-stick if you can, as it’s harder to get a clean pour from, but it’s not a dealbreaker.
You’ll also need a whisk. A small silicone whisk is great because it scrapes the corners of the pan and helps emulsify the chocolate into the milk. If you don’t have one, a fork works, but it takes more effort. A glass measuring cup is helpful for pouring the hot mixture into your storage bottle without making a mess. And finally, a clean glass bottle or jar for storage. An old jam jar works perfectly if you wash it thoroughly. I like using a bottle with a narrow neck because it controls the pour better, preventing you from dumping half the bottle into your mug.
If you want to be fancy, you can use a double boiler, but that’s just extra cleanup. The direct heat method is faster and gives you more control over the thickness. Just keep the heat low. There’s no need for fancy gadgets here. Keep it simple, keep it clean, and you’ll be sipping in no time.
Preparation Method
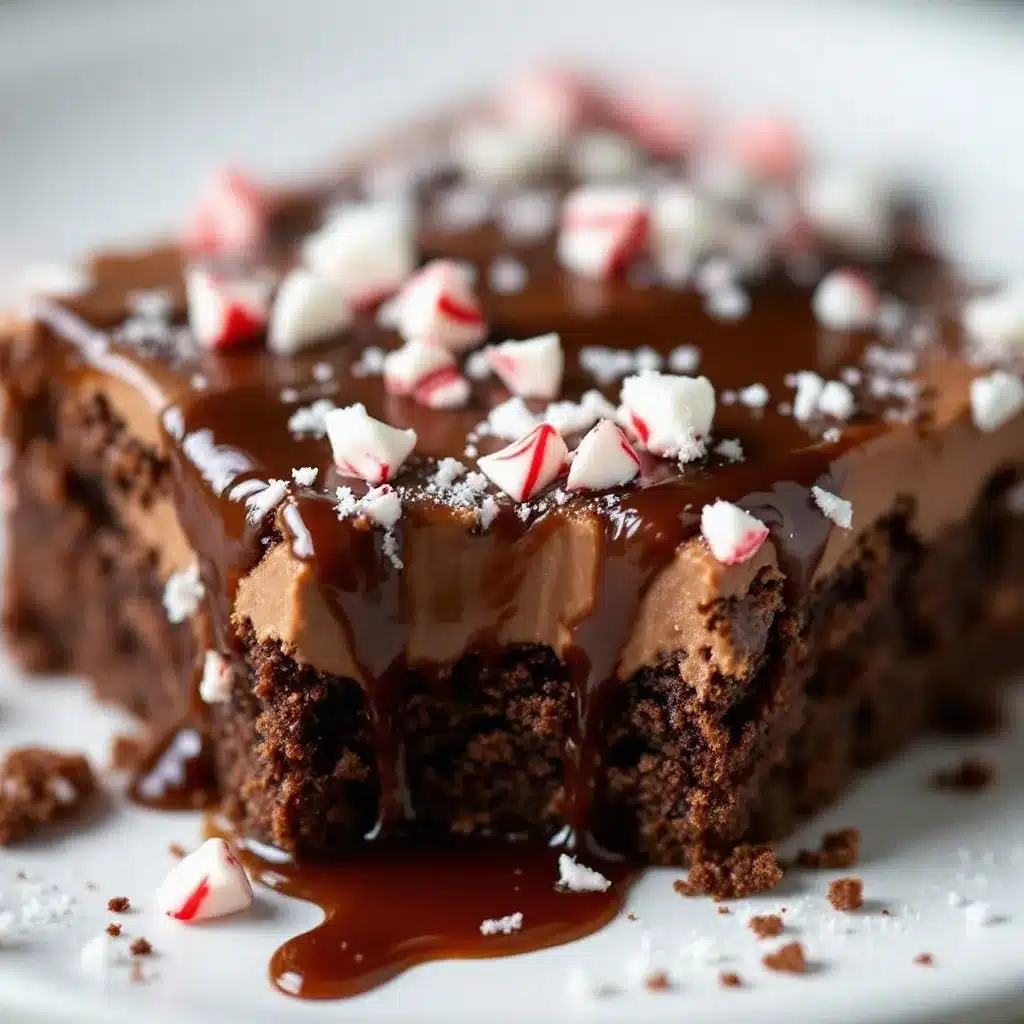
Making this syrup is straightforward, but attention to detail matters. You want a smooth, lump-free result. Follow these steps carefully, and you’ll get a professional-quality syrup every time.
- Prepare the Coffee: Start by brewing a small cup of strong coffee. You need about 1/4 cup of liquid. If you are using espresso powder, dissolve 2 teaspoons in 1/4 cup of hot water. Let it cool slightly so it doesn’t boil the milk when you add it. This step takes about 5 minutes if you’re brewing fresh.
- Combine Base Ingredients: In your small saucepan, add the sweetened condensed milk, the brewed coffee, and 2 tablespoons of water. Whisk these together gently over medium-low heat. You don’t need to boil it yet. Just want to warm it up so the chocolate melts easier. This takes about 2 minutes.
- Add Chocolate: Pour in the dark chocolate chips. Stir constantly with your whisk. The chocolate will start to melt and combine with the milk. Keep stirring until all the chips are melted and the mixture looks smooth and glossy. This is the critical step. If you see lumps, keep stirring. Do not walk away. This takes about 3-4 minutes. If the mixture looks too thick, add another tablespoon of water.
- Simmer and Thicken: Once the chocolate is fully melted, let the mixture come to a very gentle simmer. You want small bubbles around the edges, not a rolling boil. Let it cook for another 2 minutes, stirring frequently. This helps thicken the syrup slightly and cooks out any raw coffee taste. The syrup will look like thin honey when it’s done.
- Remove from Heat: Take the pan off the burner immediately. This is important because residual heat will continue to cook the mixture. If you leave it on, it might get too thick or burn.
- Add Flavors: Stir in the peppermint extract and vanilla extract. The heat will release the aroma, so you’ll smell minty chocolate goodness immediately. Taste it at this stage. If you want more mint, add a few more drops. If it’s too sweet, a tiny pinch of salt can balance it out. This step takes about 1 minute.
- Cool and Bottle: Let the syrup cool in the pan for about 10 minutes. It will thicken as it cools. Then, carefully pour it into your clean glass bottle. Use a funnel if you have one to avoid sticky fingers. Seal the bottle tightly.
The whole process, from start to finish, takes about 15 minutes. Most of that is just waiting for things to melt or cool. The active stirring time is only about 10 minutes. It’s very manageable even if you’re tired.
Cooking Tips & Techniques
I’ve made a few mistakes along the way, so you don’t have to. The biggest mistake people make is letting the chocolate burn. Chocolate seizes up if it gets too hot or if water gets into it in a weird way. Keep your heat low. Medium-low is your friend. If you see smoke, you’ve gone too far. Also, don’t stir with a wooden spoon if the pan is too hot; it can scorch the bottom. A silicone spatula or whisk is safer.
Another tip is about the coffee strength. If your coffee is too weak, the mocha flavor will be lost. You want that bold, bitter kick to cut through the sweetness. If you use instant coffee, make sure it’s a strong brew. I once used weak drip coffee and the result was just sweet mint milk. Not good. Always taste your coffee before adding it.
Multitasking is key here. While the chocolate is melting, you can prep your bottles or clean up the counter. But don’t get distracted. Stirring is essential for a smooth texture. If you stop stirring, the chocolate might settle and harden at the bottom. Keep it moving. Also, if the syrup gets too thick after cooling, you can thin it out with a little hot water or hot milk when you serve it. It’s forgiving that way.
Finally, be careful with the peppermint extract. It’s potent. Start with 1 teaspoon and add more if needed. You can always add more mint, but you can’t take it out. I learned that the hard way with one batch that tasted like toothpaste. Don’t be like me. Measure twice, stir once.
How do I fix a seized chocolate mixture?
If your chocolate looks grainy or clumpy, add a tablespoon of hot water or hot cream and whisk vigorously. It should come back together. If it doesn’t, you might have overheated it, but usually, a little liquid saves it.
Can I use milk chocolate instead?
Yes, but it will be sweeter and less chocolate-forward. You might want to reduce the added water slightly since milk chocolate has more sugar and cocoa butter.
Variations & Adaptations
One of the best things about this syrup is how customizable it is. You can tweak it to fit your dietary needs or just your mood. Here are a few variations I’ve tried:
- Dairy-Free Version: Swap the sweetened condensed milk for a dairy-free version made from coconut milk. You can find brands like Silk or Native Forest. The flavor will be slightly coconutty, which actually pairs well with the mint. You might need to add a thickener like cornstarch if it’s too thin.
- Sugar-Free Option: Use a sugar-free sweetened condensed milk alternative. There are brands that use erythritol or stevia. The texture might be slightly different, so you may need to simmer it longer to reduce it. Taste as you go, as sugar-free sweeteners can have a cooling effect themselves.
- White Chocolate Peppermint: Swap the dark chocolate for white chocolate chips. This creates a sweeter, creamier syrup that tastes like a candy cane latte. It’s great for people who don’t like the bitterness of coffee. Just be careful not to burn the white chocolate, as it melts faster.
- Mocha Mint Chip: Add a tablespoon of crushed peppermint candies or chocolate chips at the end, right before bottling. This gives you little crunchy bits in your syrup. It’s fun and adds texture. Just make sure they are small enough to pour through your bottle neck.
I also like to add a pinch of cayenne pepper if I want a little kick. It sounds weird, but it enhances the chocolate flavor and warms you up. It’s a nice twist for cold mornings. You can also swap the peppermint for almond extract for a different flavor profile, though it won’t be a mocha anymore. It’s more of an almond chocolate syrup. Still delicious, just different.
Serving & Storage Suggestions
This syrup is best served warm or at room temperature. If you store it in the fridge, it will thicken up quite a bit. Before using, just shake the bottle well and microwave the amount you need for 15-20 seconds to loosen it up. It pours much easier when it’s slightly warm. I like to serve it with hot coffee, obviously, but it’s also great in hot chocolate or even stirred into oatmeal. It adds a nice minty chocolate boost to breakfast grains.
For storage, keep it in an airtight glass jar in the refrigerator. It will last for about 2-3 weeks. If you notice any mold or off-smells, toss it out. Since it has dairy (unless you use the dairy-free version), it doesn’t keep forever. I usually make a small batch every few weeks so it’s always fresh. You can also freeze it in ice cube trays for individual portions. Just thaw a cube in your hot coffee. It melts quickly and gives you a consistent amount of syrup.
When serving, garnish with a dollop of whipped cream and a crushed candy cane. It looks festive and tastes amazing. It’s perfect for holiday gatherings or just a cozy night in. The flavors develop over time, so it might taste even better on day three as the mint and chocolate meld further. Just give it a good shake before pouring.
Nutritional Information & Benefits
While this syrup is definitely a treat and not a health food, it does have some benefits. The dark chocolate provides antioxidants, and the coffee gives you a caffeine boost to start your day. If you use a sugar-free or dairy-free version, you can control the calorie count more easily. A typical serving is about 1-2 tablespoons, which adds around 50-100 calories depending on the sweetness. It’s a small indulgence that makes your coffee feel special without adding a huge amount of sugar compared to store-bought syrups, which can have 200+ calories per serving. Plus, you control the ingredients, so you know exactly what you’re putting in your body. It’s a mindful treat, not a mindless dump of sugar.
Conclusion
Making your own cozy peppermint mocha syrup is one of those small wins that makes a big difference in your daily routine. It’s easy, it’s delicious, and it smells amazing. You don’t need to be a chef to make it, and you don’t need fancy equipment. Just a few ingredients and a little time. I hope you try this recipe and find it as comforting as I do. It’s become a staple in my kitchen, especially during the cold months. Feel free to tweak it to your taste. Add more mint, less sugar, or a splash of cream. Make it your own. And if you do, I’d love to hear how it turns out. Leave a comment below with your favorite way to use it. Do you put it in coffee, hot chocolate, or something else? Share your ideas and let’s keep the cozy vibes going. Happy brewing!
Frequently Asked Questions
Can I use homemade whipped cream with this syrup?
Absolutely. Homemade whipped cream adds a light, airy texture that pairs perfectly with the rich syrup. Just whip heavy cream with a little sugar and vanilla until soft peaks form. It’s a classic combination.
Why is my syrup too thin?
If your syrup is too thin, you can simmer it on low heat for a few more minutes to reduce it. The water content will evaporate, and it will thicken. Be careful not to burn it. You can also add a little more chocolate, which will help thicken it as it cools.
Does this syrup work in iced coffee?
Yes, it works well in iced coffee, but it might not dissolve as easily as in hot coffee. You can microwave the syrup for a few seconds to warm it up before pouring it over the ice, or stir it vigorously. It adds a nice minty chocolate flavor to iced drinks too.
Can I make this syrup without coffee?
You can, but it won’t be a mocha syrup. It will just be peppermint chocolate syrup. If you omit the coffee, add a little more water or milk to keep the consistency right. It’s still delicious, just different.
How do I clean the saucepan after making this?
The syrup can be sticky and hard to clean. Fill the pan with hot water and let it sit for 10 minutes. The sugar and chocolate will dissolve, making it easy to wipe clean. If there are stubborn bits, use a little dish soap and a sponge. Don’t scrub too hard, or you might scratch the pan.
Pin This Recipe!
Cozy Peppermint Mocha Syrup: 5-Minute Coffee Bar Recipe

A rich, homemade peppermint mocha syrup made with sweetened condensed milk and dark chocolate. This quick 15-minute recipe creates a smooth, café-quality syrup that is perfect for enhancing coffee, hot chocolate, or oatmeal.
- Prep Time: 5 minutes
- Cook Time: 10 minutes
- Total Time: 15 minutes
- Yield: Makes approx. 1 cup
- Category: Condiments & Syrups
- Cuisine: American
Ingredients
- 1 can (14 oz) sweetened condensed milk
- 1/4 cup strong brewed coffee or espresso
- 2 tablespoons water
- 1/2 cup dark chocolate chips (semi-sweet or 60% cocoa)
- 1 teaspoon peppermint extract
- 1 teaspoon vanilla extract
- Additional water as needed for consistency
Instructions
- Brew 1/4 cup of strong coffee or dissolve 2 teaspoons of instant espresso powder in 1/4 cup hot water. Let it cool slightly.
- In a small saucepan over medium-low heat, whisk together the sweetened condensed milk, brewed coffee, and 2 tablespoons of water.
- Add the dark chocolate chips to the saucepan and stir constantly until the chocolate is fully melted and the mixture is smooth and glossy.
- Bring the mixture to a very gentle simmer and cook for 2 minutes, stirring frequently, until it thickens slightly to the consistency of thin honey.
- Remove the pan from the heat immediately.
- Stir in the peppermint extract and vanilla extract. Taste and adjust mint or sweetness if desired.
- Let the syrup cool in the pan for about 10 minutes, then pour into a clean glass bottle or jar for storage.
Notes
Store in an airtight glass jar in the refrigerator for 2-3 weeks. The syrup will thicken when cold; warm it in the microwave for 15-20 seconds before using. If the chocolate seizes, add a tablespoon of hot water or cream and whisk vigorously. For a dairy-free version, use coconut milk condensed. For a sugar-free version, use sugar-free condensed milk alternatives.
Nutrition
- Serving Size: 1-2 tablespoons
- Calories: 75
- Sugar: 11
- Sodium: 25
- Fat: 3
- Saturated Fat: 2
- Carbohydrates: 12
- Fiber: 1
- Protein: 2
Keywords: peppermint mocha syrup, homemade coffee syrup, peppermint syrup, mocha syrup, coffee bar recipe, holiday coffee drink, dairy-free syrup option


