“You know that bread you make when you’re trying to hide the fact that you bought the bananas at the store?” my neighbor asked, peering over the fence with a piece of foil-wrapped loaf in her hand. It was a Tuesday, the sky was that heavy, bruised purple that promises rain, and I was standing there holding a bowl that had seen better days. She wasn’t mocking me, exactly. She was just stating a fact about our shared struggle with grocery shopping efficiency. That conversation stuck with me because it highlighted a universal truth: we all want that bakery-quality, dark-crusted, spoon-bendable banana bread, but few of us want the ten bowls of dishes that usually come with it.
So, I decided to fix it. Not by buying better bananas, but by changing the entire process. I wanted a recipe that required zero mental energy and minimal cleanup. The result is this easy one-bowl moist banana bread. It’s not fancy. It doesn’t require a stand mixer or a whisk that you have to fight to clean. It’s just flour, sugar, oil, and those overripe bananas that are starting to look like they’ve been through a war. I’ve tested this version so many times that I can probably make it with my eyes closed, which is exactly the kind of cooking I prefer after a long day.
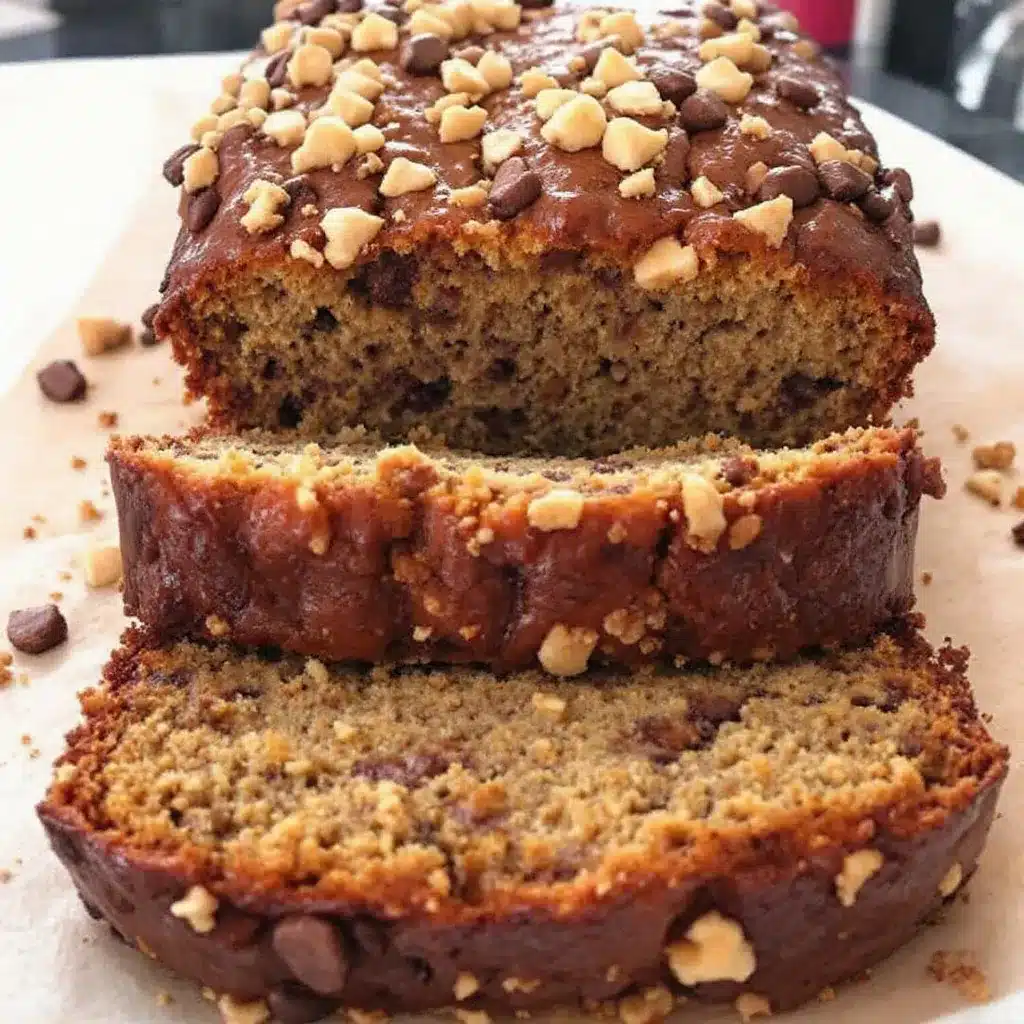
The texture is the main event here. It’s dense enough to feel substantial but moist enough that it doesn’t stick to the roof of your mouth. I use oil instead of butter, which keeps it soft for days, and I mix it in a single large bowl. No splatter, no fuss. If you’ve ever felt guilty about throwing away brown bananas, this is your redemption arc. It’s practical, it’s forgiving, and honestly, it tastes better than most things you’ll buy at the grocery store. You’ll probably end up making it just because it’s easier than deciding what to cook for dinner.
Why You’ll Love This Recipe
There is a specific kind of magic that happens when you combine simplicity with quality ingredients. This recipe isn’t just about saving time; it’s about removing the friction from baking. I’ve tried the fancy recipes with creamed butter and folded egg whites, and while they are delicious, they feel like homework. This one feels like a hug. Here is why this easy one-bowl moist banana bread has earned a permanent spot in my weekly rotation:
- Quick & Easy: You can have the batter ready in under 10 minutes. That is less time than it takes to scroll through social media, so you know it’s fast. It’s perfect for those weeknights when you’re tired and just want a treat without the effort.
- Simple Ingredients: Look in your pantry. You probably have flour, sugar, baking soda, and salt. You might even have bananas on the counter. This recipe uses staples you already own, so there is no special trip to the store needed.
- Perfect for Meal Prep: Banana bread freezes beautifully. I often make two loaves on Sunday. One goes in the freezer for later, and the other stays on the counter. It’s the ultimate make-ahead breakfast or snack.
- Crowd-Pleaser: Kids love it because it’s sweet. Adults love it because it’s not *too* sweet. It’s a neutral flavor profile that pairs well with coffee in the morning or wine in the evening. It rarely fails to impress.
- Unbelievably Moist: The use of oil and the ratio of bananas create a texture that is incredibly tender. It doesn’t dry out after a day or two, which is a common problem with butter-based quick breads.
What makes this version different from the rest is the technique. Most recipes tell you to mash the bananas, but I find that leaving a few small chunks adds a nice textural contrast. Also, using oil ensures that the crumb stays soft. Butter solidifies in the fridge, making bread feel waxy. Oil stays liquid, keeping that moisture locked in. It’s a small detail, but it makes a huge difference in the final bite. This isn’t just another banana bread recipe; it’s the most reliable version I’ve found.
What Ingredients You Will Need
This recipe relies on the chemistry of simple ingredients to create a complex flavor profile. The key is quality over quantity. Since there are no hidden fats or complex emulsifiers, every ingredient plays a major role in the final texture and taste. You don’t need anything exotic, which is part of the appeal. Here is what you need to gather:
- Ripe Bananas: You will need about 3 to 4 medium bananas. They should be heavily spotted, almost black. The darker the peel, the sweeter the bread. Green bananas will make this taste starchy and bland. (Mashed, about 1 ½ cups)
- All-Purpose Flour: Standard white flour works best for that classic tender crumb. If you want a slightly denser texture, you can swap half for whole wheat flour, but pure all-purpose is the safest bet for moisture. (2 cups)
- Sugar: I use a mix of white granulated sugar and brown sugar. The brown sugar adds moisture and a hint of caramel flavor. If you only have white, that works too, but the color will be paler. (1 cup total)
- Neutral Oil: Vegetable oil, canola oil, or light olive oil. Avoid extra virgin olive oil as the flavor is too strong. Oil keeps the bread moist longer than butter does. (½ cup)
- Eggs: Large eggs act as the binder. They hold the structure together. Room temperature eggs mix in more easily, but cold eggs are fine if you are in a rush. (2 large)
- Vanilla Extract: A splash of vanilla enhances the banana flavor. Use real vanilla extract, not imitation, if you can find it. It makes a subtle but noticeable difference. (1 teaspoon)
- Baking Soda: This is the leavening agent. It reacts with the acidic bananas to create bubbles. Make sure it’s not expired, or your bread won’t rise. (1 teaspoon)
- Salt: Salt is crucial for balancing the sweetness. Don’t skip it. (½ teaspoon)
- Optional Add-ins: Chocolate chips, walnuts, or pecans. I usually skip nuts, but if you like crunch, add ½ cup of your choice. (½ cup)
For the flour, I don’t mind generic brands, but for the vanilla, I prefer pure extract. If you are looking for a gluten-free option, a 1-to-1 gluten-free flour blend works well here, though the texture might be slightly gummier. For the oil, if you dislike the taste of vegetable oil, you can use melted coconut oil, but let it cool slightly before adding it.
Can I use frozen bananas?
Yes, absolutely. Frozen bananas are actually sweeter because the cell walls break down during freezing, releasing more sugars. Just thaw them completely and drain any excess liquid before measuring.
Equipment Needed
You don’t need a fancy kitchen to make this bread. In fact, the less equipment you use, the better. Here is what you need:
- Large Mixing Bowl: A bowl that is big enough to hold all the ingredients without splattering. A 4-quart bowl is ideal.
- Fork or Potato Masher: For mashing the bananas. A fork is easier to clean, but a masher is faster. I use a fork because it gives me more control over the chunk size.
- Measuring Cups and Spoons: Standard US and metric measurements. Level off your flour for accuracy.
- Loaf Pan: A standard 9×5 inch loaf pan. Metal pans bake more evenly than glass or ceramic, which can cause the bottom to burn. If you only have glass, lower the oven temperature by 25 degrees.
- Parchment Paper: I highly recommend lining the pan. It makes removing the bread effortless and reduces cleanup to almost zero.
I’ve tried silicone loaf pans before, and they are a mistake. They don’t conduct heat well, so the bottom never gets a nice crust. Stick to metal. Also, keep your measuring cups clean. Flour sticks to dirty cups, which throws off your ratios.
Preparation Method
Making this easy one-bowl moist banana bread is straightforward. Follow these steps carefully for the best results.
- Preheat and Prep: Heat your oven to 350°F (175°C). Grease your loaf pan with a little oil or butter, then line it with parchment paper. Leave an overhang on the sides so you can lift the bread out later. (2 minutes)
- Mash the Bananas: Peel your ripe bananas and put them in the large mixing bowl. Mash them with a fork until they are mostly smooth but still have a few small chunks. You want about 1 ½ cups of mashed banana. Don’t puree them in a blender; you want texture. (3 minutes)
- Mix Wet Ingredients: To the mashed bananas, add the sugar, melted oil, eggs, and vanilla extract. Whisk this mixture together with a fork or a spatula until it is well combined. It will look a bit curdled, which is normal. (2 minutes)
- Add Dry Ingredients: Sprinkle the flour, baking soda, and salt over the wet mixture. Do not mix yet. Just let them sit on top. (1 minute)
- Combine Batter: Using your fork or a spatula, gently fold the dry ingredients into the wet ingredients. Stop mixing as soon as you no longer see streaks of flour. Overmixing is the enemy of moist banana bread. It develops gluten, which makes the bread tough and chewy instead of tender. The batter will be thick. (2 minutes)
- Add Mix-ins: If you are using chocolate chips or nuts, fold them in now. (1 minute)
- Bake: Pour the batter into the prepared loaf pan. Smooth the top with a spatula. Place it in the center of the oven and bake for 55-65 minutes. After 40 minutes, check the top. If it is browning too quickly, tent it loosely with aluminum foil. (60 minutes)
- Test for Doneness: Insert a toothpick or a knife into the center of the loaf. It should come out clean or with just a few moist crumbs attached. If there is wet batter on it, bake for another 5-10 minutes. (5 minutes)
- Cool: Let the bread cool in the pan for 10 minutes. Then, use the parchment overhang to lift it out and place it on a wire rack to cool completely. This step is hard, but slicing warm bread makes it gummy. (30 minutes)
Why does my bread sink in the middle?
This usually happens if the oven door is opened too early or if the baking soda is expired. It can also happen if the batter is overmixed. Ensure your oven temperature is accurate and avoid opening the door for the first 40 minutes.
Cooking Tips & Techniques
I have learned a few things the hard way while making banana bread over the years. Here are some tips to ensure your loaf comes out perfect every time.
- Banana Ripeness is Key: I cannot stress this enough. Use bananas that are black on the outside. If they are yellow, they aren’t sweet enough. You can speed this up by baking them on a sheet pan at 300°F until the skins turn black, but patience yields better flavor.
- Don’t Overmix: This is the most common mistake. Once you add the flour, mix until *just* combined. Lumpy batter is better than smooth, tough batter. The residual heat will finish cooking the flour.
- Check Your Oven: Ovens vary wildly. If your bread is burning on top but raw in the middle, your oven might be too hot. Use an oven thermometer to check. Also, rotate the pan halfway through baking if your oven has hot spots.
- Use a Thermometer: For the most accurate doneness test, use an instant-read thermometer. The internal temperature should reach 200°F (93°C). This eliminates guessing.
- Let it Cool: I know it’s tempting to slice it hot. But the structure needs to set. If you cut it too soon, it will collapse. Wait at least 30 minutes for the best slice.
One personal failure I had was using a dark metal pan without adjusting the temperature. The bottom burned completely. If you use a dark pan, reduce the oven temperature by 25°F. Glass pans also retain heat differently, so keep an eye on them.
Variations & Adaptations
While the classic version is my favorite, this recipe is a great canvas for variations. Here are a few ways to change it up:
- Gluten-Free: Use a 1-to-1 gluten-free flour blend. Add a teaspoon of xanthan gum if your blend doesn’t include it. The texture will be slightly more delicate.
- Dairy-Free: This recipe is naturally dairy-free if you use oil instead of butter. Just ensure your chocolate chips are dairy-free if you add them.
- Low-Sugar:
- Spiced Banana Bread: Add 1 teaspoon of cinnamon and ¼ teaspoon of nutmeg to the dry ingredients for a warmer flavor profile.
- Chocolate Chip: Fold in 1 cup of semi-sweet chocolate chips. The contrast between the tart banana and sweet chocolate is unbeatable.
I once tried making this with zucchini, swapping half the bananas for grated zucchini. It was good, but the texture was different. It’s worth trying if you have too much zucchini from the garden, but the pure banana version is superior in my opinion.
Can I make muffins instead?
Yes! Fill muffin tins ¾ full and bake at 350°F for 20-25 minutes. They cook faster, so keep an eye on them. These are great for portion control.
Serving & Storage Suggestions
This bread is best served at room temperature. It pairs wonderfully with a hot cup of coffee or tea. For a treat, warm a slice in the microwave for 20 seconds and top with a pat of butter. The butter melts into the warm crumb, creating a rich, indulgent snack.
To store, wrap the cooled loaf tightly in plastic wrap or aluminum foil. It will keep at room temperature for up to 3 days. If you live in a humid climate, store it in the refrigerator to prevent mold.
For longer storage, freeze the loaf. Wrap it tightly in plastic wrap, then in foil. It will last for up to 3 months. Thaw it at room temperature or slice it and toast individual slices directly from the freezer. The flavors actually develop and meld together after a day, so it often tastes better on the second day.
If you are serving this for a gathering, slice it into thin pieces. It’s rich enough that a small slice is satisfying. You can also serve it alongside a fruit salad or yogurt for a more balanced breakfast.
Nutritional Information & Benefits
While this is a treat, it does offer some nutritional benefits. Bananas are a good source of potassium, which supports heart health and muscle function. They also provide vitamin B6 and vitamin C. Using whole wheat flour can increase the fiber content, helping with digestion.
However, be mindful of the sugar and calorie content. A typical slice contains around 250-300 calories, depending on the size and add-ins. It is not a low-carb food, so those on strict keto diets should avoid it or use almond flour substitutes. For most people, this is a perfect occasional indulgence.
I view this as a comfort food rather than a health food. It provides energy and satisfaction. The natural sugars from the bananas give a quick boost, while the flour provides sustained energy. It’s a balanced treat when enjoyed in moderation.
Conclusion
This easy one-bowl moist banana bread is more than just a recipe; it’s a solution to the common problem of wanting something sweet without the hassle. It’s forgiving, tasty, and incredibly easy to make. I hope you try it and find it becomes a staple in your kitchen, just like it has in mine.
Feel free to customize it with your favorite add-ins or spices. If you make it, I’d love to hear how it turned out. Leave a comment below with your tips or variations. Share it with friends who love baking, or just enjoy it yourself. Happy baking!
FAQs
How do I know when the banana bread is done?
Insert a toothpick into the center. If it comes out clean or with a few moist crumbs, it’s done. If there is wet batter, bake for 5 more minutes.
Can I use ripe green bananas?
No, green bananas are not sweet enough and will result in a bland, starchy bread. Use bananas that are black or very brown.
Why is my banana bread dense?
This is usually caused by overmixing the batter or using old baking soda. Mix gently and ensure your leavening agent is fresh.
Can I freeze the batter?
It’s better to freeze the baked loaf. Freezing the batter can affect the texture of the leavening agents. Bake it first, then freeze.
What can I use instead of eggs?
You can use flax eggs (1 tablespoon ground flaxseed mixed with 3 tablespoons water per egg) for a vegan version, but the texture will be slightly different.
Pin This Recipe!
Easy One-Bowl Moist Banana Bread
A simple, forgiving banana bread recipe that requires only one bowl and minimal cleanup. It uses oil for moisture and ripe bananas for sweetness, resulting in a dense, tender loaf perfect for breakfast or snacks.
- Prep Time: 10 minutes
- Cook Time: 60 minutes
- Total Time: 70 minutes
- Yield: 1 loaf (8-10 servings) 1x
- Category: Dessert
- Cuisine: American
Ingredients
- 3 to 4 medium ripe bananas (heavily spotted, mashed to yield 1 ½ cups)
- 2 cups all-purpose flour
- 1 cup sugar (mix of white granulated and brown sugar)
- ½ cup neutral oil (vegetable, canola, or light olive oil)
- 2 large eggs
- 1 teaspoon vanilla extract
- 1 teaspoon baking soda
- ½ teaspoon salt
- ½ cup optional add-ins (chocolate chips, walnuts, or pecans)
Instructions
- Preheat oven to 350°F (175°C). Grease a 9×5 inch loaf pan and line with parchment paper, leaving an overhang on the sides.
- Peel bananas and mash them in a large mixing bowl with a fork until mostly smooth but with some small chunks remain (about 1 ½ cups).
- Add sugar, melted oil, eggs, and vanilla extract to the mashed bananas. Whisk with a fork or spatula until well combined.
- Sprinkle flour, baking soda, and salt over the wet mixture.
- Gently fold the dry ingredients into the wet ingredients using a fork or spatula. Stop mixing as soon as no flour streaks remain to avoid tough bread.
- Fold in optional add-ins like chocolate chips or nuts if using.
- Pour batter into the prepared loaf pan and smooth the top. Bake for 55-65 minutes. If browning too quickly after 40 minutes, tent with aluminum foil.
- Test for doneness by inserting a toothpick into the center; it should come out clean or with moist crumbs. Internal temperature should reach 200°F (93°C).
- Let the bread cool in the pan for 10 minutes, then lift out using the parchment paper and cool completely on a wire rack before slicing.
Notes
Use bananas that are heavily spotted or black for maximum sweetness. Do not overmix the batter once flour is added, as this develops gluten and makes the bread tough. For best results, let the bread cool completely before slicing to prevent gumminess. Can be frozen for up to 3 months.
Nutrition
- Serving Size: 1 slice
- Calories: 275
- Sugar: 24
- Sodium: 250
- Fat: 10
- Saturated Fat: 1
- Carbohydrates: 42
- Fiber: 2
- Protein: 4
Keywords: banana bread, one bowl recipe, moist banana bread, easy baking, quick bread, gluten-free option, dairy-free


