That sharp, sweet scent of caramelizing sugar — the kind that makes your stomach growl before you even grab a spatula — still takes me straight to a cold October morning in a kitchen that smelled like old books and pumpkin spice. I was ten years old, standing on a step stool that wobbled dangerously, watching my dad pour batter onto the griddle. He wasn’t making normal pancakes. He was making monsters. Or at least, that’s what I thought until he flipped the first one over, revealing a perfectly carved, glowing orange face with triangular eyes and a jagged grin.
We had Halloween trick-or-treating later that afternoon, but the real magic happened before the doorbell ever rang. It was quiet, just the hum of the refrigerator and the hiss of the pan. Dad didn’t use cookie cutters or fancy molds. He used a simple butter knife and a steady hand, carving the face into the cooking pancake while it was still soft and raw. I remember the steam rising up, fogging my glasses, and the way the orange food coloring bled slightly into the white batter, creating those messy, authentic edges that looked exactly like a real jack-o’-lantern.
Honestly, I tried to replicate that morning for years. I bought plastic molds that stuck. I tried piping bags that leaked. Nothing worked quite like the chaotic, improvised art my dad created with just batter and butter. But after a few burnt attempts and a lot of laughter, I finally cracked the code. It’s not about perfection; it’s about the fun of watching something simple transform into something festive right in front of your eyes.
These Jack-O-Lantern Pancakes for Halloween Breakfast aren’t just about looking cute on Instagram. They’re about that shared moment of surprise and delight. They’re about waking up kids who are usually grumpy on holidays and turning them into eager little helpers. Let’s face it, getting children to eat breakfast can be a battle, but when the pancakes look like they’re grinning back at you? You’ve already won. This recipe stuck with me because it turned a routine morning into a memory. And now, I get to share that same small, sweet joy with you.
Why You’ll Love This Recipe
There is something undeniably special about breakfast that feels like an event rather than just fuel. These Jack-O-Lantern Pancakes are exactly that. They are the kind of recipe that makes you close your eyes after the first bite, not just because it tastes good, but because it feels like a hug from your childhood. Here is why this recipe has become a staple in my kitchen every October:
- Quick & Easy: You know how morning chaos can get? This recipe comes together in under 20 minutes. The batter is basic, and the carving technique is simpler than it looks, making it perfect for busy weeknights or last-minute Halloween morning cravings.
- Simple Ingredients: No fancy grocery trips needed. You likely already have everything in your kitchen. Flour, milk, eggs, baking powder, and orange food coloring. That’s it. If you have a jar of maple syrup, you are good to go.
- Perfect for Kids (and Adults): Great for breakfast, brunch, or even a late-night snack. It’s a wonderful way to get kids involved in the kitchen. Let them help pour the batter or choose the face designs. It turns cooking into play.
- Crowd-Pleaser: Always gets rave reviews from kids and adults alike. The visual appeal is huge, but the taste is classic comfort food. It’s familiar, warm, and satisfying.
- Unbelievably Delicious: The texture is fluffy and light, and the slight sweetness of the orange-tinted batter pairs perfectly with butter and syrup. It’s next-level comfort food that feels festive without being overly complicated.
What makes this recipe different from the rest? Many people think you need special molds or expensive silicone mats. I’ve tested those, and they often lead to sticking issues or uneven cooking. This method uses just a butter knife. It’s a creative twist that requires zero special equipment. It’s not just another version; it’s the most accessible version. It’s comfort food reimagined—faster, easier, but with the same soul-soothing satisfaction. Whether you are impressing guests or just trying to make your own kids smile, this recipe delivers without the stress.
What Ingredients You Will Need
This recipe uses simple, wholesome ingredients to deliver bold flavor and satisfying texture without the fuss. The key is keeping the batter consistent so it holds its shape when you carve the faces. You don’t need anything exotic here. Most of these items are pantry staples.
- All-Purpose Flour: The base of the pancake. I recommend a standard brand like Gold Medal or King Arthur for best texture. It provides the right amount of structure without being too dense.
- Baking Powder: Essential for fluffiness. Make sure it’s fresh, or your pancakes will be flat. About two teaspoons should do it for this batch.
- Salt: Just a pinch. It balances the sweetness and brings out the flavor of the vanilla.
- Milk: Whole milk is best for richness, but any milk works. Dairy-free milk can be substituted if needed, though it might change the browning slightly.
- Eggs: Large eggs, room temperature. They help bind the batter and add structure.
- Unsalted Butter: Melted and cooled slightly. Adds moisture and a tender crumb. You can use oil if you prefer, but butter tastes better.
- Vanilla Extract: A teaspoon of good quality vanilla adds that classic pancake aroma.
- Orange Food Coloring: Gel food coloring is preferred because it doesn’t thin out the batter like liquid coloring. A little goes a long way. You want a vibrant orange, not a pale yellow.
- Maple Syrup: For serving. Real maple syrup is worth the extra cost. It’s the perfect pairing for the sweet, orange-tinted pancakes.
- Whipped Cream or Ice Cream: Optional topping. A dollop of whipped cream makes it look like a pumpkin stem, adding a nice visual touch.
For the best results, measure your flour correctly. Scooping directly from the bag can pack it down, leading to tough pancakes. Spoon it into the measuring cup and level it off. If you are making these for a large group, you might need to double the batch, but keep an eye on your griddle space. You can’t cook too many at once. Also, if you want a gluten-free option, you can use a 1:1 gluten-free flour blend, though the texture might be slightly different. In summer, you could swap the orange color for a green one to make “monster” pancakes, but orange is classic for a reason.
Equipment Needed
You don’t need a lot of fancy gear to make these pancakes. In fact, keeping it simple is part of the charm. Here is what you will need:
- Non-Stick Griddle or Skillet: This is crucial. A well-seasoned cast iron skillet works wonders, but a standard non-stick pan is easier for beginners. Avoid stainless steel, as the batter might stick during the carving process.
- Spatula: A thin, flexible metal spatula is best for flipping delicate pancakes. A wide rubber one can work, but be gentle.
- Butter Knife: A standard table knife is perfect for carving the faces. You don’t need a sharp chef’s knife. The blunt edge is actually safer and easier to control for young helpers.
- Bowl and Whisk: For mixing the batter. A medium-sized bowl is sufficient.
- Measuring Cups and Spoons: For accuracy. Consistency is key for fluffy pancakes.
- Small Spoon or Dropper: For adding the orange food coloring. This helps control the amount so you don’t turn your batter into neon sludge.
If you don’t have a griddle, a large non-stick frying pan works fine. Just be prepared to cook in smaller batches. For budget-friendly options, any basic non-stick pan from a discount store will do. The most important thing is that the surface is smooth. If your pan has scratches, the batter might seep into them, making carving difficult. Also, keep a damp cloth nearby to wipe the pan between batches if any bits of batter stick. It keeps the cooking surface clean and ensures even browning.
Preparation Method
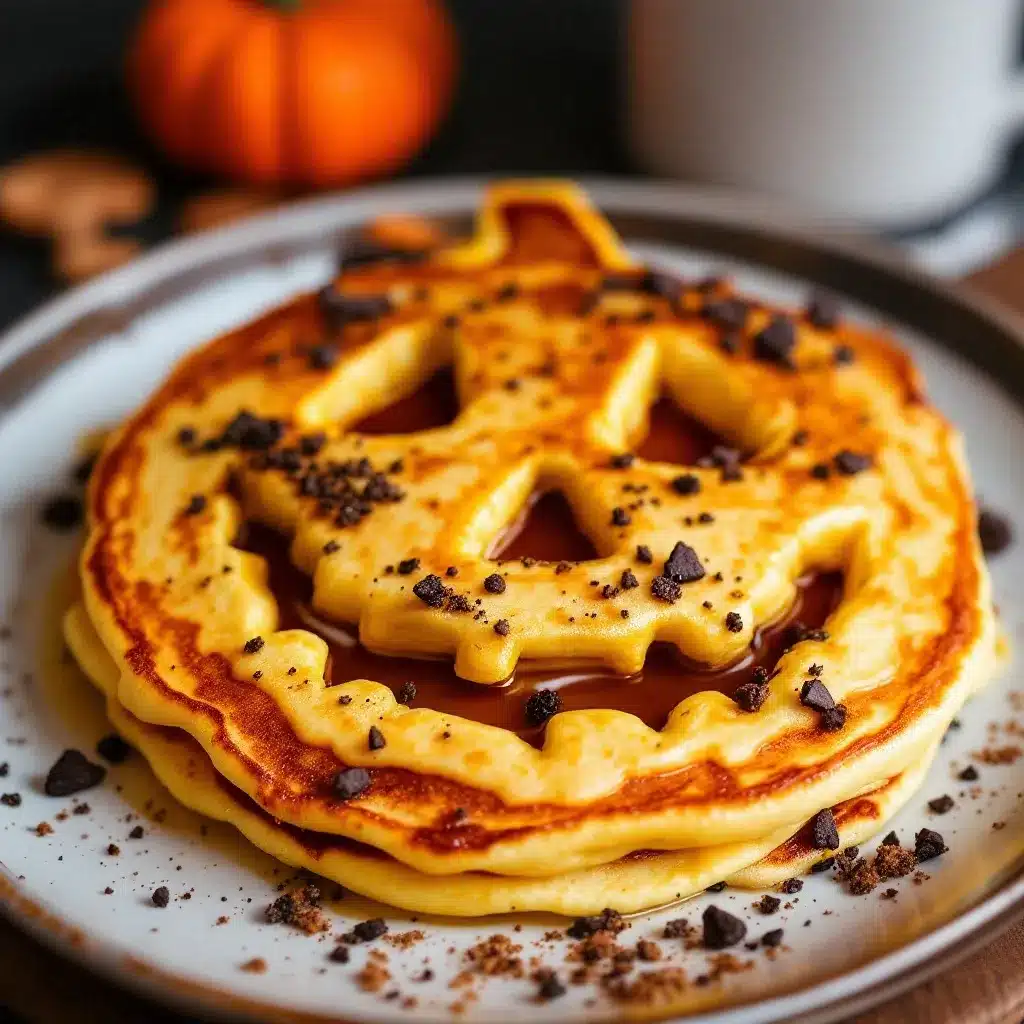
Making Jack-O-Lantern Pancakes is easier than it sounds. The trick is timing. You need to carve the face while the pancake is cooking but not yet flipped. Here is how to do it step-by-step.
- Mix the Batter: In a medium bowl, whisk together 1 cup of flour, 2 teaspoons of baking powder, and a pinch of salt. In a separate bowl or measuring cup, combine 1 cup of milk, 1 large egg, 2 tablespoons of melted butter, and 1 teaspoon of vanilla extract. Whisk the wet ingredients until smooth. Pour the wet ingredients into the dry ingredients. Stir gently with a spoon until just combined. Do not overmix. Lumps are okay. Overmixing makes pancakes tough. Let the batter rest for 5 minutes. This allows the baking powder to activate and the flour to hydrate, resulting in fluffier pancakes.
- Add the Color: Add 3-4 drops of orange gel food coloring to the batter. Stir until the color is even. The batter should be a vibrant orange. If it’s too pale, add one more drop. Remember, the color will lighten slightly as it cooks, so aim for a strong orange. If you are using liquid coloring, add it slowly, as it can thin the batter.
- Heat the Pan: Place your non-stick griddle or skillet over medium heat. Let it warm up for about 2 minutes. To test if it’s ready, sprinkle a few drops of water on the surface. If they sizzle and evaporate quickly, it’s ready. Lightly grease the pan with butter or cooking spray. You don’t need much; just a thin layer.
- Pour the Batter: Using a 1/4 cup measuring cup, pour the batter onto the hot griddle. Make round, flat circles. Space them out so they have room to cook. You can make them smaller for kids or larger for adults. The size doesn’t matter as much as the shape. Try to keep them as circular as possible for a better pumpkin look.
- Watch for Bubbles: Cook for about 2-3 minutes. Watch the edges. When the edges look set and dry, and bubbles form on the surface and pop, leaving small holes that don’t fill back in, it’s time to carve. This is the critical moment. If you wait too long, the pancake will be too firm to carve. If you go too early, the batter will be too runny.
- Carve the Face: Take your butter knife and gently trace the face design into the raw batter. Start with the eyes. Draw two triangles or circles. Then, draw a nose, maybe a small triangle. Finally, carve a jagged or curved mouth. Be gentle. You are just scratching the surface, not cutting all the way through. If you press too hard, you might tear the pancake. The carved areas will cook slightly faster and turn a darker orange, creating a contrast.
- Flip the Pancake: Once the face is carved, wait another 30 seconds to let the carved lines set slightly. Then, slide your spatula under the pancake. Flip it over carefully. Cook for another 1-2 minutes on the other side. The flipped side should show the carved face, slightly indented and darker. If the face didn’t show up well, don’t worry. You can add a little more batter to the carved areas before flipping to fill them in, creating a raised effect.
- Serve: Stack the pancakes on a plate. Top with a pat of butter and a generous drizzle of maple syrup. Add a dollop of whipped cream on top for a “stem” effect if you like. Serve immediately while hot.
Cooking Tips & Techniques
Getting the perfect Jack-O-Lantern pancake takes a little practice, but here are some professional tips to help you succeed.
- Temperature Control: Medium heat is your friend. If the pan is too hot, the outside will burn before the inside cooks. If it’s too low, the pancake will be pale and flat. Adjust your heat as needed. Every stove is different.
- Don’t Press Down: When flipping, never press down on the pancake with your spatula. This squeezes out the air bubbles and makes the pancake dense. Let it flip naturally.
- Carving Depth: The key to a visible face is the depth of the carve. You want to cut deep enough to expose the darker, cooked batter underneath, but not so deep that the pancake falls apart. Think of it as scoring the surface.
- Batter Consistency: If your batter is too thick, it will be hard to carve. If it’s too thin, it will spread too much. Aim for a consistency similar to thick yogurt. If it’s too thick, add a splash of milk. If it’s too thin, add a spoonful of flour.
- Common Mistakes: The most common mistake is waiting too long to flip. If the bubbles on top stop forming and the surface looks dry, it’s too late. Carve as soon as you see the first few bubbles pop.
- Multitasking: If you are making a large batch, keep the finished pancakes warm in a 200°F oven on a baking sheet while you cook the rest. This ensures everyone gets a hot meal at the same time.
I once tried to carve a complex face with too many details. It was a disaster. The pancake broke apart when I tried to flip it. Lesson learned: simple is better. Big eyes and a wide mouth work best. Less is more. Also, don’t be afraid to experiment with different face designs. Some kids prefer cute faces, while others like spooky ones. Let their creativity guide you.
Variations & Adaptations
While orange is classic, there are many ways to customize these pancakes. Here are a few ideas:
- Green Monster Pancakes: Use green food coloring instead of orange. Carve eyes and a mouth to look like a monster. This is great for kids who like spooky themes but want a different color.
- Purple Witch Pancakes: Use purple food coloring. Carve a witch’s hat or a crescent moon. This adds a nice variety to the plate.
- Gluten-Free Option: Substitute all-purpose flour with a 1:1 gluten-free flour blend. The texture might be slightly denser, but the taste will still be great. Add a teaspoon of xanthan gum if your blend doesn’t include it.
- Dairy-Free Option: Use plant-based milk and dairy-free butter. The color and flavor will remain the same. Just ensure your baking powder is dairy-free.
- Whole Wheat Option: Substitute half of the all-purpose flour with whole wheat flour. This adds a nuttier flavor and more fiber. The pancakes might be slightly heavier, so don’t overmix.
- Chocolate Chip Twist: Add a handful of mini chocolate chips to the batter before pouring. The chocolate adds sweetness and texture. Just be careful not to overload the batter, or it might be hard to carve.
I tried making green monster pancakes for my nieces, and they loved them. The green color contrasted nicely with the orange syrup. It was a fun way to mix things up. You can also use natural food colorings like beet juice for pink or spinach powder for green, though the colors might be less vibrant. The beauty of this recipe is its flexibility. Feel free to experiment and make it your own.
Serving & Storage Suggestions
These pancakes are best served immediately while they are hot and fluffy. Stack them high on a plate and drizzle with warm maple syrup. The syrup will seep into the carved areas, highlighting the face. For a festive touch, garnish with a sprig of fresh mint or a small dollop of whipped cream on top to resemble a pumpkin stem.
If you have leftovers, store them in an airtight container in the refrigerator for up to 3 days. To reheat, place them in a toaster oven or microwave for 30-60 seconds. They will lose some of their fluffiness, but they will still taste good. You can also freeze them for up to 2 months. Lay them flat on a baking sheet, freeze until solid, then transfer to a freezer bag. Reheat in a toaster or oven for best texture.
The flavors develop over time, especially if you add toppings like fruit or nuts just before serving. Fresh berries, like blueberries or raspberries, add a nice tartness that balances the sweetness of the pancakes. For a savory twist, serve with crispy bacon or sausage on the side. The combination of sweet and salty is always a hit.
Nutritional Information & Benefits
These Jack-O-Lantern Pancakes are a fun treat, but they also have some nutritional benefits. Pancakes are a good source of carbohydrates, which provide energy for a busy day of trick-or-treating. The eggs add protein, which helps keep you full. Using whole milk adds calcium and vitamin D.
For a healthier version, you can use whole wheat flour and reduce the sugar in the batter. Adding mashed banana or applesauce to the batter can add natural sweetness and fiber. However, the classic version is best enjoyed as an occasional treat. The orange food coloring is just for fun and doesn’t add nutritional value.
If you have dietary restrictions, be sure to check the ingredients of your baking powder and flour. Most standard brands are gluten-free or dairy-free, but always read the label. For those with allergies, substitute ingredients as needed. The key is to enjoy the process and the result, regardless of the nutritional profile.
Conclusion
Making Jack-O-Lantern Pancakes for Halloween Breakfast is more than just cooking; it’s about creating memories. It’s about the laughter in the kitchen, the mess on the counter, and the smiles on your family’s faces. This recipe is worth trying because it is simple, fun, and delicious. It transforms a ordinary morning into a special occasion.
I encourage you to customize this recipe based on your preferences. Try different face designs, colors, and toppings. Make it your own. I love this recipe because it brings back happy memories of my own childhood and allows me to share that joy with my family. It’s a small thing, but it makes a big difference.
If you try this recipe, I would love to hear how it went. Leave a comment below and let me know what face designs you tried. Share your photos on social media and tag me. I love seeing your creations. And if you have any questions, don’t hesitate to ask. Happy Halloween, and happy cooking!
FAQs
Can I make the batter ahead of time?
It’s best to make the batter fresh. If you let it sit for too long, the baking powder will lose its effectiveness, and the pancakes will be flat. You can mix the dry ingredients ahead of time, but add the wet ingredients just before cooking.
Why didn’t my face show up on the pancake?
You might have waited too long to carve. Make sure to carve as soon as bubbles form and pop on the surface. Also, ensure you are carving deep enough to expose the darker, cooked batter underneath.
Can I use liquid food coloring?
Yes, but gel food coloring is better because it doesn’t thin out the batter. If you use liquid coloring, add it slowly and watch the consistency. You may need to add a little more flour to compensate.
How do I keep the pancakes warm?
Place the finished pancakes on a baking sheet in a 200°F oven while you cook the rest. This keeps them warm without drying them out.
Can I freeze these pancakes?
Yes, you can freeze them for up to 2 months. Lay them flat on a baking sheet, freeze until solid, then transfer to a freezer bag. Reheat in a toaster or oven for best texture.
Pin This Recipe!
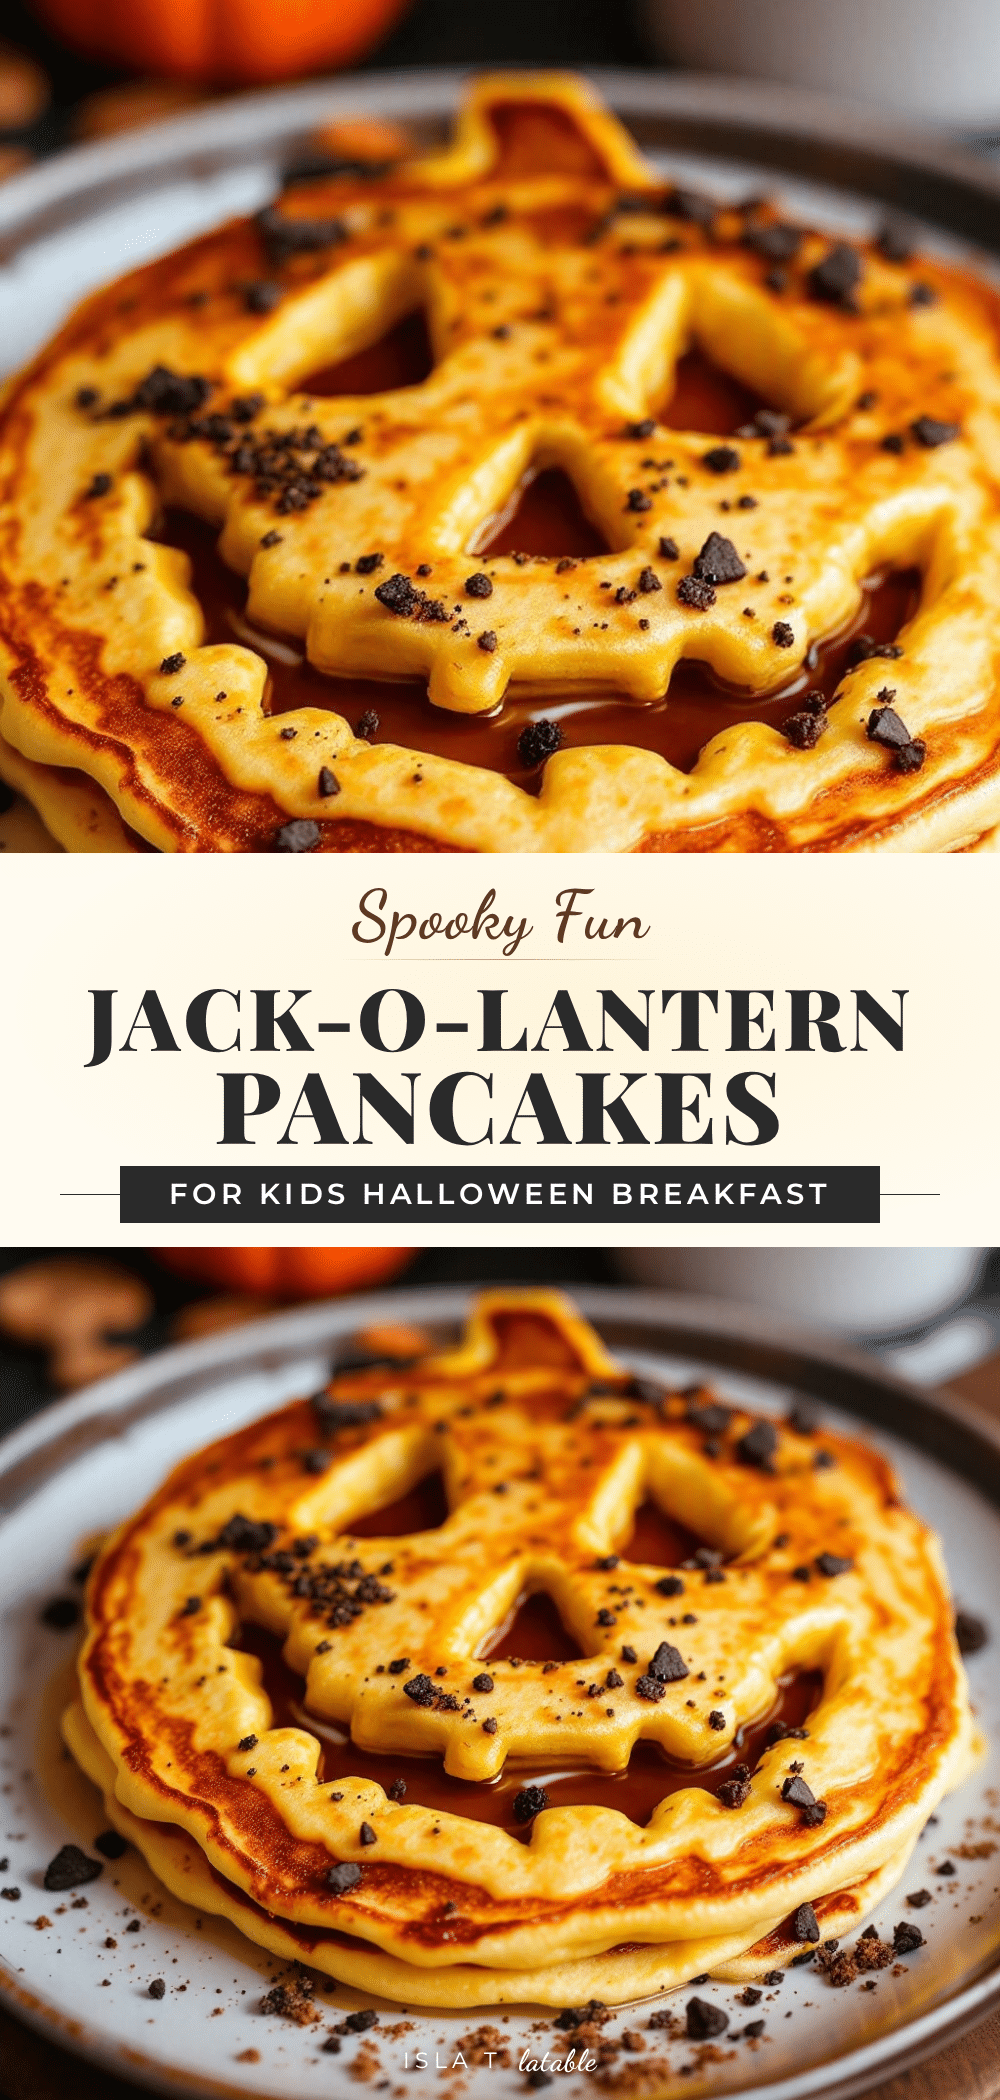
Fun Jack-O-Lantern Pancakes: 5 Easy Halloween Breakfast Ideas
Create festive Halloween breakfast with these easy Jack-O-Lantern pancakes. Using simple ingredients and a butter knife to carve faces into the batter, this recipe turns a routine morning into a fun, memorable event for kids and adults alike.
- Prep Time: 10 minutes
- Cook Time: 10 minutes
- Total Time: 20 minutes
- Yield: 4 servings 1x
- Category: Breakfast
- Cuisine: American
Ingredients
- 1 cup All-Purpose Flour
- 2 teaspoons Baking Powder
- Pinch of Salt
- 1 cup Milk (whole milk recommended)
- 1 Large Egg (room temperature)
- 2 tablespoons Unsalted Butter (melted and cooled)
- 1 teaspoon Vanilla Extract
- 3–4 drops Orange Gel Food Coloring
- Maple Syrup (for serving)
- Whipped Cream or Ice Cream (optional, for stem effect)
Instructions
- In a medium bowl, whisk together 1 cup of flour, 2 teaspoons of baking powder, and a pinch of salt.
- In a separate bowl, combine 1 cup of milk, 1 large egg, 2 tablespoons of melted butter, and 1 teaspoon of vanilla extract. Whisk until smooth.
- Pour the wet ingredients into the dry ingredients and stir gently until just combined. Do not overmix; lumps are okay.
- Let the batter rest for 5 minutes to allow the baking powder to activate.
- Add 3-4 drops of orange gel food coloring to the batter and stir until the color is even and vibrant.
- Heat a non-stick griddle or skillet over medium heat for about 2 minutes. Lightly grease with butter or cooking spray.
- Pour 1/4 cup of batter onto the hot griddle to form round circles.
- Cook for 2-3 minutes until edges look set and bubbles form on the surface and pop.
- Take a butter knife and gently trace a face design (eyes, nose, mouth) into the raw batter. Be gentle to avoid tearing.
- Wait 30 seconds for the carved lines to set, then carefully flip the pancake with a spatula.
- Cook for another 1-2 minutes on the other side until golden brown.
- Serve immediately with butter, maple syrup, and optional whipped cream.
Notes
Use gel food coloring to prevent thinning the batter. Carve the face as soon as bubbles pop on the surface for the best results. If the batter is too thick, add a splash of milk; if too thin, add a spoonful of flour. Keep finished pancakes warm in a 200°F oven while cooking the rest.
Nutrition
- Serving Size: 1-2 pancakes per per
- Calories: 250
- Sugar: 10
- Sodium: 200
- Fat: 8
- Saturated Fat: 4
- Carbohydrates: 35
- Fiber: 1
- Protein: 6
Keywords: Halloween breakfast, Jack-O-Lantern pancakes, easy pancake recipe, kids breakfast ideas, festive cooking, Halloween treats


