The snap is what matters. Not the taste, not the sweetness, but that sharp, audible crackle when your teeth first meet the surface. It’s a sound so distinct in a quiet kitchen that it feels like a secret being told. You know that feeling when you bite into something fragile, something that holds its shape until the very last second? That’s the ghost.
I made these for a Halloween party last year, and I wasn’t planning to share the secret. I was just trying to stop my kids from eating the chocolate chips before they even became eyes. The cookies sat on a platter next to some heavy, dense brownies, and everyone ignored them. They looked too plain. Too white. Too simple.
Then my neighbor took a bite.
The sound stopped the conversation. It was just that one crisp, hollow *crack* that echoed off the walls. Everyone turned around. They wanted to know how I made something so light it felt like eating air, yet so sturdy it didn’t crumble into dust. That’s the thing about meringue. It’s mostly air and sugar, but it’s also patience.
I’ve spent years messing up batches of meringue, turning them into weepy puddles or burnt rocks. But this? This crispy ghost meringue cookie with chocolate chip eyes is different. It’s not just a dessert; it’s a texture experiment. It’s about mastering that delicate balance between stiff peaks and stable structure.
There’s something satisfying about making something that looks like it might vanish. You whisk egg whites until they shine, fold in sugar until it’s smooth, and bake them low and slow. It’s a quiet process. No smoke, no sizzle. Just the slow transformation of simple ingredients into something that looks like a little white sheet floating in the oven.
I love these because they’re not complicated. You don’t need fancy gadgets or hard-to-find ingredients. You just need egg whites, sugar, and a little patience. And maybe a bag of mini chocolate chips. They’re perfect for parties because they’re individual. You can hand one to someone, and they’ll smile at the silly face you made with the chocolate.
It’s a trick, really. A visual trick. But the taste is just sweet, clean, and slightly vanilla. The texture is the star. It melts away quickly, leaving you wondering if it was real or just a dream. That’s why I keep making them. For the snap. For the surprise. For the way they disappear, leaving only a few crumbs and a happy kid.
Why You’ll Love This Recipe
Let’s be honest, most Halloween treats are either too sweet or too messy. You know the kind? The ones that leave your hands sticky with orange frosting and your kids covered in sprinkles. These crispy ghost meringue cookies are the antidote to that chaos. They are clean, crisp, and surprisingly sophisticated for something that looks like a cartoon.
I’ve tested this recipe dozens of times. Some batches were too chewy (underbaked), some were too hard (overbaked). This version is the sweet spot. It’s the result of trial and error, and I’m sharing it so you don’t have to make my mistakes.
Here is why this recipe earns a spot in your baking rotation:
- Quick & Easy: The active time is less than 20 minutes. Most of the work is just whisking and waiting. This is perfect for busy weeknights or last-minute Halloween prep when you realize you forgot to buy candy.
- Simple Ingredients: You likely already have everything in your kitchen. Egg whites, sugar, vanilla, and chocolate chips. No fancy grocery trips needed. It’s pantry-friendly baking at its finest.
- Perfect for Parties: These are easy to grab and go. Great for Halloween parties, school treats, or cozy dinners. They don’t melt in your hand, which is a huge plus for little ones.
- Crowd-Pleaser: Always gets rave reviews. Kids love the spooky shape, and adults love the light texture. It’s a win-win that keeps everyone happy without the sugar crash of heavy candies.
- Unbelievably Delicious: The texture and flavor combo is next-level comfort food. It’s airy, sweet, and slightly crunchy. It’s not just good—it is the kind that makes you close your eyes after the first bite because the texture is so surprising.
What makes this recipe different from the rest? It’s the technique. Many meringue recipes call for cream of tartar to stabilize the eggs. I find that a pinch of salt and proper whisking power is enough for this specific texture. It keeps the flavor pure. Also, the low-and-slow bake ensures they dry out completely rather than just baking. This prevents the dreaded “weepy” bottom.
This recipe isn’t just a cookie. It’s a lesson in precision. It’s comfort food reimagined—healthier in the sense that it’s pure sugar and air, but with the same soul-soothing satisfaction of a classic treat. Perfect for impressing guests without stress, or turning a simple meal into something memorable.
What Ingredients You Will Need
This recipe uses simple, wholesome ingredients to deliver bold flavor and satisfying texture without the fuss. The beauty of meringue is that it relies on the quality of its few components. Since there’s no fat or flour to hide behind, every ingredient plays a critical role. You can use pantry staples for most of this, but a few choices matter more than others.
Here is what you need to gather before you start whisking:
- Egg Whites: You will need about 3 large egg whites. Room temperature egg whites whip up faster and to a greater volume than cold ones. This is non-negotiable if you want that stiff peak structure. Make sure there is not a single drop of yolk in the whites. Fat kills the foam.
- Granulated Sugar: Standard white granulated sugar works best. I recommend Domino or C&H for their consistent grain size. The sugar dissolves into the egg whites, creating that smooth, shiny surface. Coarse sugars won’t dissolve fully, leaving a gritty texture.
- Vanilla Extract: Use pure vanilla extract, not imitation. About one teaspoon. It adds a warm, aromatic background note that balances the pure sweetness. If you’re allergic to vanilla, you can skip it, but it adds depth.
- Mini Chocolate Chips: This is crucial. Use mini chocolate chips for the eyes. They are the perfect size to look like eyes without overwhelming the delicate meringue. Standard chips are too big and heavy. You can find them in the baking aisle near the regular chips.
- Salt: A tiny pinch of salt helps to strengthen the protein structure of the egg whites and enhances the flavor. It’s subtle, but it prevents the cookies from tasting one-dimensionally sweet.
Substitution Notes:
If you are looking for a gluten-free option, this recipe is naturally gluten-free. Just ensure your chocolate chips are certified gluten-free, as some brands process them in facilities with wheat. For a dairy-free version, check the chocolate chip label. Most standard chips contain milk fat, but dark chocolate mini chips are often dairy-free. In summer, if you’re worried about the cookies getting sticky, store them in an airtight container with a silica packet to absorb moisture.
I personally prefer to weigh my sugar for accuracy. If you are using volume measurements, be sure to spoon the sugar into the cup and level it off. Packed sugar will throw off the ratio and make the meringue too wet.
Equipment Needed
You don’t need a lot of fancy gear for this, but having the right tools makes the process smoother.
- Mixing Bowl: A large glass or metal bowl is best. Avoid plastic if you can, as plastic can retain traces of oil that might interfere with whipping. A copper bowl is traditional and helps stabilize the whites, but stainless steel or glass works perfectly fine.
- Hand Mixer or Stand Mixer: A hand mixer is sufficient for this small batch. If you have a stand mixer with a whisk attachment, use that for less arm fatigue. You need to whip the eggs vigorously.
- Spatula: A silicone spatula is essential for folding in the sugar and chocolate chips. You need to be gentle to keep the air in the mixture.
- Piping Bag or Ziploc Bag: To get the ghost shape, you need control. A piping bag with a round tip works, but a heavy-duty Ziploc bag with the corner cut off is easier and less messy. It’s budget-friendly and effective.
- Baking Sheets: Standard half-sheet pans. Line them with parchment paper. Do not use silicone mats for this, as meringues sometimes stick to silicone. Parchment allows them to slide off easily when done.
I’ve tried using piping bags with star tips, but for a ghost shape, a round tip or a simple bag cut is better. It creates a smoother surface. If you’re on a budget, just use a spoon to drop mounds onto the parchment. They won’t look as neat, but they’ll still taste great.
Preparation Method
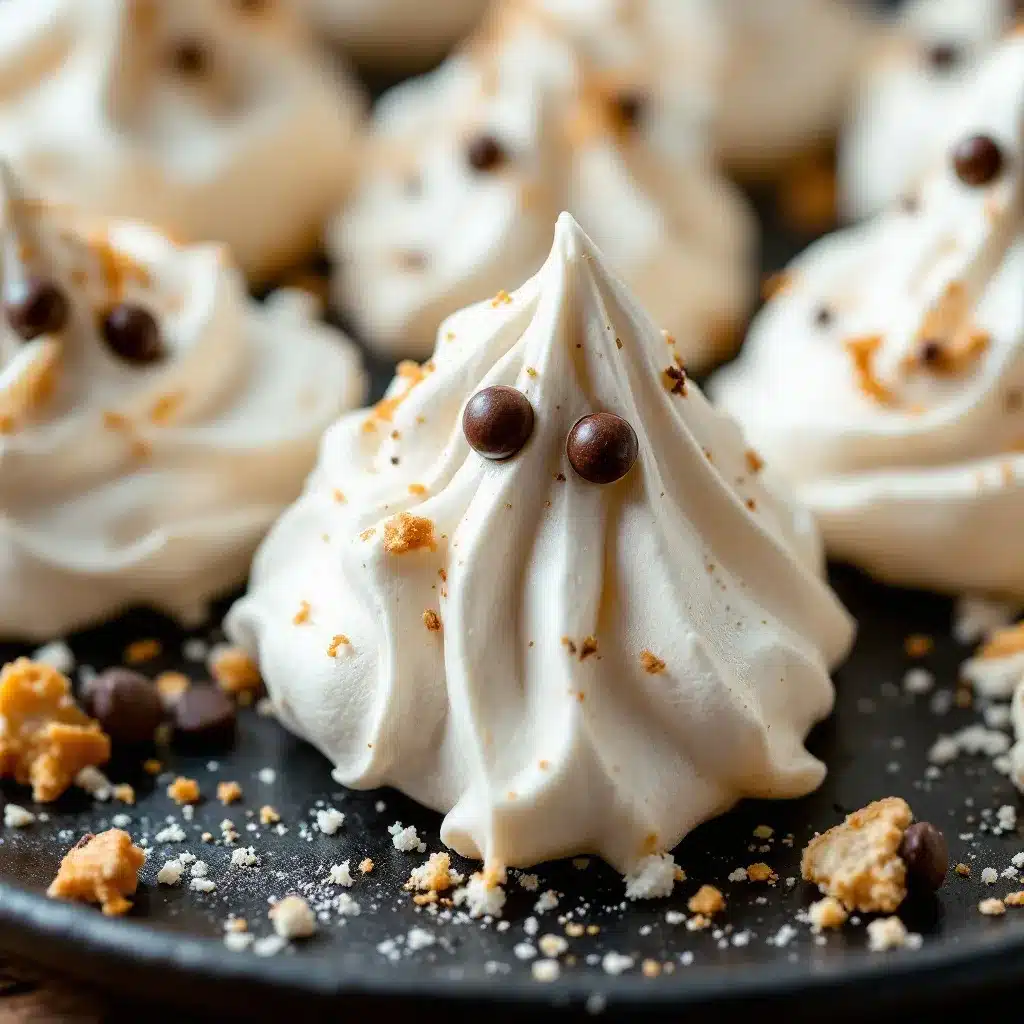
Making crispy ghost meringue cookies is a process of layers. You build the structure first, then add the personality. Here is how to do it step-by-step.
- Prep the Oven and Pans (5 minutes): Preheat your oven to 225°F (107°C). This low temperature is key. It dries the meringues out without browning them. Line two baking sheets with parchment paper. Make sure the paper is flat and smooth. Crinkles can cause uneven baking.
- Whip the Egg Whites (5 minutes): Place your egg whites in the clean, dry mixing bowl. Add a tiny pinch of salt. Using a hand mixer on medium speed, beat the whites until they become frothy. This takes about one minute. Then, increase the speed to high and continue beating until soft peaks form. Soft peaks mean the peaks curl over when you lift the beater. Do not skip this stage.
- Add the Sugar (3 minutes): While the mixer is running on high, slowly pour in the granulated sugar. Add it in a thin stream, not all at once. This helps it dissolve properly. Continue beating until the mixture is glossy, thick, and holds stiff peaks. When you lift the beater, the peak should stand straight up. This should take about 3-4 minutes. The mixture should feel smooth between your fingers, not gritty.
- Add Vanilla (1 minute): Turn off the mixer. Add the vanilla extract. Fold it in gently with your spatula. Just a few strokes to incorporate it. Over-mixing at this stage can deflate the eggs.
- Pipe the Ghosts (5 minutes): Transfer the mixture to a piping bag or a Ziploc bag. If using a Ziploc, cut a small hole in one corner. Squeeze the bag to push the mixture down toward the hole. On the baking sheet, pipe a tall, narrow mound. It should look like a teardrop or a sheet. The top should be pointy. You can use the back of the spoon to smooth the sides if you want a more uniform look. Leave space between each ghost, as they don’t spread much.
- Add the Eyes (2 minutes): This is the fun part. Take two mini chocolate chips and press them gently into the upper third of each ghost mound. Space them apart to look like eyes. If the chips slide down, the meringue might be too soft. If that happens, chill the piped ghosts in the fridge for 15 minutes before adding the eyes. It firms up the surface.
- Bake (90-120 minutes): Place the pans in the oven. Bake for 90 minutes to 2 hours. The time depends on your oven and the size of the ghosts. They are done when they are completely dry to the touch. They should not stick to the parchment paper at all. They should lift off easily. Do not turn the oven off yet.
- Cool Completely (30 minutes): Leave the ghosts in the turned-off oven with the door slightly ajar. This gradual cooling prevents cracking. Let them cool completely on the pan before handling. They will crisp up further as they cool.
Troubleshooting Tip: If your meringues weep (release liquid) after baking, it means they weren’t baked long enough or the sugar didn’t dissolve fully. Next time, ensure you beat the sugar in thoroughly and bake for a longer period at the lower temperature.
Cooking Tips & Techniques
Meringue can be finicky, but it’s also forgiving if you know the rules. Here are some professional techniques and personal lessons I’ve learned over the years.
- Room Temperature Eggs: I know it’s annoying to wait for egg whites to warm up, but it’s worth it. Cold egg whites take longer to whip and don’t reach the same volume. Take them out of the fridge an hour before you start.
- Clean Bowl is Critical: Even a tiny drop of egg yolk or grease in the bowl will prevent the whites from whipping. Wipe your bowl with a paper towel dipped in vinegar or lemon juice before you start. It removes any invisible oil residue.
- Don’t Rush the Sugar: Adding sugar too quickly can weigh down the eggs. Pour it in slowly while the mixer is running. This ensures it dissolves completely. If you can feel grit between your fingers after whipping, keep beating. It needs to be smooth.
- Low and Slow: I’ve tried baking at higher temperatures to save time, but the results are inconsistent. Higher heat causes the outside to harden too fast, trapping moisture inside. Low heat dries them out evenly, resulting in that signature crispness.
- The Crack Test: When you tap a finished ghost, it should sound hollow. If it sounds solid or dull, it needs more time. If it shatters into dust, it’s overbaked. Aim for the hollow sound.
I once made a batch in humid weather, and they never crisped up. I learned that humidity is the enemy of meringue. If it’s a rainy day, consider using a dehumidifier in the kitchen or baking when the air is drier. It’s a small detail that makes a big difference.
Variations & Adaptations
While the classic ghost is my favorite, there are fun ways to twist this recipe.
- Colored Ghosts: Add a drop of gel food coloring to the egg whites before whipping. Red for vampire ghosts, black for spooky bats, or orange for pumpkins. Gel colors are better than liquid because they don’t add extra water.
- Gluten-Free: This recipe is naturally gluten-free. Just double-check your chocolate chips. Most mini chips are GF, but some brands use wheat starch. Look for the GF label to be safe.
- Flavor Twists: Swap the vanilla for almond extract for a marzipan-like flavor. Or add a teaspoon of citrus zest (lemon or orange) to the whites for a bright, fresh note. The citrus zest also adds a tiny bit of acid, which can help stabilize the eggs.
- Dairy-Free: Use dairy-free mini chocolate chips. Many dark chocolate brands are naturally dairy-free. This makes the entire treat safe for those with milk allergies.
I tried making these with brown sugar once. It was a mistake. Brown sugar has molasses, which adds moisture. The result was chewy and dark, not crisp and white. Stick to white granulated sugar for the classic look and texture.
My personal favorite variation is adding a tiny drop of peppermint extract and using white chocolate chips. It tastes like a holiday mint cookie but looks like a ghost. It’s a fun surprise for people who expect plain sugar.
Serving & Storage Suggestions
These cookies are best served at room temperature. They are fragile, so handle them with care.
- Presentation: Serve them on a white plate or a clear glass platter. The white-on-white look is elegant and spooky. You can arrange them in a cluster to look like a group of ghosts floating together. Add a few black licorice strings for extra spookiness.
- Pairings: They go well with black coffee or tea. The bitterness of the coffee balances the sweetness. They also pair nicely with a glass of milk or a cup of hot chocolate. If you’re serving them at a party, consider a punch bowl with dry ice for a foggy effect (use food-safe dry ice only!).
- Storage: Store the cookies in an airtight container at room temperature. They will keep for up to two weeks. Do not refrigerate them, as the humidity in the fridge will make them soft and sticky. If you live in a humid climate, add a silica gel packet to the container to absorb moisture.
- Reheating: You don’t need to reheat them. If they do get soft, you can place them in a 200°F oven for 10 minutes to crisp them back up. Let them cool completely before serving.
The flavors don’t change much over time, but the texture is the main concern. As long as they stay dry, they remain crisp. I’ve been known to stash a few in my desk drawer for a mid-afternoon snack. They are light and satisfying.
Nutritional Information & Benefits
These cookies are primarily sugar and air, so they are high in carbohydrates and low in protein and fat.
- Calories: Each ghost is approximately 15-20 calories, depending on size.
- Sugar: High. One ghost has about 3-4 grams of sugar.
- Fat: Negligible, unless you count the fat in the chocolate chips.
- Protein: Small amount from the egg whites.
Health Benefits:
While not a health food, egg whites are a good source of protein. They are also low in calories compared to other cookies. If you are watching your sugar intake, enjoy these in moderation. They are a treat, not a staple.
Allergen Notes:
Contains eggs. Check chocolate chips for dairy and soy. Naturally gluten-free.
I love these because they are a lighter alternative to heavy cakes. They satisfy the sweet tooth without leaving you feeling sluggish. It’s a guilty pleasure that’s actually not *that* guilty, if you keep the portion size reasonable.
Conclusion
These crispy ghost meringue cookies are more than just a Halloween treat. They are a celebration of texture, simplicity, and a little bit of fun. I hope you try them out. They are easier than you think, and the results are impressive.
Feel free to customize them. Change the colors, change the eyes, change the flavors. Make them your own. The base recipe is flexible, so don’t be afraid to experiment.
I’d love to see your creations. If you make these, please share a photo or leave a comment below. Tell me how they turned out. Did they snap? Did the kids love them? I read every comment and love hearing about your baking adventures.
Happy baking, and happy Halloween. May your cookies be crisp and your ghosts be cute.
Frequently Asked Questions
Can I use liquid egg whites instead of fresh ones?
Yes, you can use pasteurized liquid egg whites from a carton. However, fresh egg whites often whip to a higher volume and have a better texture. If using liquid whites, you may need to whip them a bit longer to reach stiff peaks.
Why did my meringues spread and lose their shape?
This usually happens if the oven temperature is too high or if the meringue was not whipped enough. Ensure you are whipping until stiff peaks form and keep the oven temperature low (225°F). Also, make sure your bowl is completely clean and grease-free.
Can I make these ahead of time?
Yes, these are great for making ahead. They can be made up to two weeks in advance if stored in an airtight container. They actually crisp up more as they sit, so making them a few days early is a good idea.
How do I get the chocolate eyes to stick?
Press the mini chocolate chips gently into the meringue right after piping. If the meringue is too soft, the chips will slide. You can chill the piped ghosts in the fridge for 15 minutes to firm up the surface before adding the eyes.
Are these cookies safe for kids to eat?
Yes, they are safe for kids. They are made from simple ingredients. However, they are fragile, so young children should be supervised to avoid choking on small pieces. Also, ensure the chocolate chips are age-appropriate (no honey for infants under 1 year).
Pin This Recipe!
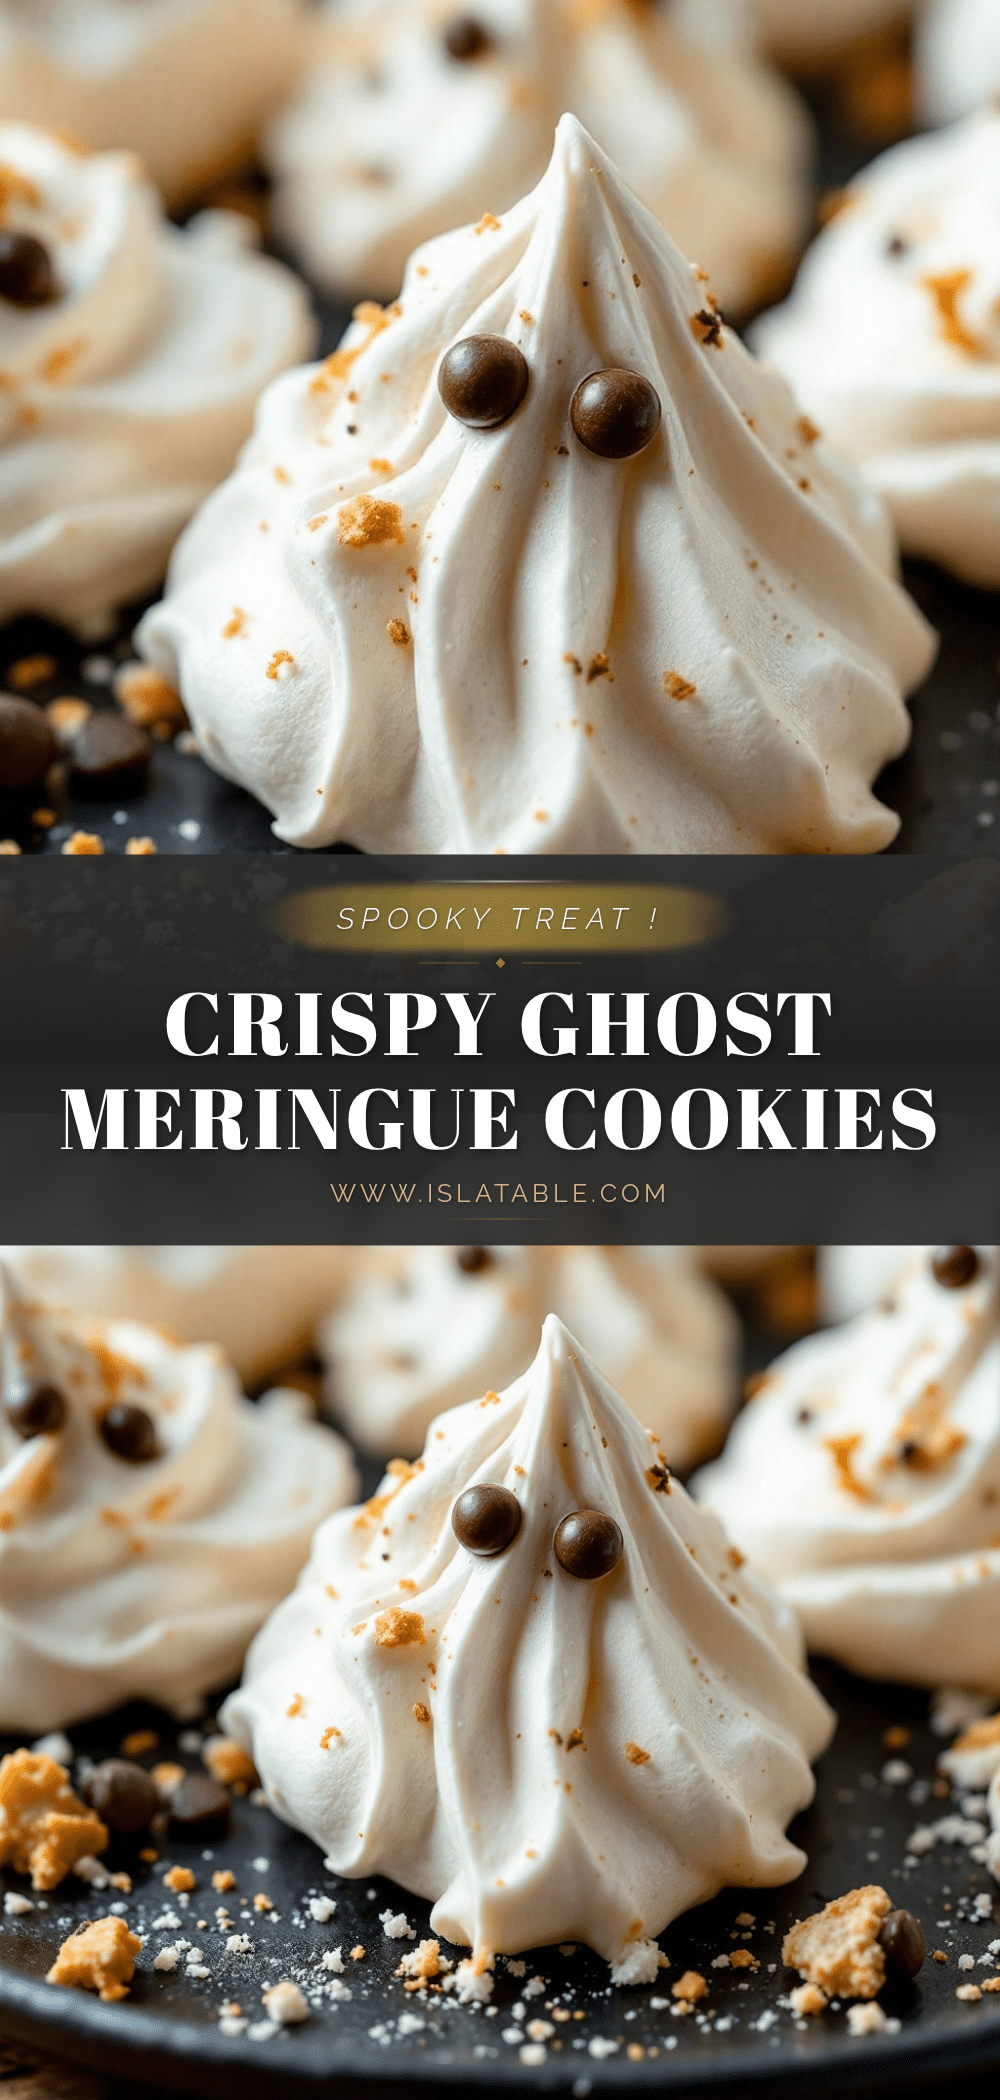
Crispy Ghost Meringue Cookies: Easy Halloween Treat
These crispy ghost meringue cookies are a light, airy, and visually striking Halloween treat. Made with simple ingredients like egg whites and sugar, they offer a satisfying snap and clean taste without the mess of traditional frosting.
- Prep Time: 20 minutes
- Cook Time: 90-120 minutes
- Total Time: 110-140 minutes
- Yield: Approximately 12-15 cookies 1x
- Category: Dessert
- Cuisine: American
Ingredients
- 3 large egg whites, room temperature
- 1 cup granulated sugar (approx. 200g)
- 1 teaspoon pure vanilla extract
- Pinch of salt
- Mini chocolate chips (for eyes)
Instructions
- Preheat oven to 225°F (107°C). Line two baking sheets with parchment paper.
- Place egg whites and salt in a clean, dry glass or metal bowl. Beat with a hand mixer on medium speed until frothy (about 1 minute).
- Increase speed to high and beat until soft peaks form.
- With the mixer running on high, slowly pour in the granulated sugar in a thin stream. Continue beating until the mixture is glossy, thick, and holds stiff peaks (about 3-4 minutes). The mixture should feel smooth, not gritty.
- Turn off the mixer and gently fold in the vanilla extract with a spatula.
- Transfer mixture to a piping bag fitted with a round tip or a Ziploc bag with the corner cut off.
- Pipe tall, narrow mounds onto the baking sheets to resemble ghosts. Leave space between them.
- Press two mini chocolate chips into the upper third of each ghost to create eyes. If the meringue is too soft, chill the piped ghosts for 15 minutes before adding eyes.
- Bake for 90 minutes to 2 hours, until the cookies are completely dry to the touch and do not stick to the parchment.
- Turn off the oven and leave the cookies inside with the door slightly ajar to cool completely (about 30 minutes). This prevents cracking.
- Remove from oven and store in an airtight container at room temperature.
Notes
Ensure the mixing bowl is completely clean and grease-free, as any fat will prevent the egg whites from whipping. Use room temperature egg whites for better volume. Do not use silicone mats; parchment paper is essential for easy removal. Store in an airtight container with a silica packet if humidity is high.
Nutrition
- Serving Size: 1 cookie
- Calories: 18
- Sugar: 4
- Sodium: 5
- Carbohydrates: 4
Keywords: Halloween, meringue, cookies, ghost, easy dessert, gluten-free, kid-friendly, party treat


