“These are the best scones I’ve ever had in my life.” My sister said it with her mouth full, which normally drives me crazy, but she had a point. I mean, she was holding a pumpkin scone with maple glaze, so I let it slide.
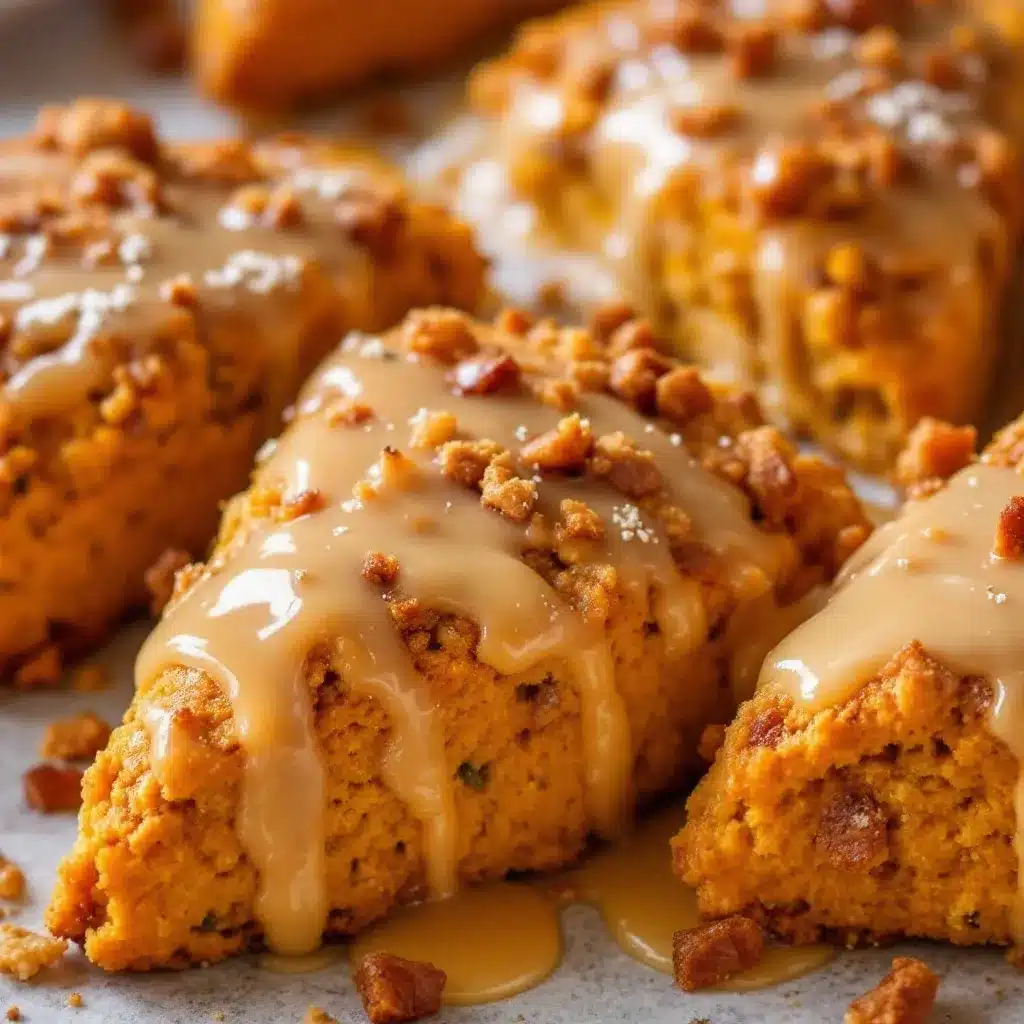
I’d spent the better part of a Saturday morning testing batches. The first ones came out like hockey pucks — dry, dense, and honestly, a little sad. The second batch was better but the glaze slid right off like it was scared to commit. By the third try, something clicked. The kitchen smelled like fall had exploded in the best way, and there they were: tender, golden, perfectly spiced pumpkin scones with that dreamy maple glaze dripping down the sides.
You know that feeling when you bite into something and everything just stops for a second? That’s what these are. They’re not just another pumpkin recipe — they’re the one you’ll make every single autumn. Maybe even in spring, if you’re like me and refuse to let pumpkin season be limited to three months.
The funny thing is, I wasn’t even trying to create the perfect pumpkin scone. I was just craving something warm and cozy on a rainy morning, and this is what happened. Sometimes the best recipes come from not trying too hard, you know?
Trust me on this one.
Why You’ll Love This Recipe
Let me tell you why these pumpkin scones with maple glaze are about to become your new favorite fall obsession. I’ve tested this recipe more times than I care to admit, and it’s finally just right.
- Quick & Easy: You can have these on the table in about 35 minutes. No stand mixer required, no complicated techniques. Just a bowl, a pastry cutter, and your hands.
- Simple Ingredients: Canned pumpkin, basic baking staples, and real maple syrup. Nothing weird, nothing hard to find. You probably already have most of it.
- Perfect for Fall Mornings: These are made for cozy weekends, Thanksgiving brunch, or that moment when you just need something warm and spiced with your coffee.
- Crowd-Pleaser: I brought a batch to my neighbor’s potluck and three people asked for the recipe before I even left. Kids love them, adults love them, everyone loves them.
- Unbelievably Delicious: The texture is what gets me every time — tender and flaky on the inside with that slightly crisp edge. And the maple glaze? It’s not too sweet, not too thin, just perfectly glossy and rich.
What makes these different from every other pumpkin scone recipe out there? It’s the technique. I use cold butter and a gentle hand, plus just the right amount of pumpkin puree to keep them moist without making them gummy. The maple glaze uses real maple syrup, not extract, which makes all the difference. Honestly, once you try these, you’ll never go back to the coffee shop version.
These pumpkin scones are the kind of thing that makes you close your eyes after the first bite. It’s comfort food at its finest — warm, spiced, and exactly what you need on a crisp autumn morning.
What Ingredients You Will Need
This recipe uses simple, wholesome ingredients to deliver that perfect pumpkin scone texture and flavor. Most of these are pantry staples, which makes this an easy last-minute baking project.
For the Pumpkin Scones
- All-purpose flour — 2 cups (250g). Spoon and level it for accuracy. I’ve tested this with King Arthur brand and it works beautifully.
- Granulated sugar — 1/3 cup (65g). Adds just enough sweetness without overpowering the pumpkin.
- Baking powder — 1 tablespoon (14g). Make sure it’s fresh for the best rise.
- Pumpkin pie spice — 1 ½ teaspoons. You can use store-bought or make your own with cinnamon, nutmeg, ginger, and cloves.
- Ground cinnamon — 1 teaspoon. For that extra warm spice kick.
- Salt — ½ teaspoon. Balances the sweetness and enhances the flavors.
- Unsalted butter — 6 tablespoons (85g), cold and cubed. This is crucial for flaky scones. I like using Kerrygold for its rich flavor.
- Pumpkin puree — ½ cup (120g). Not pumpkin pie filling! Make sure it’s 100% pure pumpkin. Libby’s is my go-to.
- Heavy cream — 3 tablespoons (45ml), plus more for brushing. You can substitute with whole milk if needed, but cream gives a richer texture.
- Vanilla extract — 1 teaspoon. Pure vanilla, not imitation, for the best flavor.
- Large egg — 1, room temperature. Helps bind everything together.
For the Maple Glaze
- Powdered sugar — 1 cup (120g), sifted for a smooth glaze.
- Pure maple syrup — 2 tablespoons (30ml). Grade A dark amber is my favorite for its robust flavor.
- Heavy cream or milk — 1-2 tablespoons (15-30ml), to thin the glaze to your preferred consistency.
- Vanilla extract — ½ teaspoon. Just a hint to round out the maple flavor.
Ingredient Tips: For the best texture, make sure your butter is really cold. I pop mine in the freezer for 10 minutes before cutting it into the flour. If you’re dairy-free, you can use cold vegan butter and coconut cream in place of heavy cream — I’ve tried it and it works surprisingly well. For a gluten-free option, use a 1:1 gluten-free baking flour blend, but add an extra tablespoon of cream since gluten-free flours tend to absorb more moisture.
Equipment Needed
You don’t need fancy equipment for these pumpkin scones, which is part of what makes them so approachable. Here’s what you’ll need:
- Large mixing bowl — For combining dry ingredients. Any medium-to-large bowl works.
- Pastry cutter or two forks — To cut the cold butter into the flour. I prefer a pastry cutter for speed, but forks work just fine. You could even use your fingertips if you work quickly.
- Baking sheet — Line it with parchment paper for easy cleanup. I use a half-sheet pan.
- Parchment paper — Prevents sticking and makes transferring the scones a breeze.
- Bench scraper or sharp knife — For cutting the scone dough into wedges. A bench scraper is my favorite tool here.
- Whisk — For mixing the glaze until smooth. A small one works perfectly.
- Cooling rack — Lets air circulate so the glaze sets properly. If you don’t have one, just use a plate.
- Measuring cups and spoons — Accurate measurements matter in baking.
Budget-friendly tip: If you don’t have a pastry cutter, don’t run out and buy one. Two forks or even your hands (work quickly so the butter doesn’t warm up) will do the job. I’ve made these scones more times than I can count with just a fork and a bowl, and they come out perfect every time.
Preparation Method
Let’s make these perfect pumpkin scones with maple glaze. Follow these steps carefully, and you’ll have bakery-quality scones right in your own kitchen.
- Preheat your oven to 400°F (200°C). Line a baking sheet with parchment paper. Getting the oven hot before you start mixing is important — you want it ready to go as soon as the scones are shaped.
- Mix the dry ingredients. In a large bowl, whisk together 2 cups all-purpose flour, 1/3 cup sugar, 1 tablespoon baking powder, 1½ teaspoons pumpkin pie spice, 1 teaspoon cinnamon, and ½ teaspoon salt. Make sure the baking powder is evenly distributed — nobody wants a bitter bite of baking powder.
- Cut in the cold butter. Add the 6 tablespoons of cold, cubed butter to the flour mixture. Use your pastry cutter or two forks to cut the butter into the flour until it resembles coarse crumbs with some pea-sized butter pieces remaining. This takes about 2-3 minutes. Don’t overwork it — those little butter pieces create flaky layers as they melt in the oven.
- Combine the wet ingredients. In a separate small bowl, whisk together ½ cup pumpkin puree, 3 tablespoons heavy cream, 1 teaspoon vanilla extract, and 1 large egg until smooth. The mixture should be a uniform orange color.
- Bring the dough together. Pour the wet ingredients into the dry ingredients. Stir with a spatula or wooden spoon just until the dough comes together. It will look shaggy and a little dry — that’s exactly what you want. Overmixing will make tough scones. If there are a few dry bits at the bottom, that’s okay.
- Shape the dough. Turn the dough out onto a lightly floured surface. Gently bring it together with your hands, patting it into a circle about ¾-inch thick. Don’t knead it — just press it together. The dough should be cohesive but not smooth.
- Cut the scones. Use a bench scraper or sharp knife to cut the circle into 8 equal wedges, like a pizza. Transfer the wedges to the prepared baking sheet, spacing them about 2 inches apart. They won’t spread much, but they need room for the heat to circulate.
- Brush with cream. Brush the tops of the scones with a little extra heavy cream. This helps them develop that beautiful golden-brown crust. You can also sprinkle a little coarse sugar on top if you like extra crunch.
- Bake. Place the baking sheet in the preheated oven and bake for 14-18 minutes, or until the scones are golden brown on the edges and a toothpick inserted in the center comes out clean. The kitchen will smell incredible at this point.
- Cool completely. Transfer the scones to a cooling rack and let them cool completely before glazing. This is important — if they’re warm, the glaze will just melt and run off. Patience, my friend.
- Make the maple glaze. While the scones cool, whisk together 1 cup sifted powdered sugar, 2 tablespoons pure maple syrup, ½ teaspoon vanilla extract, and 1 tablespoon of heavy cream. Add more cream, one teaspoon at a time, until you reach a thick but pourable consistency. The glaze should be thick enough to coat the back of a spoon but thin enough to drizzle.
- Glaze the scones. Once the scones are completely cool, drizzle the maple glaze over the tops using a spoon or a small piping bag. Let the glaze set for about 10 minutes before serving. The glossy finish is just beautiful.
Cooking Tips & Techniques
After making these pumpkin scones more times than I can count, I’ve learned a few things the hard way. Here are my best tips for perfect results every time.
Keep everything cold. This is the number one rule of scone-making. Cold butter creates steam pockets as it melts in the oven, which gives you those flaky layers. If your kitchen is warm, pop the shaped scones in the fridge for 15 minutes before baking. I forgot this once on a hot summer day and ended up with flat, greasy scones. Never again.
Don’t overwork the dough. I know it’s tempting to keep mixing until everything looks smooth, but stop as soon as the dough comes together. Overmixing develops gluten, and that leads to tough, dense scones. Shaggy dough is good dough. Trust the process.
Use a light hand when shaping. Press the dough together gently — don’t compact it. You want it to hold its shape without being compressed. Think of it like you’re being kind to the dough, not wrestling it into submission.
Watch the baking time. Every oven runs a little differently. Start checking at 14 minutes. The scones should be golden on the edges and just barely set in the center. If you tap the top, it should feel firm but not hard. Overbaked scones are dry scones, and that’s a tragedy.
Glaze strategically. I like to place the cooling rack over a piece of parchment paper before glazing. That way, any drips land on the paper instead of your counter. You can even scoop up the excess glaze and reuse it if you’re feeling thrifty.
Make ahead tip: You can freeze the unbaked scones! Cut them into wedges, place them on a baking sheet, and freeze until solid. Then transfer to a freezer bag. When you’re ready to bake, add 2-3 minutes to the baking time. Fresh scones anytime — yes, please.
Variations & Adaptations
One of the best things about this pumpkin scone recipe is how versatile it is. Here are some ways to make it your own.
Gluten-Free Version: Substitute the all-purpose flour with a 1:1 gluten-free baking flour blend. I’ve had good results with Bob’s Red Mill. Add an extra tablespoon of heavy cream since gluten-free flours tend to be more absorbent. The texture will be slightly more tender, but still delicious.
Dairy-Free Version: Use cold vegan butter (I like Miyoko’s) and replace the heavy cream with full-fat coconut cream or oat milk. The scones will be a little less rich, but the pumpkin and spice flavors still shine. You can also use a dairy-free milk in the glaze.
Lower Sugar Option: Reduce the sugar in the scone dough to 2 tablespoons and use a sugar-free maple-flavored syrup in the glaze. The scones will be less sweet, but the pumpkin and spice flavors become more prominent. I’ve made these for my diabetic-friendly brunch spread and they were a hit.
Add Mix-Ins: Fold in ½ cup of dried cranberries, chopped pecans, or even white chocolate chips before shaping the dough. Cranberry-pumpkin scones with maple glaze? Absolutely. Pecan-pumpkin? Even better.
Spice It Up: If you love a kick, add ¼ teaspoon of ground ginger or a pinch of cayenne pepper to the dry ingredients. The warmth from the spice pairs beautifully with the sweet maple glaze.
Chocolate Drizzle: For a totally indulgent twist, drizzle melted dark chocolate over the maple glaze. I tried this one afternoon when I was feeling extra and it was honestly life-changing. The bitterness of the dark chocolate balances the sweet maple perfectly.
Serving & Storage Suggestions
These pumpkin scones with maple glaze are best served slightly warm, but they’re wonderful at room temperature too. Here’s how to enjoy and store them.
Serving: I love serving these with a hot cup of coffee or chai latte. The spiced pumpkin flavor is a natural match for warm beverages. For a fall brunch spread, arrange them on a wooden board with apple slices, a bowl of whipped butter, and maybe some gluten-free cornbread muffins for variety. They also make a lovely addition to a Thanksgiving dessert table alongside a diabetic-friendly lemon cake for guests who want something lighter.
Temperature: These scones are delicious warm, at room temperature, or even slightly chilled. If you want to warm them up, pop them in a 300°F oven for 5 minutes. The microwave works too, but it can make them a little soft — use 10-second intervals.
Storage: Store glazed scones in an airtight container at room temperature for up to 3 days. If you stack them, place a piece of parchment paper between layers to prevent the glaze from sticking. Un-glazed scones can be stored for up to 5 days.
Freezing: These freeze beautifully! Freeze un-glazed scones in a single layer on a baking sheet, then transfer to a freezer bag. They’ll keep for up to 3 months. Thaw at room temperature, then warm and glaze before serving. The glaze itself can be stored in the fridge for up to a week — just whisk it before using.
Flavor Development: Honestly, these scones taste even better the next day. The flavors meld together and the texture softens just a bit. If you can resist eating them all on day one, you’re in for a treat on day two.
Nutritional Information & Benefits
While these pumpkin scones are definitely a treat, they do offer some nutritional perks thanks to the star ingredient. Here’s the breakdown per scone (makes 8):
| Nutrient | Amount per Scone |
|---|---|
| Calories | 285 |
| Total Fat | 12g |
| Saturated Fat | 7g |
| Cholesterol | 55mg |
| Sodium | 280mg |
| Total Carbohydrates | 40g |
| Dietary Fiber | 2g |
| Sugars | 20g |
| Protein | 4g |
Health Benefits: Pumpkin is packed with vitamin A (beta-carotene), which supports eye health and immune function. It’s also a good source of fiber, which helps with digestion and keeps you feeling full. The cinnamon in these scones has anti-inflammatory properties and may help regulate blood sugar. Not that you need an excuse to enjoy one, but it’s nice to know they’re not completely empty calories.
Dietary Considerations: These scones contain gluten, dairy, and eggs. For allergy-friendly options, check the variations section above. This recipe is not low-carb or keto-friendly as written, but you could experiment with almond flour — though the texture will be quite different.
FAQs
Can I use fresh pumpkin instead of canned?
You can, but be careful. Fresh pumpkin puree has more water content than canned, which can make your scone dough too wet. If you use fresh, squeeze the puree in a clean kitchen towel to remove excess moisture before measuring. I’ve done it, and it works, but canned is honestly more consistent.
Why did my scones turn out dry?
This usually happens for one of three reasons: too much flour, overbaking, or overmixing the dough. Make sure you’re measuring your flour correctly (spoon and level, don’t scoop), check your scones at the minimum baking time, and stop mixing as soon as the dough comes together. A little dryness can be fixed by serving with extra butter or a drizzle of cream.
Can I make the dough ahead of time?
Absolutely! You can prepare the scone dough, shape it into wedges, and refrigerate them on the baking sheet for up to 24 hours. Cover them with plastic wrap. When you’re ready to bake, add 2-3 minutes to the baking time. You can also freeze the unbaked scones for up to 3 months — just bake from frozen, adding a few extra minutes.
Can I skip the maple glaze?
You can, but honestly, the maple glaze is what takes these pumpkin scones from good to unforgettable. If you want a simpler option, brush the warm scones with a little melted butter and sprinkle with cinnamon sugar. Or just enjoy them plain with a pat of butter — they’re still delicious.
How do I get a thicker glaze?
If your maple glaze is too thin, add more sifted powdered sugar, one tablespoon at a time, until it reaches the consistency you want. If it’s too thick, add a tiny splash of milk or cream. The perfect glaze should be thick enough to coat the back of a spoon but still pourable. Let it set for at least 10 minutes before serving.
Conclusion
These perfect pumpkin scones with maple glaze are everything I want in a fall recipe — warm, spiced, comforting, and just a little bit special. They come together quickly with simple ingredients, but they taste like something from a fancy bakery. That’s my favorite kind of recipe, honestly.
I hope you make these and love them as much as I do. Maybe you’ll even get that same comment from someone in your life — “these are the best scones I’ve ever had.” There’s something really satisfying about sharing food that makes people feel that way.
Don’t be afraid to make them your own. Add cranberries, swap the glaze, double the recipe — whatever feels right. Baking should be fun, not stressful. And if your first batch isn’t perfect? That’s okay. I’ve eaten plenty of imperfect scones, and you know what? They were still pretty great.
If you try these pumpkin scones with maple glaze, I’d love to hear about it. Drop a comment below or tag me in your photos. Happy baking, friends!
Pin This Recipe!
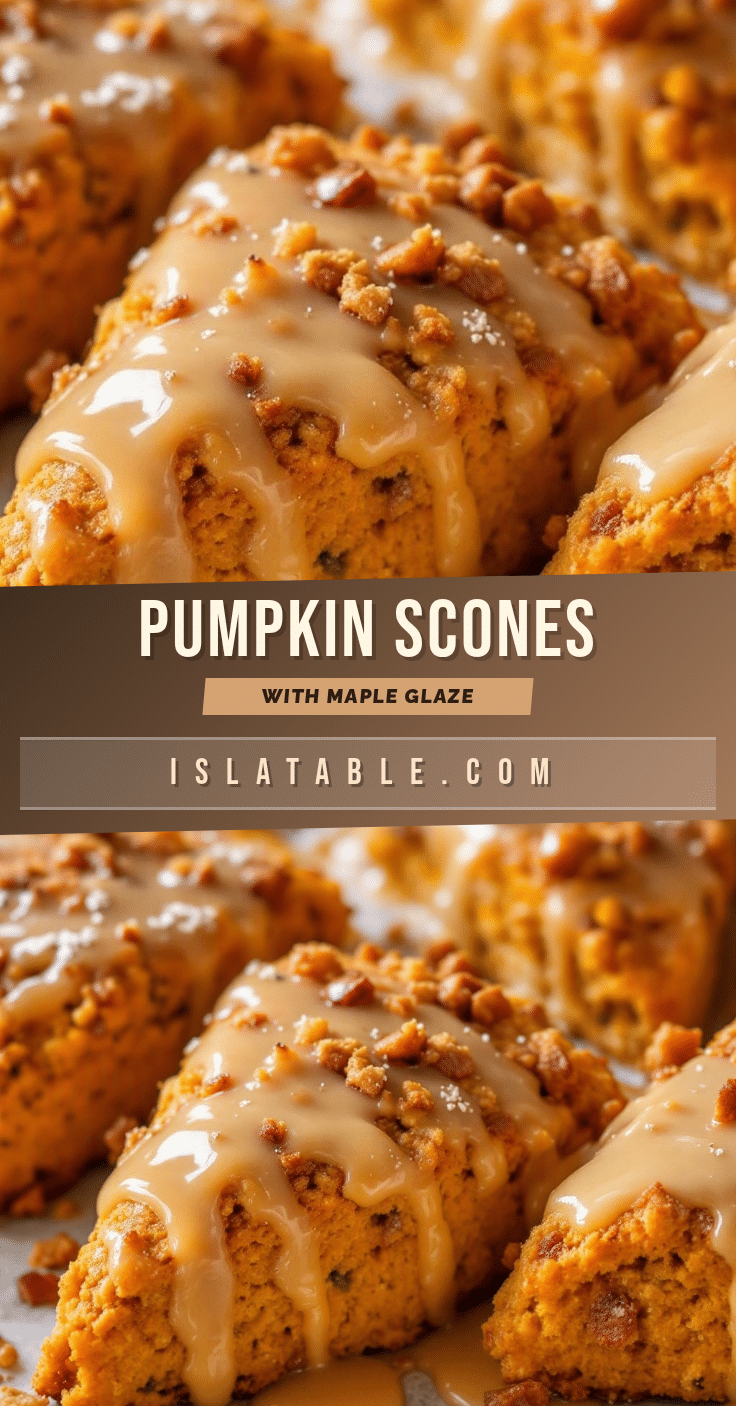
Perfect Pumpkin Scones with Easy Maple Glaze

Tender, golden, perfectly spiced pumpkin scones with a dreamy maple glaze that drips down the sides. These are the ultimate fall treat, easy to make with simple ingredients.
- Prep Time: 15 minutes
- Cook Time: 18 minutes
- Total Time: 33 minutes
- Yield: 8 servings 1x
- Category: Dessert
- Cuisine: American
Ingredients
- 2 cups (250g) all-purpose flour
- 1/3 cup (65g) granulated sugar
- 1 tablespoon (14g) baking powder
- 1 ½ teaspoons pumpkin pie spice
- 1 teaspoon ground cinnamon
- ½ teaspoon salt
- 6 tablespoons (85g) unsalted butter, cold and cubed
- ½ cup (120g) pumpkin puree (not pumpkin pie filling)
- 3 tablespoons (45ml) heavy cream, plus more for brushing
- 1 teaspoon vanilla extract
- 1 large egg, room temperature
- 1 cup (120g) powdered sugar, sifted
- 2 tablespoons (30ml) pure maple syrup
- 1–2 tablespoons (15-30ml) heavy cream or milk
- ½ teaspoon vanilla extract
Instructions
- Preheat your oven to 400°F (200°C). Line a baking sheet with parchment paper.
- In a large bowl, whisk together 2 cups all-purpose flour, 1/3 cup sugar, 1 tablespoon baking powder, 1½ teaspoons pumpkin pie spice, 1 teaspoon cinnamon, and ½ teaspoon salt.
- Add the 6 tablespoons of cold, cubed butter to the flour mixture. Use a pastry cutter or two forks to cut the butter into the flour until it resembles coarse crumbs with some pea-sized butter pieces remaining.
- In a separate small bowl, whisk together ½ cup pumpkin puree, 3 tablespoons heavy cream, 1 teaspoon vanilla extract, and 1 large egg until smooth.
- Pour the wet ingredients into the dry ingredients. Stir with a spatula or wooden spoon just until the dough comes together. It will look shaggy and a little dry.
- Turn the dough out onto a lightly floured surface. Gently bring it together with your hands, patting it into a circle about ¾-inch thick. Do not knead.
- Use a bench scraper or sharp knife to cut the circle into 8 equal wedges. Transfer the wedges to the prepared baking sheet, spacing them about 2 inches apart.
- Brush the tops of the scones with a little extra heavy cream.
- Bake for 14-18 minutes, or until the scones are golden brown on the edges and a toothpick inserted in the center comes out clean.
- Transfer the scones to a cooling rack and let them cool completely before glazing.
- While the scones cool, whisk together 1 cup sifted powdered sugar, 2 tablespoons pure maple syrup, ½ teaspoon vanilla extract, and 1 tablespoon of heavy cream. Add more cream, one teaspoon at a time, until you reach a thick but pourable consistency.
- Once the scones are completely cool, drizzle the maple glaze over the tops. Let the glaze set for about 10 minutes before serving.
Notes
Keep butter cold for flaky layers. Do not overwork the dough. For best results, chill shaped scones for 15 minutes before baking if your kitchen is warm. Scones can be frozen unbaked for up to 3 months.
Nutrition
- Serving Size: 1 scone
- Calories: 285
- Sugar: 20
- Sodium: 280
- Fat: 12
- Saturated Fat: 7
- Carbohydrates: 40
- Fiber: 2
- Protein: 4
Keywords: pumpkin scones, maple glaze, fall baking, easy scone recipe, pumpkin recipes


