Easy No-Bake Pumpkin Cheesecake Bars with Gingersnap Crust
The snap of a gingersnap cookie breaking — that sharp, spicy-sweet crack — still takes me straight to my first apartment. It was late September and I was determined to make a Thanksgiving-worthy dessert without turning on the oven. My tiny kitchen had no central air, and the idea of a pumpkin cheesecake felt absurd in the lingering heat. So I grabbed a box of gingersnaps, some cream cheese, and a can of pumpkin puree, fully expecting a disaster. Instead, I got these easy no-bake pumpkin cheesecake bars with gingersnap crust, and honestly, I haven’t made a traditional baked version since. The crust is ridiculously simple — just crushed cookies and butter — and the filling sets up perfectly in the fridge. No water baths, no cracked tops, no stress. It was one of those accidental wins that turns into a yearly tradition.
These bars have a way of making people pause mid-bite. The gingersnap crust adds this warm, molasses-y kick that plays off the creamy, spiced pumpkin filling like they were meant for each other. And because there’s no baking involved, you can whip them up even when your oven is full of other dishes or when you just don’t feel like turning it on. They’re the kind of dessert that feels fancy but is secretly low-effort — my favorite kind.
Why You’ll Love This Recipe
I’ve tested this recipe at least a dozen times across different kitchens, and it never fails. Here’s why it’s become my go-to fall dessert:
- No oven required — Perfect for warm days or when your oven is already occupied with a main dish. You don’t even need a stove for the filling.
- Simple, real ingredients — No boxed mixes or hard-to-find items. You probably have most of these in your pantry right now.
- Make-ahead friendly — These bars actually taste better after a full night in the fridge. The flavors meld and the crust firms up beautifully.
- Crowd-pleaser guaranteed — I’ve served these at Friendsgiving, potlucks, and casual dinners. Even people who claim they don’t like pumpkin desserts ask for seconds.
- Foolproof texture — Unlike baked cheesecake, there’s zero risk of cracking or over-baking. The filling stays creamy and sliceable without being too dense.
What really sets these bars apart is the crust. Most no-bake cheesecake bars use graham crackers, which are fine but a little boring. Gingersnaps bring warmth and complexity that elevates the whole dessert. The filling uses a clever trick — a bit of gelatin for structure without the heaviness of a fully baked cheesecake. It’s the kind of detail that makes you close your eyes after the first bite, wondering why you ever bothered with the oven version.
What Ingredients You Will Need
This recipe uses simple, wholesome ingredients to deliver that classic pumpkin cheesecake flavor with a spiced twist. Most are pantry staples, and the rest are easy to find at any grocery store.
For the Gingersnap Crust:
- 2 cups (about 200g) gingersnap cookies, finely crushed — I prefer Nabisco or Mi-Del for consistent texture. You can pulse them in a food processor or crush them in a bag with a rolling pin.
- 6 tablespoons (85g) unsalted butter, melted — Use salted butter if that’s what you have, just skip the added salt in the crust.
- 2 tablespoons (25g) granulated sugar — This balances the spicy cookies. You can reduce or omit if your gingersnaps are very sweet.
- Pinch of salt — Optional, but it helps the crust hold together and enhances the flavor.
For the Pumpkin Cheesecake Filling:
- 16 ounces (450g) cream cheese, softened — Full-fat is best for creamy texture. If you need a lighter option, Neufchâtel works but the filling will be slightly less firm.
- 1 cup (200g) granulated sugar — You can reduce to ¾ cup if you prefer a less sweet dessert. The pumpkin and spices add natural sweetness.
- 1 cup (240g) pumpkin puree — Not pumpkin pie filling. I use Libby’s, but any 100% pure pumpkin works. Homemade puree is fine if you drain it well.
- 1 teaspoon vanilla extract — Pure vanilla extract adds depth. Imitation works in a pinch.
- 1 ½ teaspoons pumpkin pie spice — Store-bought is fine, or make your own: ½ teaspoon cinnamon, ¼ teaspoon ginger, ¼ teaspoon nutmeg, ⅛ teaspoon cloves, and a pinch of allspice.
- ½ teaspoon ground cinnamon — Extra warmth. I add this even when using pumpkin pie spice.
- ¼ teaspoon salt — Balances the sweetness and brings out the pumpkin flavor.
- 1 cup (240ml) heavy cream, cold — Whipped to stiff peaks. This lightens the filling and gives it that mousse-like texture. Coconut cream works for a dairy-free version.
- 1 packet (about 2 ¼ teaspoons) unflavored gelatin — Bloomed in 2 tablespoons cold water. This is the secret to clean, sliceable bars without baking. You can skip it for a softer, mousse-like texture.
For the Topping (optional but lovely):
- ½ cup (120ml) heavy cream, cold — For whipped cream topping.
- 1 tablespoon powdered sugar — Sweetens the whipped cream without grittiness.
- ¼ teaspoon vanilla extract
- Ground cinnamon or crushed gingersnaps for garnish
Equipment Needed
You don’t need a lot of fancy tools for these bars. Here’s what I use every time:
- 9×9-inch baking pan — An 8×8 works too, but the bars will be slightly thicker. Line it with parchment paper for easy removal.
- Food processor or rolling pin — For crushing the gingersnaps. A food processor gives a finer, more even crumb, but a bag and rolling pin work just fine.
- Electric mixer — A hand mixer or stand mixer works. You need to whip the cream cheese until smooth and the cream until stiff.
- Medium saucepan — For melting the butter and blooming the gelatin.
- Small bowl — For blooming the gelatin.
- Spatula — A rubber spatula helps fold the whipped cream into the cream cheese mixture without deflating it.
- Measuring cups and spoons
If you don’t have a 9×9 pan, you can use a 9-inch springform pan. The bars will be a bit taller, and you can skip the parchment — just grease the sides lightly. I actually prefer the springform pan for cleaner slices, but the square pan is easier for storing leftovers.
Preparation Method
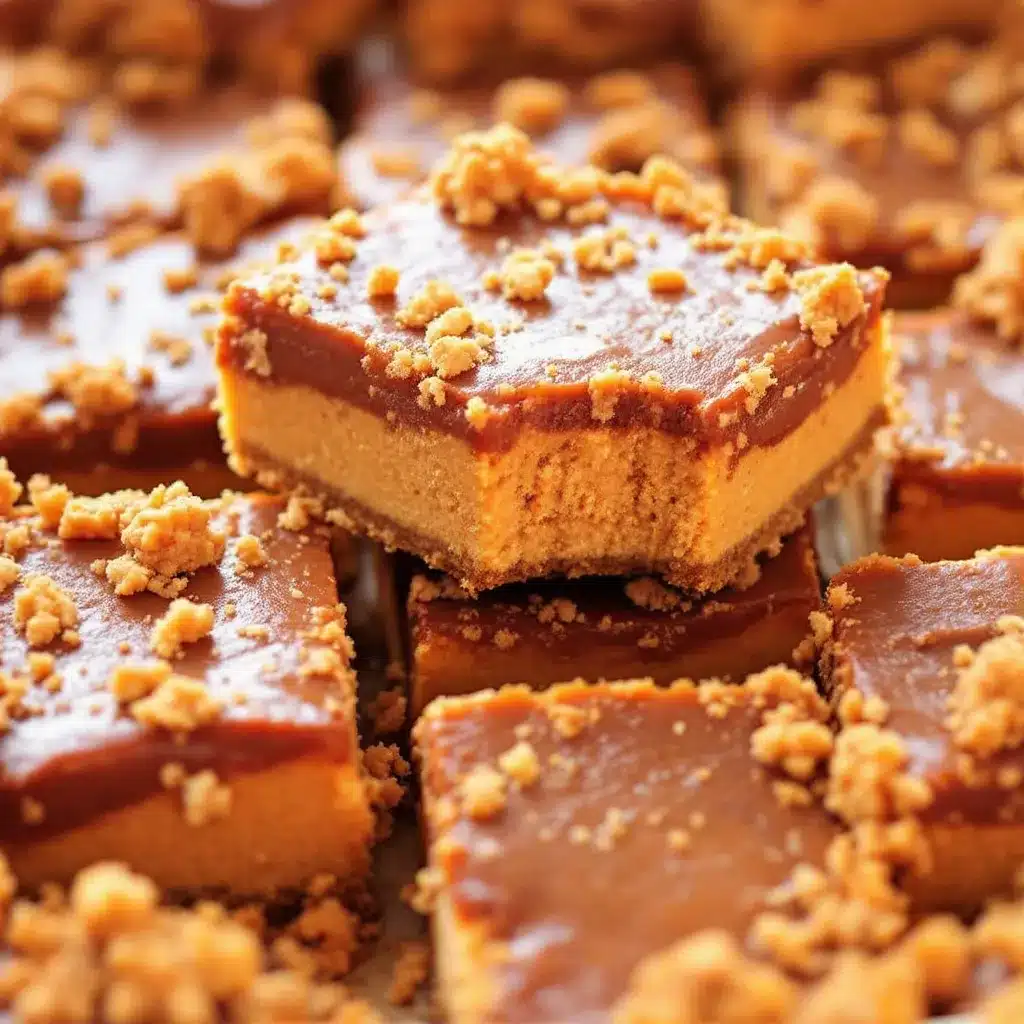
Let’s get into the step-by-step. I’ll walk you through every detail so you feel confident, even if you’ve never made a no-bake cheesecake before.
Step 1: Make the Gingersnap Crust
Crush 2 cups of gingersnap cookies until you have fine crumbs. You want them consistent — no big chunks, but not quite dust either. A food processor takes about 30 seconds. If you’re using a bag and rolling pin, put the cookies in a zip-top bag, squeeze out the air, and roll firmly until crushed. Pour the crumbs into a medium bowl. Add 2 tablespoons sugar and a pinch of salt, then pour in 6 tablespoons melted butter. Stir with a fork until every crumb is moistened. It should look like wet sand and hold together when pressed.
Press the mixture firmly into the bottom of your lined 9×9 pan. Use the bottom of a measuring cup or a flat glass to get it even and compact. Pop the pan in the fridge while you make the filling — at least 15 minutes. This helps the crust set and prevents it from crumbling when you cut the bars later.
Step 2: Bloom the Gelatin
Sprinkle 1 packet of unflavored gelatin over 2 tablespoons cold water in a small bowl. Let it sit for 5-10 minutes until it looks like firm, wobbly jelly. This is called blooming. Don’t skip this step — it ensures the gelatin dissolves evenly without clumps. While it sits, move on to the next step.
Step 3: Make the Pumpkin Cheesecake Filling
In a large bowl, beat 16 ounces softened cream cheese with an electric mixer until smooth and creamy — about 2 minutes. Scrape the bowl well. Add 1 cup sugar and beat until combined, another minute. Add 1 cup pumpkin puree, 1 teaspoon vanilla, 1 ½ teaspoons pumpkin pie spice, ½ teaspoon cinnamon, and ¼ teaspoon salt. Beat on medium speed until everything is smooth and uniform. The mixture will be thick and fragrant. Set aside.
Step 4: Melt the Gelatin
Place the bloomed gelatin in a small saucepan over low heat. Stir constantly until it liquefies — about 30 seconds. Do not let it boil. Remove from heat immediately. Let it cool for 1 minute, then slowly drizzle it into the cream cheese mixture while beating on low speed. Make sure it’s fully incorporated. This gelatin is what gives the bars their clean, sliceable structure.
Step 5: Whip the Cream
In a separate bowl, pour 1 cup cold heavy cream. Beat with an electric mixer on medium-high until soft peaks form — about 2-3 minutes. The cream should hold its shape but still look soft and billowy. Don’t overwhip or you’ll end up with butter. Add the whipped cream to the pumpkin mixture in two additions. Gently fold with a rubber spatula until no white streaks remain. The goal is to keep the mixture light and airy.
Step 6: Assemble and Chill
Pour the filling over the chilled crust. Spread it evenly with a spatula. Tap the pan gently on the counter to release any air bubbles. Cover with plastic wrap and refrigerate for at least 6 hours, but overnight is best. The longer it sits, the cleaner your slices will be.
Step 7: Make the Topping (optional)
Just before serving, whip ½ cup heavy cream with 1 tablespoon powdered sugar and ¼ teaspoon vanilla until soft peaks form. Spread or pipe over the chilled bars. Sprinkle with cinnamon or crushed gingersnaps.
Step 8: Slice and Serve
Lift the bars out of the pan using the parchment overhang. Use a sharp knife, wiping it clean between cuts, for neat slices. Serve cold.
Cooking Tips & Techniques
I’ve made a lot of mistakes with no-bake cheesecakes over the years. Here’s what I’ve learned so you don’t have to repeat them:
- Don’t rush the cream cheese softening. Cold cream cheese creates lumps that no amount of beating will fix. Leave it on the counter for at least an hour. If you’re in a hurry, cut it into cubes and microwave in 10-second bursts until just soft.
- Whip the cream to the right stage. Soft peaks that droop slightly when you lift the beater are perfect. If you whip to stiff peaks, the filling can become grainy. If you under-whip, the bars won’t set properly.
- Fold, don’t stir. When adding the whipped cream to the pumpkin mixture, use a gentle folding motion. Stirring aggressively deflates the air and makes the bars dense.
- Patience with chilling. I know it’s tempting to dig in after 4 hours, but the gelatin needs time to fully set. Overnight chilling gives you those perfect, clean slices that look like they came from a bakery.
- Wipe your knife between cuts. This is a small thing that makes a huge difference. A clean knife gives sharp edges. Warm the knife under hot water, dry it, and slice.
Variations & Adaptations
These bars are surprisingly flexible. Here are some ways I’ve adapted them:
- Gluten-free version: Use gluten-free gingersnap cookies. Many brands are available, or you can substitute with gluten-free graham crackers. The rest of the ingredients are naturally gluten-free.
- Dairy-free version: Use dairy-free cream cheese (like Kite Hill or Tofutti) and full-fat coconut cream instead of heavy cream. The texture will be slightly softer, so chill for a full 24 hours. The coconut cream needs to be refrigerated overnight first, then scooped from the solid top.
- Lower sugar option: Reduce the sugar in the filling to ¾ cup. You can also use a sugar substitute like monk fruit or allulose, but the texture may be slightly different. The crust sugar can be omitted entirely.
- Pumpkin spice variation: Swap the pumpkin puree for an equal amount of sweet potato puree for a slightly different flavor profile. Or add ¼ cup maple syrup to the filling for extra depth.
- Chocolate twist: Add 2 tablespoons cocoa powder to the crust for a chocolate-ginger combination that’s absolutely addictive. Or drizzle melted dark chocolate over the finished bars.
I once made a batch with a pecan shortbread crust instead of gingersnaps when I ran out of cookies. It was fantastic — nutty and buttery. Don’t be afraid to experiment.
Serving & Storage Suggestions
These bars are best served cold, straight from the fridge. The filling is firm but creamy, and the crust stays crunchy. I like to let them sit at room temperature for about 5 minutes before serving — it takes the chill off without making them soft.
For presentation, I dust the tops with a little cinnamon and a few crushed gingersnaps. A dollop of whipped cream on each slice makes it feel extra special. These pair beautifully with a cup of hot coffee or a spiced chai latte. If you’re serving them for a fall gathering, they also go well with a gluten-free cornbread muffin for a sweet-savory contrast.
Storage: Keep the bars covered in the refrigerator for up to 5 days. The crust will soften slightly over time, but they’re still delicious. Do not freeze them — the texture of the gelatin and cream changes upon thawing, becoming watery and grainy.
Reheating: You don’t need to reheat these bars. Serve cold. If you’ve added whipped cream, add it fresh just before serving, as it will deflate over time.
The flavors actually improve after a day or two. The pumpkin spice melds with the gingersnap crust, and the filling becomes even creamier. I’ve found that bars made on a Friday are perfect for a Sunday dessert.
Nutritional Information & Benefits
These bars are a treat, but they have some redeeming qualities. Here’s an approximate breakdown per bar (assuming 9 servings):
- Calories: 380-420
- Fat: 26g (mostly from cream cheese and heavy cream)
- Carbohydrates: 34g
- Protein: 6g
- Fiber: 2g
- Sugar: 24g
Pumpkin is packed with vitamin A, fiber, and antioxidants. It’s also lower in calories than many other dessert bases. The cream cheese adds calcium and protein, though it’s not exactly health food. If you’re watching your sugar, the reduced-sugar variation works well.
This recipe is vegetarian and can be made gluten-free and dairy-free with the substitutions above. It’s not low-carb unless you use a sugar substitute, but it’s a far better option than most store-bought desserts. I love that I can serve these to guests with dietary restrictions without them feeling left out.
Conclusion
These easy no-bake pumpkin cheesecake bars with gingersnap crust are the kind of recipe that makes you look like a hero with minimal effort. The crust is spicy and crunchy, the filling is creamy and rich, and the whole thing comes together without turning on the oven. I’ve made them for Thanksgiving, Halloween parties, and random Tuesday cravings, and they always disappear fast.
I love that this recipe is forgiving enough for beginners but impressive enough for experienced bakers. You can dress it up with toppings or keep it simple. Either way, it’s a dessert that delivers on flavor without the stress.
I’d love to hear how yours turn out. Did you try a variation? Add a topping? Serve it at a special occasion? Drop a comment below and let me know. And if you’re looking for another no-bake dessert to round out your fall menu, check out these gluten-free red, white, and blueberry parfaits for a fresh, fruity option. Happy cooking — or rather, happy no-cooking!
Frequently Asked Questions
Can I use pumpkin pie filling instead of pumpkin puree?
No, pumpkin pie filling is pre-sweetened and spiced, which will throw off the sugar and spice balance. Stick with 100% pure pumpkin puree for best results.
How long do these bars need to chill?
At least 6 hours, but overnight is ideal for clean slices. The gelatin needs time to fully set, and the flavors meld beautifully after a full chill.
Can I skip the gelatin?
Yes, but the bars will be softer and more mousse-like. They’ll still taste great, but they won’t slice as cleanly. If you skip the gelatin, reduce the heavy cream to ¾ cup for a firmer texture.
What if I don’t have gingersnap cookies?
You can use graham crackers, shortbread cookies, or even vanilla wafers. The flavor will be different but still delicious. Add a teaspoon of ground ginger and a pinch of cloves to the crust to mimic the gingersnap flavor.
Can I make these bars vegan?
Yes, with a few swaps. Use vegan cream cheese, full-fat coconut cream instead of heavy cream, and a vegan butter substitute. Use agar agar instead of gelatin (follow package directions for substitution). Chill for a full 24 hours for best texture.
Pin This Recipe!
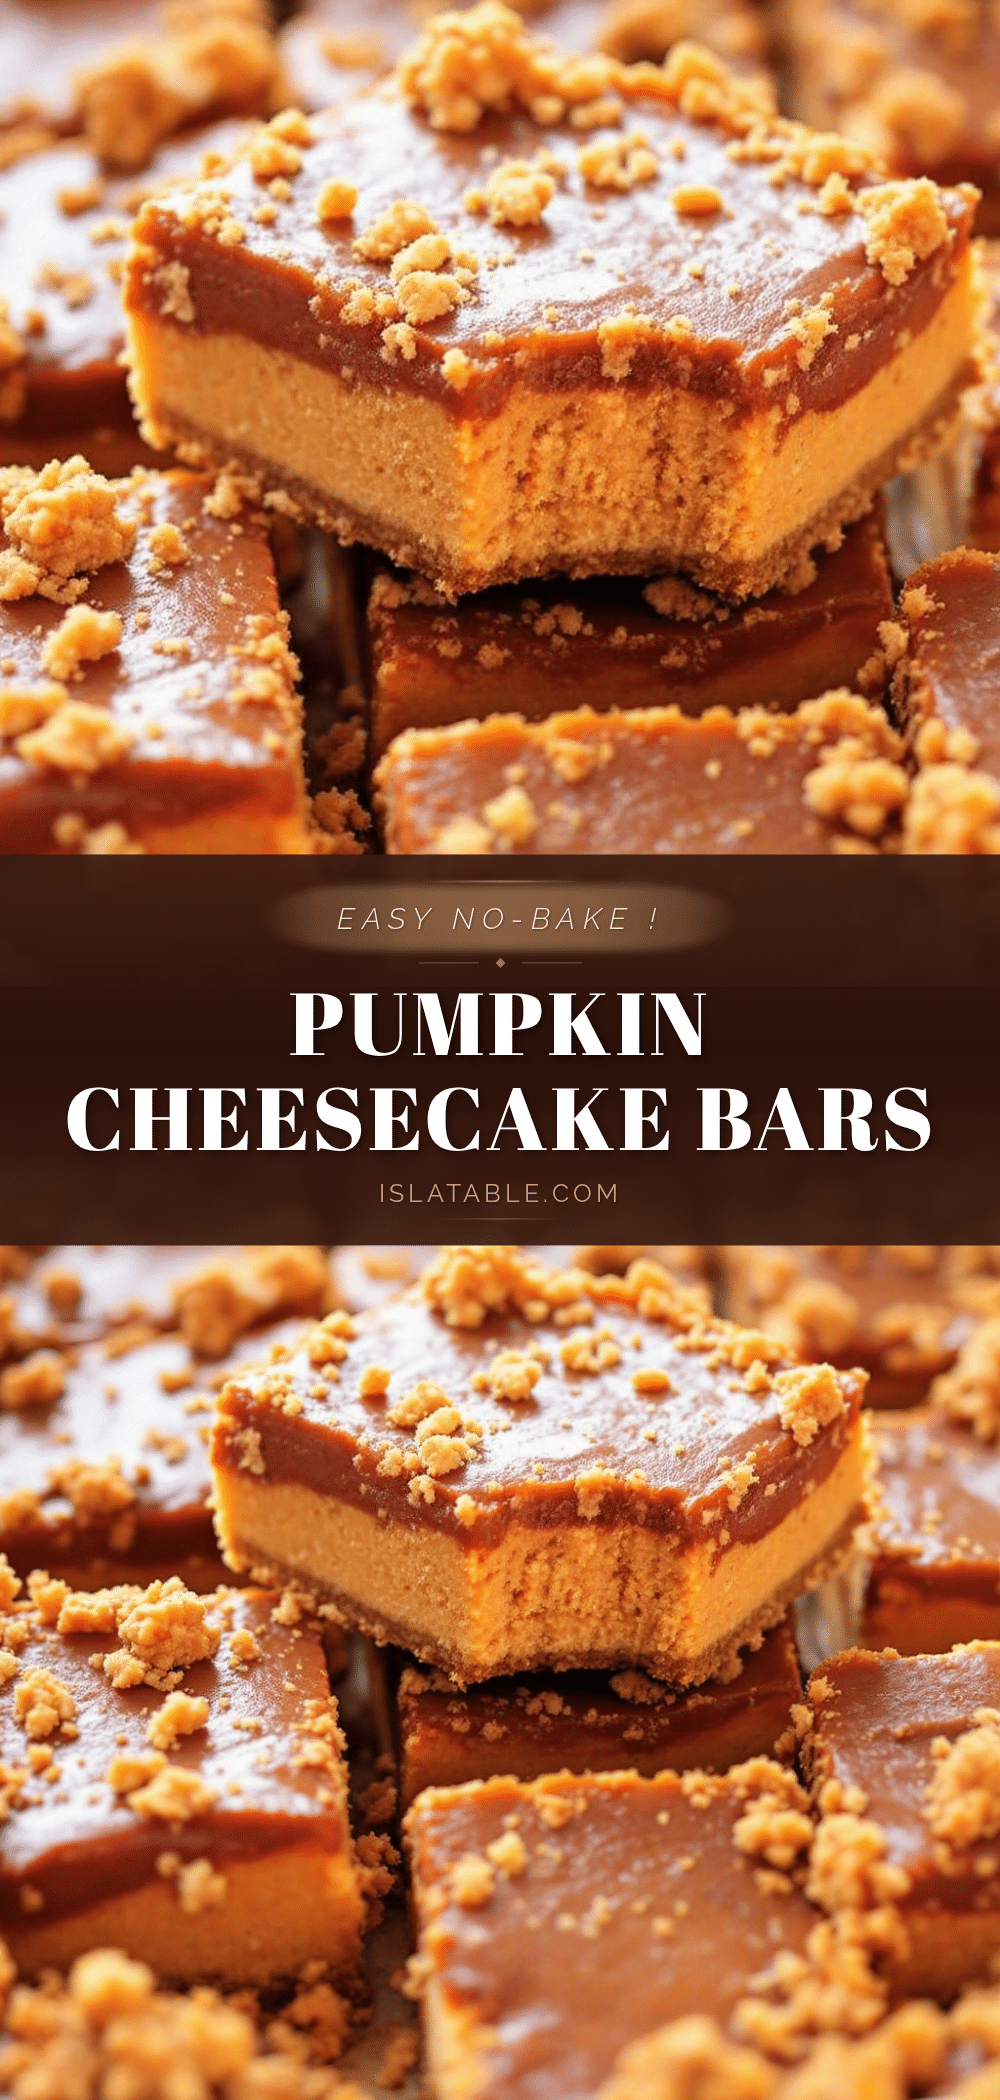
Easy No-Bake Pumpkin Cheesecake Bars with Gingersnap Crust
These no-bake pumpkin cheesecake bars feature a spicy gingersnap crust and a creamy, mousse-like pumpkin filling. They’re a foolproof, make-ahead dessert that’s perfect for fall gatherings without turning on the oven.
- Prep Time: 30 minutes
- Cook Time: 0 minutes
- Total Time: 6 hours 30 minutes (includes chilling)
- Yield: 9 servings 1x
- Category: Dessert
- Cuisine: American
Ingredients
- 2 cups (about 200g) gingersnap cookies, finely crushed
- 6 tablespoons (85g) unsalted butter, melted
- 2 tablespoons (25g) granulated sugar
- Pinch of salt
- 16 ounces (450g) cream cheese, softened
- 1 cup (200g) granulated sugar
- 1 cup (240g) pumpkin puree
- 1 teaspoon vanilla extract
- 1 ½ teaspoons pumpkin pie spice
- ½ teaspoon ground cinnamon
- ¼ teaspoon salt
- 1 cup (240ml) heavy cream, cold
- 1 packet (about 2 ¼ teaspoons) unflavored gelatin
- 2 tablespoons cold water (for blooming gelatin)
- ½ cup (120ml) heavy cream, cold (for topping)
- 1 tablespoon powdered sugar (for topping)
- ¼ teaspoon vanilla extract (for topping)
- Ground cinnamon or crushed gingersnaps for garnish
Instructions
- Make the crust: Crush gingersnap cookies into fine crumbs. Mix with sugar, salt, and melted butter until moistened. Press firmly into the bottom of a lined 9×9-inch pan. Refrigerate for at least 15 minutes.
- Bloom the gelatin: Sprinkle gelatin over cold water in a small bowl. Let sit for 5-10 minutes until firm and wobbly.
- Make the filling: Beat softened cream cheese until smooth. Add sugar, pumpkin puree, vanilla, pumpkin pie spice, cinnamon, and salt. Beat until smooth.
- Melt the gelatin: Place bloomed gelatin in a small saucepan over low heat, stirring until liquefied (about 30 seconds). Do not boil. Let cool 1 minute, then drizzle into cream cheese mixture while beating on low.
- Whip the cream: In a separate bowl, beat cold heavy cream until soft peaks form. Gently fold into pumpkin mixture in two additions until no white streaks remain.
- Assemble: Pour filling over chilled crust. Spread evenly. Tap pan to release air bubbles. Cover and refrigerate at least 6 hours, preferably overnight.
- Make the topping (optional): Just before serving, whip heavy cream with powdered sugar and vanilla until soft peaks form. Spread or pipe over bars. Garnish with cinnamon or crushed gingersnaps.
- Slice and serve: Lift bars out using parchment overhang. Slice with a sharp knife, wiping clean between cuts. Serve cold.
Notes
For best results, chill overnight. The gelatin ensures clean slices; if omitted, bars will be softer. Use full-fat cream cheese for creamiest texture. Can be made gluten-free with gluten-free gingersnaps or dairy-free with substitutions.
Nutrition
- Serving Size: 1 bar
- Calories: 400
- Sugar: 24
- Sodium: 280
- Fat: 26
- Saturated Fat: 15
- Carbohydrates: 34
- Fiber: 2
- Protein: 6
Keywords: no-bake pumpkin cheesecake bars, gingersnap crust, pumpkin dessert, fall dessert, easy cheesecake bars


