My husband looked at the loaf cooling on the counter and said, “I don’t do pumpkin bread.” Just like that. Flat. Final. He’d had one too many dry, spice-dusted bricks from coffee shops over the years, and he was done. I almost told him to forget it, but the brown butter was already bubbling in the pan, smelling like toasted nuts and caramel, and I figured I’d let the bread do the talking.
Honestly, I thought he might have a point. Pumpkin bread has a reputation problem. It can be dense, gummy, or worse—that weirdly spongy texture that tastes more like squash than dessert. But I had a hunch that brown butter could fix everything. It always does, right? That nutty, almost toffee-like depth has a way of making ordinary things feel special. And I wanted this loaf to feel special.
So I browned the butter, mashed the banana, stirred in the pumpkin, and held my breath. The kitchen smelled like fall in a way that felt personal—warm, a little sweet, with that edge of toasted butter that makes you close your eyes. When I finally sliced into it, the crumb was tender, the top was crackled, and the whole thing smelled like a hug.
He ate three slices. In a row. Without saying a word. Then he looked at me and said, “Okay, this is different.” That was the moment I knew this Brown Butter Pumpkin Banana Bread was something worth sharing. It’s not just another pumpkin bread. It’s the one that converts the skeptics.
Why You’ll Love This Recipe
This isn’t your average pumpkin bread. I’ve tested this recipe more times than I care to admit—through burnt butter, over-mixed batter, and one particularly sad loaf that refused to rise. But this version? This is the one. Here’s why it works.
- Brown Butter Magic : The star of the show. Browning the butter adds a nutty, caramelized depth that makes the pumpkin and banana taste richer. It’s like toasting the flavor before it even hits the oven.
- Perfectly Moist, Never Gummy : The combination of pumpkin puree and ripe banana creates a tender crumb without that heavy, wet texture. The trick is using the right ratio—and I’ve nailed it after a few soggy failures.
- Simple Pantry Ingredients : No weird flours or obscure extracts. You probably have everything already—flour, sugar, eggs, baking soda, pumpkin puree, and a banana that’s seen better days.
- One Bowl, No Mixer : Seriously. You whisk the wet ingredients, stir in the dry, and pour. No stand mixer, no hand mixer, no extra bowls to wash. This is the kind of recipe you can make on a Tuesday afternoon.
- Freezes Like a Dream : Bake it now, freeze it for later. The flavor actually gets better after a day or two, and it thaws beautifully. I’ve hidden slices in the freezer for emergencies.
- Converted My Pumpkin-Hating Husband : I’m not exaggerating. He went from “I don’t do pumpkin bread” to asking if there’s more. That alone makes this recipe a keeper.
This bread is the kind of thing you make when you want to impress without stress. It’s cozy enough for a quiet morning with coffee, fancy enough to bring to a brunch, and forgiving enough for a beginner baker. Honestly, it’s the best version of pumpkin bread I’ve ever made—and I’ve made a lot.
What Ingredients You Will Need
This recipe relies on simple, everyday ingredients that work together to create something genuinely special. The brown butter does the heavy lifting, but each ingredient plays a role. Here’s what you need and why it matters.
- 1/2 cup unsalted butter : This is non-negotiable. You need unsalted butter so you can control the salt level. Browning it transforms the flavor completely—don’t skip this step. I use Kerrygold for its higher fat content, which browns more evenly.
- 1 cup pumpkin puree : Make sure it’s 100% pumpkin puree, not pumpkin pie filling. I prefer Libby’s for its consistent thickness and smooth texture. If your puree looks watery, pat it dry with a paper towel before using.
- 1 large ripe banana, mashed : The riper, the better. Brown spots are your friend. A ripe banana adds natural sweetness and moisture that complements the pumpkin without overpowering it.
- 1/2 cup granulated sugar : Standard white sugar. It adds sweetness and helps create that crackly top. You can reduce it slightly if your banana is very sweet.
- 1/2 cup light brown sugar, packed : Brown sugar adds moisture and a hint of molasses that pairs beautifully with the brown butter. I’ve used dark brown sugar in a pinch, and it works too—just expect a deeper flavor.
- 2 large eggs, room temperature : Room temperature eggs emulsify better into the batter, creating a smoother, more even crumb. If you forget to set them out, place them in a bowl of warm water for 5 minutes.
- 1 teaspoon vanilla extract : Pure vanilla extract, not imitation. It rounds out the flavors and makes everything taste warmer. I like Nielsen-Massey for its floral notes.
- 1 1/2 cups all-purpose flour : Spoon and level your flour—don’t scoop directly from the bag. Scooping packs the flour and leads to dry bread. If you want a whole wheat version, swap half the flour for white whole wheat.
- 1 teaspoon baking soda : This is your leavener. Make sure it’s fresh—test it by dropping a little in vinegar. If it fizzes, you’re good.
- 1/2 teaspoon baking powder : Adds a little extra lift. I’ve forgotten it before, and the bread came out denser. It’s worth including.
- 1/2 teaspoon salt : Fine sea salt or table salt. Salt balances the sweetness and enhances the brown butter flavor.
- 1 1/2 teaspoons pumpkin pie spice : Store-bought is fine, but I make my own: 1 teaspoon cinnamon, 1/2 teaspoon ginger, 1/4 teaspoon nutmeg, 1/4 teaspoon cloves. It’s fresher and you can adjust the ratios.
- 1/2 teaspoon ground cinnamon : Extra cinnamon because I love it. Feel free to skip if you’re using pumpkin pie spice.
Optional Add-Ins : 1/2 cup chopped pecans or walnuts add crunch. 1/3 cup chocolate chips make it dessert-worthy. A sprinkle of turbinado sugar on top before baking gives a lovely crunchy crust.
Equipment Needed
You don’t need a fancy kitchen to make this bread. Here’s what I use, plus a few alternatives if you’re working with limited tools.
- 9×5-inch loaf pan : Standard size. If you use an 8×4 pan, the bread will take longer to bake and may dome more. Glass or metal both work, but metal gives a nicer crust.
- Light-colored saucepan : For browning the butter. A light-colored pan helps you see the color change. Dark pans make it harder to judge when the butter is done.
- Mixing bowls : One large bowl for wet ingredients, one medium bowl for dry. I use glass or stainless steel—plastic can retain odors.
- Whisk : For combining wet ingredients and mixing the batter. A fork works in a pinch, but a whisk is easier.
- Rubber spatula : For scraping every last bit of brown butter from the pan and folding the batter. Don’t use a metal spoon—you’ll scratch your bowl and miss half the butter.
- Parchment paper : Line the pan for easy removal. If you don’t have parchment, grease the pan thoroughly with butter and dust with flour.
- Cooling rack : Lets air circulate around the loaf so the bottom doesn’t get soggy. If you don’t have one, use the oven rack turned upside down.
- Toothpick or skewer : For testing doneness. A wooden skewer works better than a toothpick for a deeper test.
A note on budget: I’ve made this bread with a $5 loaf pan from a discount store and it turned out perfectly. Don’t let equipment hold you back. The only thing that really matters is a good pan and a watchful eye on the butter.
Preparation Method
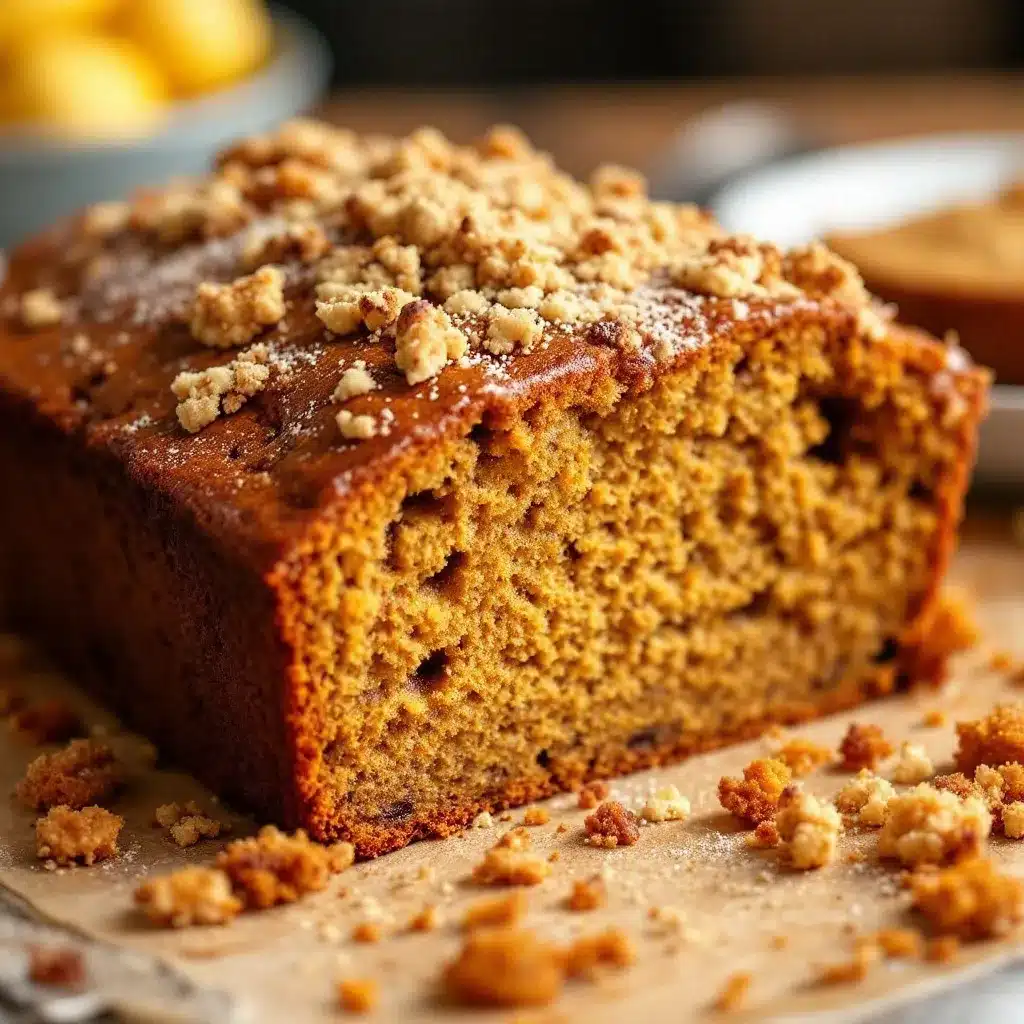
Let’s bake some bread. This method is broken down into clear steps with time estimates and visual cues so you know exactly what to look for. Take your time—rushing is the enemy of good baking.
Step 1: Brown the Butter (5-7 minutes)
Cut the butter into small cubes and place them in your light-colored saucepan over medium heat. Stir constantly with a rubber spatula or wooden spoon. The butter will melt, then foam, then start to crackle. Watch closely. After about 4-5 minutes, you’ll see golden brown specks forming at the bottom of the pan. The butter will smell nutty and toasty—like toasted hazelnuts. Once it reaches a deep amber color, remove it from the heat immediately and pour it into a heatproof bowl. Don’t leave it in the hot pan or it will continue to cook and burn. Let it cool for 10-15 minutes while you prep the other ingredients.
Step 2: Preheat and Prep (5 minutes)
Preheat your oven to 350°F (175°C). Position the rack in the center of the oven. Line your 9×5-inch loaf pan with parchment paper, leaving overhang on the two long sides. This makes lifting the bread out a breeze. If you’re not using parchment, grease the pan thoroughly with butter and dust with a light coating of flour.
Step 3: Mix the Wet Ingredients (3 minutes)
In a large mixing bowl, whisk together the cooled brown butter, granulated sugar, and brown sugar until well combined. It will look a little grainy—that’s fine. Add the pumpkin puree, mashed banana, eggs, and vanilla extract. Whisk until smooth. The mixture should be a beautiful orange-brown color and smell incredible. Make sure the brown butter isn’t hot when you add the eggs, or you’ll end up with scrambled eggs in your batter. Warm is fine, hot is not.
Step 4: Combine the Dry Ingredients (2 minutes)
In a separate medium bowl, whisk together the flour, baking soda, baking powder, salt, pumpkin pie spice, and cinnamon. Whisking aerates the flour and ensures the spices are evenly distributed. If you skip this step, you might end up with a pocket of baking soda in one slice—trust me, it’s not pleasant.
Step 5: Fold Everything Together (2 minutes)
Add the dry ingredients to the wet ingredients in two additions. Use a rubber spatula to fold gently—stirring just until you no longer see streaks of flour. Overmixing develops gluten and makes the bread tough. A few small lumps are perfectly fine. If you’re adding nuts or chocolate chips, fold them in at the end.
Step 6: Bake (50-60 minutes)
Pour the batter into the prepared loaf pan and spread it evenly. Tap the pan on the counter a few times to release any air bubbles. Bake for 50-60 minutes, or until a toothpick inserted into the center comes out clean or with a few moist crumbs. If the top is browning too quickly (around the 40-minute mark), tent the pan loosely with aluminum foil. The bread is done when the internal temperature reaches 200-205°F (93-96°C) if you’re using an instant-read thermometer.
Step 7: Cool and Enjoy (1 hour minimum)
Let the bread cool in the pan for 10-15 minutes, then lift it out using the parchment overhang and transfer to a cooling rack. Let it cool completely before slicing—at least 1 hour. I know it’s tempting to cut into it warm, but the crumb needs time to set. Warm bread will crumble and fall apart. Patience pays off here.
Cooking Tips & Techniques
I’ve made this bread more times than I can count, and I’ve learned a few things the hard way. Here are the tips that make the difference between good bread and great bread.
Don’t Walk Away from the Butter : Browning butter is a quick process, and it can go from perfect to burnt in seconds. I learned this the hard way when I tried to multitask and ended up with black specks instead of golden ones. Stay at the stove, stir constantly, and trust your nose. The moment it smells nutty and looks amber, pull it off the heat.
Room Temperature Ingredients Matter : Cold eggs and cold butter won’t emulsify properly, leading to a denser, less tender crumb. I set my eggs out 30 minutes before baking. If I forget, I place them in a bowl of warm water for 5 minutes. The banana should be at room temperature too—cold banana can make the batter seize up.
Measure Your Pumpkin Correctly : Pumpkin puree varies in water content. If your puree looks watery, spoon it onto a paper towel-lined plate and pat it dry. Too much moisture leads to a gummy, sunken loaf. I’ve had loaves that looked beautiful going into the oven and came out flat as a pancake—all because the pumpkin was too wet.
Use the Spoon-and-Level Method for Flour : Scooping flour directly from the bag packs it down, adding up to 20% more flour than the recipe calls for. Instead, spoon the flour into your measuring cup and level it off with a knife. This simple step prevents dry, crumbly bread.
Check for Doneness Early : Every oven runs differently. Start checking at the 50-minute mark. If the toothpick comes out with wet batter, give it 5 more minutes. If it comes out clean, it’s done. A little carryover cooking happens as the bread cools, so don’t overbake.
Let It Cool Completely : I cannot stress this enough. Slicing warm bread is like trying to cut through a cloud—it just falls apart. The bread continues to set as it cools, and the flavors meld together. I’ve ruined perfectly good loaves by being impatient. Let it rest.
Variations & Adaptations
This recipe is forgiving and flexible. Here are a few ways to make it your own, based on what I’ve tried and loved.
Gluten-Free Version : Swap the all-purpose flour for a 1:1 gluten-free baking flour blend. I use King Arthur’s Measure for Measure blend, and it works beautifully. Add 1/4 teaspoon xanthan gum if your blend doesn’t include it. The texture will be slightly more tender, but the flavor is spot on.
Dairy-Free Version : Use vegan butter or coconut oil in place of the unsalted butter. Coconut oil adds a subtle coconut flavor that pairs surprisingly well with pumpkin and banana. Just make sure to brown it carefully—coconut oil browns faster than butter.
Lower Sugar Option : Reduce the granulated sugar to 1/4 cup and the brown sugar to 1/4 cup. The bread will be less sweet, but the banana and pumpkin add natural sweetness. I’ve also used coconut sugar in place of brown sugar for a lower glycemic option.
Chocolate Chip Pumpkin Banana Bread : Fold in 1/2 cup of dark chocolate chips along with the dry ingredients. The bitterness of dark chocolate balances the sweetness beautifully. I’ve made this version for holiday parties and it disappears fast.
Nutty Crunch Version : Add 1/2 cup toasted pecans or walnuts to the batter, and sprinkle another 2 tablespoons on top before baking. The nuts add texture and a savory note that contrasts with the sweet, tender crumb. Toast the nuts first for maximum flavor—5 minutes in a 350°F oven does the trick.
Spice It Up : If you love warm spices, add 1/4 teaspoon ground cardamom or allspice to the dry ingredients. Cardamom adds an unexpected floral note that makes the bread feel fancy. I tried this on a whim and now it’s my go-to for holiday baking.
Serving & Storage Suggestions
This bread is versatile enough for breakfast, brunch, dessert, or a midday snack. Here’s how to serve and store it for the best experience.
Serving Temperature : Serve at room temperature or slightly warm. If you want to reheat individual slices, pop them in the toaster or microwave for 10-15 seconds. A warm slice with a pat of butter is pure comfort.
Presentation Ideas : Slice the bread into thick pieces and arrange on a wooden board. Dust with powdered sugar or drizzle with a simple glaze made from 1/2 cup powdered sugar and 2 tablespoons milk. Add a few fresh cranberries or a cinnamon stick for a festive touch.
What to Serve With It : A hot cup of coffee or chai tea is the perfect companion. For brunch, serve it alongside a dairy-free brunch casserole or a gluten-free caprese pasta salad for a balanced spread. For dessert, a scoop of vanilla ice cream or a dollop of whipped cream takes it over the top.
Refrigerator Storage : Wrap the cooled loaf tightly in plastic wrap or aluminum foil and store in the refrigerator for up to 5 days. The cold temperature actually helps the flavors meld, and the bread becomes even more moist by day two.
Freezer Storage : This bread freezes beautifully. Wrap the whole loaf or individual slices in plastic wrap, then place in a freezer-safe bag or container. Freeze for up to 3 months. To thaw, leave at room temperature for 2-3 hours or microwave individual slices for 20-30 seconds.
Flavor Development : Here’s a secret—this bread tastes better on day two. The spices mellow, the moisture evens out, and the brown butter flavor becomes more pronounced. I often bake it a day ahead and let it rest overnight before serving.
Nutritional Information & Benefits
This bread is a treat, but it also has some redeeming qualities. Here’s a rough breakdown per slice (based on 10 slices).
- Calories : Approximately 280-320 per slice
- Fat : 12-14g (mostly from butter and eggs)
- Carbohydrates : 38-42g
- Fiber : 2-3g (from pumpkin and banana)
- Sugar : 22-26g (can be reduced with sugar alternatives)
- Protein : 4-5g
Health Benefits : Pumpkin is packed with vitamin A, fiber, and antioxidants. Bananas add potassium and vitamin B6. The brown butter provides a small amount of vitamin A and healthy fats. While this isn’t a health food, it’s a more nourishing option than many store-bought baked goods.
Dietary Considerations : This recipe is vegetarian. For a vegan version, use flax eggs (2 tablespoons ground flaxseed mixed with 6 tablespoons water) and vegan butter. For a gluten-free version, use a 1:1 gluten-free flour blend. It’s not low-carb or keto-friendly due to the sugar and flour content.
Allergen Notes : Contains dairy (butter), eggs, and gluten. If you have nut allergies, skip the optional pecans or walnuts. The base recipe is nut-free.
I don’t pretend this bread is a health food, but I feel good about feeding it to my family. It’s made with real ingredients, and that counts for something.
Conclusion
This Brown Butter Pumpkin Banana Bread is the recipe I turn to when I want something that feels special but doesn’t require a trip to the store or a complicated technique. It’s the bread that converted my pumpkin-skeptic husband, the one that disappears fastest at brunches, and the one I hide slices of in the freezer for those days when I need a little comfort.
The brown butter changes everything. It adds depth and warmth that plain butter just can’t match. The banana keeps it tender, the pumpkin keeps it moist, and the spices make it taste like fall in every bite. It’s simple enough for a beginner, satisfying enough for an experienced baker, and forgiving enough to handle your mistakes.
I hope you try this recipe and make it your own. Add chocolate chips if that’s your thing. Skip the nuts. Double the cinnamon. Bake it for a holiday breakfast or a random Tuesday afternoon. Whatever you do, don’t skip the brown butter—it’s the heart of this bread.
If you make it, I’d love to hear how it turns out. Leave a comment below, share a photo, or tell me about your own variations. And if you’re looking for more cozy baking ideas, check out my gluten-free cornbread muffins or this diabetic-friendly lemon cake for more delicious options. Happy baking!
Frequently Asked Questions
Can I use salted butter instead of unsalted?
Yes, you can. Just reduce the added salt in the recipe to 1/4 teaspoon. The brown butter will still work beautifully, but you’ll want to control the overall saltiness. I’ve done it before when I ran out of unsalted butter, and it turned out fine.
Why did my bread sink in the middle?
A sunken middle usually means the batter was too wet or the oven wasn’t hot enough. Make sure your pumpkin puree isn’t watery, and check your oven temperature with an oven thermometer. Underbaking can also cause sinking—always test with a toothpick before pulling it out.
Can I make this into muffins instead of a loaf?
Absolutely. Grease a 12-cup muffin tin or line with paper liners. Fill each cup about 3/4 full and bake at 350°F for 18-22 minutes. Check for doneness with a toothpick. Muffins bake faster, so start checking at 18 minutes. This is my go-to for quick breakfasts.
How do I know when the brown butter is done?
Look for three signs: color, smell, and sound. The butter will turn a deep amber color, smell nutty and toasty, and the crackling sound will subside. Once you see golden brown specks forming at the bottom of the pan, remove it from the heat immediately. It will continue to darken slightly as it cools.
Can I use frozen banana instead of fresh?
Yes, but thaw it completely and drain off any excess liquid before mashing. Frozen bananas release more water than fresh ones, which can make the batter too wet. I’ve used frozen bananas many times, and the bread still turns out great—just make sure to pat them dry.
Pin This Recipe!
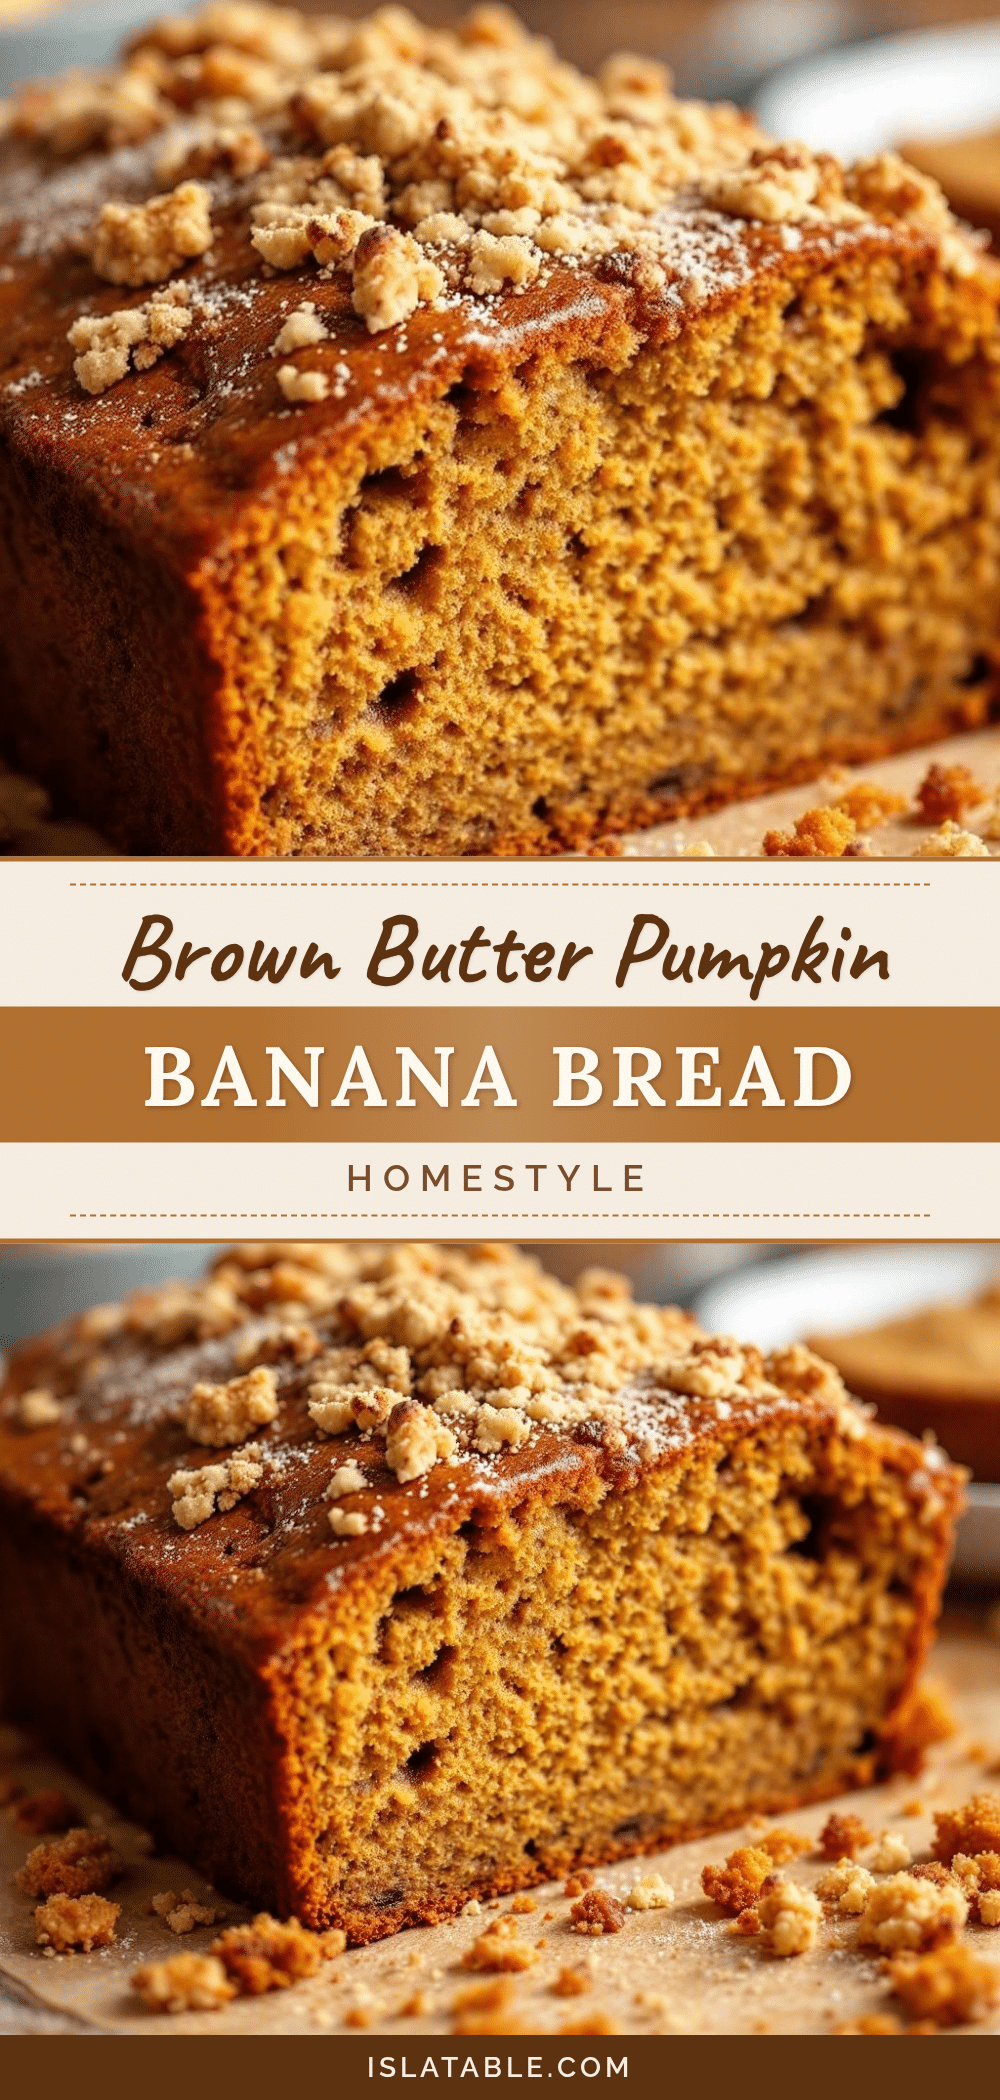
Best Brown Butter Pumpkin Banana Bread Recipe
This Brown Butter Pumpkin Banana Bread is the ultimate fall treat, combining nutty brown butter with moist pumpkin and ripe banana for a tender, flavorful loaf that converts even pumpkin skeptics.
- Prep Time: 15 minutes
- Cook Time: 55 minutes
- Total Time: 1 hour 10 minutes
- Yield: 10 servings 1x
- Category: Dessert
- Cuisine: American
Ingredients
- 1/2 cup unsalted butter
- 1 cup pumpkin puree
- 1 large ripe banana, mashed
- 1/2 cup granulated sugar
- 1/2 cup light brown sugar, packed
- 2 large eggs, room temperature
- 1 teaspoon vanilla extract
- 1 1/2 cups all-purpose flour
- 1 teaspoon baking soda
- 1/2 teaspoon baking powder
- 1/2 teaspoon salt
- 1 1/2 teaspoons pumpkin pie spice
- 1/2 teaspoon ground cinnamon
- Optional: 1/2 cup chopped pecans or walnuts
- Optional: 1/3 cup chocolate chips
- Optional: turbinado sugar for topping
Instructions
- Brown the butter: Cut butter into small cubes and place in a light-colored saucepan over medium heat. Stir constantly until butter melts, foams, and turns deep amber with golden specks (about 5-7 minutes). Remove from heat immediately and pour into a heatproof bowl. Let cool for 10-15 minutes.
- Preheat oven to 350°F (175°C). Line a 9×5-inch loaf pan with parchment paper, leaving overhang on the long sides. Alternatively, grease and flour the pan.
- Mix wet ingredients: In a large bowl, whisk together cooled brown butter, granulated sugar, and brown sugar until combined. Add pumpkin puree, mashed banana, eggs, and vanilla extract. Whisk until smooth.
- Combine dry ingredients: In a separate medium bowl, whisk together flour, baking soda, baking powder, salt, pumpkin pie spice, and cinnamon.
- Fold dry ingredients into wet ingredients in two additions, using a rubber spatula. Stir just until no streaks of flour remain. Fold in optional add-ins if using.
- Pour batter into prepared loaf pan and spread evenly. Tap pan on counter to release air bubbles.
- Bake for 50-60 minutes, or until a toothpick inserted into the center comes out clean or with a few moist crumbs. If top browns too quickly, tent with foil at 40 minutes.
- Cool in pan for 10-15 minutes, then lift out using parchment and transfer to a cooling rack. Cool completely before slicing (at least 1 hour).
Notes
Don’t walk away from the butter while browning; it can burn quickly. Use room temperature ingredients for best results. Measure flour using the spoon-and-level method. Let the bread cool completely before slicing to avoid crumbling. The bread tastes even better on day two.
Nutrition
- Serving Size: 1 slice
- Calories: 300
- Sugar: 24
- Sodium: 280
- Fat: 13
- Saturated Fat: 7
- Carbohydrates: 40
- Fiber: 2.5
- Protein: 4.5
Keywords: pumpkin bread, banana bread, brown butter, fall baking, easy recipe, moist pumpkin bread, pumpkin banana bread


