I need a cookie that actually looks gross. Not cute-spooky. Not adorable with a candy corn smile. I mean genuinely unsettling—the kind that makes people do a double-take before they bite. And I have exactly thirty minutes before my niece shows up for our annual Halloween baking session, which means no chilling dough, no complicated piping, no fondant work. Just butter, sugar, flour, and almonds. The almonds are the key. I’m staring at a bag of whole almonds in my pantry, and my brain makes the connection: almonds look exactly like fingernails if you squint. Or if you don’t squint, honestly. Slivered almonds, pressed into the tip of a butter cookie shaped like a knobby finger—that’s the whole trick. No food coloring needed for the nail, no elaborate sculpting. Just a little almond sliver and some green gel food coloring for the skin tone. (Because dead fingers aren’t tan, let’s be real.) I grab my mixing bowl and start creaming butter before I can talk myself out of it.
This is how the best witch finger cookies for Halloween get born—not from a Pinterest board full of perfect photos, but from a frantic real-time need to deliver something memorable with minimal fuss. And honestly? They turned out better than I expected. The dough is a simple shortbread base, which means it holds its shape beautifully and doesn’t spread into blobs. The almond fingernails toast slightly in the oven, giving them that yellowed, aged look. And the green tint—well, it’s just enough to make people uncomfortable without being cartoonish. My niece took one look at them, screamed with laughter, and immediately posted a photo to her friends. That’s when I knew these were keepers.
These spooky witch finger cookies aren’t just for Halloween parties. They’re for the moment you want to impress without stress. They’re for the school bake sale where you want to be remembered. They’re for the family gathering where someone inevitably says, “I can’t believe those are cookies.” And they’re for you, the person who wants to create something that feels a little bit wicked but tastes completely innocent. Let’s make some fingers.
Why You’ll Love This Recipe
I’ve tested this recipe about four times to get the texture right—too much butter and the fingers spread into stumps, too little sugar and they’re more like breadsticks than cookies. What I landed on is a shortbread-style dough that bakes up tender, slightly crumbly, and sturdy enough to hold that creepy finger shape without cracking. Here’s why this version stands out:
- Quick & Easy: From start to finish, these take about 45 minutes. No chilling, no resting, no complicated steps. Mix, shape, bake, freak people out.
- Simple Ingredients: Butter, sugar, flour, eggs, vanilla, almonds, and green food coloring. That’s it. You probably have most of these in your kitchen right now.
- Perfect for Halloween Parties: These are the star of any spread. Kids love them, adults get a kick out of them, and they’re completely nut-free if you skip the almonds (though they’re less convincing without the fingernails).
- Crowd-Pleaser: Despite the creepy appearance, these are just buttery shortbread cookies. Even picky eaters will grab one once they see someone else take a bite.
- Unbelievably Delicious: The almond fingernail adds a subtle nutty crunch that complements the sweet, buttery cookie perfectly. It’s not just a gimmick—it genuinely tastes good.
What makes these different from every other witch finger cookie recipe out there? The texture, honestly. Most versions use a sugar cookie dough that spreads too much, leaving you with fat, blob-like fingers. My shortbread base holds its shape, creating those knobby knuckles and tapered fingertips that look genuinely realistic. Plus, I add a tiny bit of almond extract to the dough itself, which reinforces the almond flavor from the fingernail and ties everything together. It’s a small detail, but it makes a big difference.
These cookies are the kind that make people close their eyes after the first bite—partly from enjoyment, partly from the cognitive dissonance of eating something that looks like a finger. It’s comfort food with a side of mischief, and honestly, that’s my favorite kind of baking.
What Ingredients You Will Need
This recipe uses simple, everyday ingredients to create something that looks complicated but isn’t. The magic is all in the shaping and the almond fingernails. Here’s what you’ll need:
For the Cookie Dough
- 1 cup (226g) unsalted butter, softened (I use Land O’Lakes for consistent results)
- 1 cup (200g) granulated sugar
- 1 large egg, room temperature
- 1 teaspoon pure vanilla extract
- 1/2 teaspoon almond extract (this is key for the flavor connection to the fingernails)
- 2 1/2 cups (312g) all-purpose flour
- 1/2 teaspoon salt
- Green gel food coloring (I prefer Americolor brand—liquid coloring won’t give you the right shade without making the dough too wet)
For the Fingernails
- About 30-35 whole almonds, skin on (the skin gives them that realistic nail-bed look)
For the Finishing Touch
- 1 tablespoon strawberry or raspberry jam (optional, for “blood” at the base of the fingernail)
Ingredient Tips & Substitutions
- Butter: Make sure it’s truly softened, not melted. If you microwave it, do it in 5-second bursts and check frequently. Melted butter will make the cookies spread.
- Almond Extract: Don’t skip this. It gives the cookies that subtle marzipan-like flavor that makes the almond fingernails feel intentional rather than random. If you don’t have it, use an extra 1/2 teaspoon of vanilla.
- Green Food Coloring: Gel coloring is non-negotiable here. Liquid food coloring will thin out your dough and you’ll need way too much to get a decent green. Start with a small amount and add more until you reach a shade that looks slightly sickly—think pale zombie green, not bright neon.
- Almonds: Keep the skins on. Blanched almonds look too clean and fake. The brown skin gives the fingernail that realistic, slightly dirty appearance.
- Jam: Completely optional, but if you want to go full horror-movie, a tiny dab of red jam at the cuticle area adds a nice gory touch. Just don’t overdo it—you want people to still want to eat them.
If you’re looking for a nut-free version, you can skip the almonds entirely and just press a small indent at the tip of each finger with a knife to simulate the nail bed. They won’t look quite as realistic, but they’ll still be creepy. For a gluten-free option, substitute a 1:1 gluten-free baking flour blend—I’ve had good results with Bob’s Red Mill. The texture will be slightly more tender, so handle the dough gently.
Equipment Needed
- Large mixing bowl or stand mixer with paddle attachment
- Measuring cups and spoons
- Baking sheets (2-3, depending on size)
- Parchment paper or silicone baking mats
- Small paring knife (for creating knuckle lines)
- Small offset spatula (helpful for transferring shaped fingers)
- Cooling rack
- Pastry brush (for applying jam, if using)
You don’t need any special cookie cutters or molds for this recipe—everything is done by hand, which is part of the fun. If you don’t have a stand mixer, a hand mixer works perfectly fine. The dough is sturdy enough to mix by hand with a wooden spoon if you’re patient. I’ve made these in a friend’s kitchen with just a fork and a bowl, and they still turned out great (though my arm was tired).
Preparation Method

- Cream the butter and sugar. In a large mixing bowl, beat the softened butter and granulated sugar together until light and fluffy, about 3-4 minutes. You want the mixture to look pale and almost doubled in volume. Scrape down the sides of the bowl halfway through.
- Add the wet ingredients. Beat in the egg, vanilla extract, and almond extract until fully combined. The mixture might look slightly separated at this point—that’s normal. Now add your green gel food coloring. Start with 1/4 teaspoon and mix well. Assess the color. You want a pale, sickly green—think the color of a bruise that’s healing, not a Grinch costume. Add more coloring a tiny bit at a time until you’re satisfied.
- Mix the dry ingredients. In a separate bowl, whisk together the all-purpose flour and salt. Gradually add this to the wet mixture, mixing on low speed until a soft dough forms. Don’t overmix—stop as soon as the flour disappears into the dough. The dough should be pliable but not sticky. If it feels too sticky, add a tablespoon more flour. If it feels too dry, add a teaspoon of milk.
- Preheat and prep. Preheat your oven to 350°F (175°C). Line your baking sheets with parchment paper or silicone mats. This is important—ungreased sheets will cause the cookies to stick and potentially break when you try to move them.
- Shape the fingers. Take about 1 tablespoon of dough (roughly the size of a walnut) and roll it into a log shape about 3 inches long. Don’t make it perfectly uniform—fingers aren’t perfectly straight. Slightly taper one end to create the fingertip, and make the other end slightly wider where it would attach to the hand. Place it on the prepared baking sheet. Repeat with the remaining dough, spacing the fingers about 2 inches apart—they don’t spread much, but they need a little room.
- Create the knuckles. Using a small paring knife, gently press 2-3 horizontal lines into each finger to simulate knuckles. Don’t cut too deep—you want indentations, not slices. Press gently at the “joint” areas to create a slight bulge on either side of the knuckle line. This adds realism. Also press a small indent at the tip where the fingernail will go.
- Add the fingernails. Take a whole almond and press it firmly into the indent at the tip of each finger, pointed end facing outward. The almond should sit flush with the dough. If it sticks up too much, press it in a little deeper. The almond will toast slightly during baking, which gives it that yellowed, aged nail look.
- Bake. Bake for 12-15 minutes, or until the cookies are set and the edges are just barely starting to turn golden. The centers should still look slightly pale. Don’t overbake—these are shortbread cookies, and they continue to firm up as they cool. The almonds should be lightly toasted. Let the cookies cool on the baking sheet for 5 minutes, then transfer to a cooling rack.
- Add the finishing touch (optional). If you’re using jam for “blood,” warm a tablespoon of strawberry or raspberry jam in the microwave for 10 seconds. Using a small pastry brush or your fingertip, dab a tiny amount at the base of each almond fingernail, where it meets the cookie. This creates the illusion of a bloody cuticle. Less is more—you want people to notice it when they look closely, not have it be the first thing they see.
Cooking Tips & Techniques
I learned most of these tips the hard way—by making mistakes. Here’s what I wish someone had told me before my first batch:
Don’t skip the almond extract. I made a test batch without it, and the cookies tasted fine, but the almond fingernails felt disconnected from the cookie itself. The extract bridges that gap and makes the whole thing taste intentional. It’s a small addition that elevates the recipe from “cute Halloween cookie” to “actually delicious cookie that happens to look like a finger.”
Keep your hands slightly cool. If your hands are warm, the butter in the dough will start to soften too much, making the fingers harder to shape. If the dough gets too sticky, pop it in the fridge for 10 minutes. I’ve had to do this more times than I care to admit.
Make the knuckles look realistic. The key is asymmetry. Real fingers don’t have perfectly evenly spaced knuckles. Make one knuckle closer to the fingertip, another closer to the base. Press a little harder on one side to create a slight bulge. Look at your own hand for reference—it sounds weird, but it helps.
Watch the almond placement. If you press the almond in too deep, it will sink into the cookie during baking and disappear. If you don’t press it in enough, it will fall off when you pick up the cookie. The sweet spot is pressing until the almond is about halfway embedded. The dough will grip it during baking and hold it in place.
Don’t overbake. I once left a batch in for 17 minutes because I got distracted, and the fingers came out hard and brittle. They looked great, but they broke when anyone tried to bite them. Shortbread should be tender and slightly crumbly, not rock-hard. Pull them out when the edges are just barely golden.
Batch size matters. This recipe makes about 30-35 fingers, depending on how generous you are with the dough. If you’re making these for a party, double the recipe. They disappear fast, and people will ask for the recipe.
Variations & Adaptations
Over the years, I’ve experimented with different versions of these cookies. Here are a few that turned out surprisingly well:
Chocolate Witch Fingers: Replace 1/4 cup of the flour with unsweetened cocoa powder. The chocolate version looks like dirt-crusted fingers, which is even more unsettling. Use a dark chocolate almond for the fingernail—it blends in better than a light almond.
Gluten-Free Version: Substitute the all-purpose flour with a 1:1 gluten-free baking blend. I’ve tested this with King Arthur Measure for Measure, and it works beautifully. The texture is slightly more delicate, so be gentler when shaping and transferring. If you enjoy this, you might also like my soft gluten-free pretzel bites for another Halloween treat.
Vegan Adaptation: Use vegan butter (I like Earth Balance) and replace the egg with a flax egg (1 tablespoon ground flaxseed mixed with 3 tablespoons water, let sit for 5 minutes). The texture will be slightly more crumbly, but the flavor is still excellent. For a festive spread, pair these with my creamy dairy-free queso dip for a fully plant-based Halloween party.
Spooky Blood Splatter: Instead of just dabbing jam at the cuticle, you can flick a little thinned jam over the baked cookies for a blood-splatter effect. Mix 2 tablespoons of jam with 1 teaspoon of water, dip a toothbrush into it, and run your thumb across the bristles to create fine droplets. It’s messy but dramatic.
Zombie Green Variation: Add a tiny drop of black gel food coloring to your green dough to create a darker, more decayed-looking finger. This works especially well if you’re going for a zombie theme rather than a witch theme.
Serving & Storage Suggestions
Serving: These cookies are best served at room temperature. Arrange them on a platter in a way that looks like a pile of severed fingers—it’s creepy and hilarious. You can also place them sticking out of a bowl of dip (like a hand reaching up from the grave). For a Halloween party, I like to serve them alongside other spooky treats like these kid-friendly breakfast ideas for a full themed spread.
Pairing Suggestions:
– A glass of cold milk (the classic choice)
– Hot apple cider for a fall-themed party
– Pumpkin spice latte for a cozy Halloween morning
– Dark hot chocolate for a more grown-up pairing
Storage:
– Room Temperature: Store in an airtight container at room temperature for up to 5 days. Layer them between sheets of parchment paper to prevent the almonds from scratching the surface of other cookies.
– Refrigerator: They’ll keep in the fridge for up to 10 days. Let them come to room temperature before serving for the best texture.
– Freezer: These freeze beautifully. Place the baked, cooled cookies in a single layer on a baking sheet and freeze for 1 hour, then transfer to a freezer-safe bag or container. They’ll keep for up to 3 months. Thaw at room temperature for about 30 minutes before serving.
Flavor Development: Like most shortbread cookies, these actually taste better the next day. The flavors meld together and the almond extract mellows out. If you can resist eating them all on day one, you’ll be rewarded on day two.
Nutritional Information & Benefits
Let’s be honest—these are Halloween cookies, not health food. But here’s what you’re working with per cookie (based on 32 servings):
| Nutrient | Amount Per Cookie |
|---|---|
| Calories | 145 |
| Total Fat | 8g |
| Saturated Fat | 5g |
| Cholesterol | 25mg |
| Sodium | 55mg |
| Total Carbohydrates | 17g |
| Dietary Fiber | 1g |
| Sugars | 8g |
| Protein | 2g |
Health Highlights:
– Almonds provide healthy monounsaturated fats, vitamin E, and magnesium. Even though it’s just one almond per cookie, every little bit counts.
– Butter contains fat-soluble vitamins A, D, E, and K, plus conjugated linoleic acid (CLA) which has some health benefits.
– Eggs provide high-quality protein and choline, which supports brain health.
Dietary Considerations:
– Contains gluten, dairy, eggs, and tree nuts (almonds)
– Not suitable for vegans (unless adapted, see variations above)
– Can be made gluten-free with a 1:1 flour blend
– Relatively low in sugar compared to frosted or decorated cookies
Personal Perspective: I don’t make these cookies for their nutritional profile. I make them because they bring joy and laughter to Halloween gatherings. But I do feel slightly better knowing that the almond fingernails provide a tiny bit of healthy fat and protein to balance out the sugar. It’s a small comfort, but I’ll take it.
Conclusion
These witch finger cookies are the perfect blend of creepy and delicious—the kind of Halloween treat that gets people talking before they even take a bite. They’re surprisingly easy to make, require no special equipment, and use ingredients you probably already have in your pantry. The best part? They taste like buttery shortbread cookies, so even the most skeptical eaters will be won over after that first crunchy bite.
I love this recipe because it proves that you don’t need elaborate decorating skills to create something memorable. A little green food coloring, some almond fingernails, and a few knuckle lines are all it takes to transform a basic cookie into a Halloween showstopper. It’s the kind of recipe that makes you feel like a kitchen wizard—even if you’re just following simple instructions.
I’d love to hear how your witch finger cookies turn out! Did you add blood splatter? Did you make them chocolate? Did anyone refuse to eat them because they looked too real? Drop a comment below and share your photos—I genuinely get excited every time someone tries this recipe and puts their own spin on it. Happy Halloween, and happy baking!
Frequently Asked Questions
Can I make these cookies ahead of time?
Absolutely. You can bake them up to 3 days in advance and store them in an airtight container at room temperature. They actually taste better on day two. You can also freeze the unbaked dough—just shape the fingers, place them on a parchment-lined baking sheet, freeze until solid, then transfer to a freezer bag. Bake directly from frozen, adding 2-3 minutes to the baking time.
Why did my cookies spread and lose their finger shape?
This usually happens when the butter is too soft or the dough is too warm. Make sure your butter is softened but not melted—it should still hold its shape when you press it. If your kitchen is warm, chill the shaped fingers on the baking sheet for 10 minutes before baking. Also, double-check your flour measurement; too little flour can cause spreading.
Can I use a different nut for the fingernails?
You can, but almonds work best because of their shape and size. Pistachios are too small, walnuts are too crumbly, and pecans are too soft. If you need a nut-free option, you can use a small piece of sliced almond or simply press an indent at the fingertip with a knife to simulate the nail bed. The cookies will look less realistic but will still be delicious.
How do I get the green color right?
Use gel food coloring, not liquid. Start with a small amount (about 1/4 teaspoon) and mix thoroughly before adding more. You want a pale, sickly green—think the color of a bruise that’s healing. If it looks too bright, add a tiny drop of black or brown gel coloring to mute it. If it looks too dark, add a drop of yellow to lighten it.
Can I make these cookies with kids?
Yes, and it’s a blast! Kids love shaping the fingers and pressing in the almond fingernails. Just be prepared for them to get a little too into the creepy factor—I’ve had kids make fingers with extra knuckles, crooked fingers, and even “broken” fingers with a crack down the middle. It’s all part of the fun, and the cookies will taste just as good no matter how they look.
Pin This Recipe!
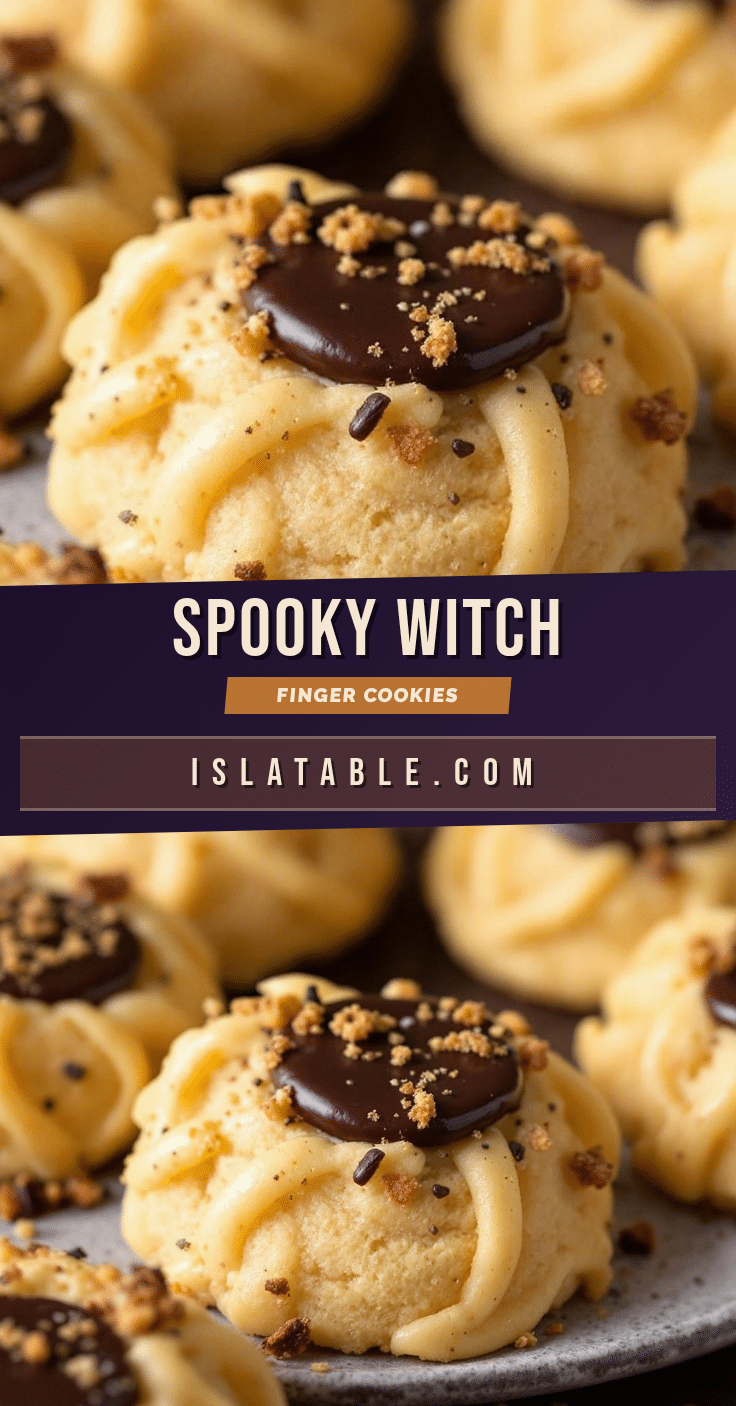
Best Witch Finger Cookies – Easy Halloween Recipe

These spooky witch finger cookies are buttery shortbread cookies shaped like creepy fingers with almond fingernails. They’re quick, easy, and perfect for Halloween parties.
- Prep Time: 30 minutes
- Cook Time: 15 minutes
- Total Time: 45 minutes
- Yield: 32 servings 1x
- Category: Dessert
- Cuisine: American
Ingredients
- 1 cup (226g) unsalted butter, softened
- 1 cup (200g) granulated sugar
- 1 large egg, room temperature
- 1 teaspoon pure vanilla extract
- 1/2 teaspoon almond extract
- 2 1/2 cups (312g) all-purpose flour
- 1/2 teaspoon salt
- Green gel food coloring
- About 30–35 whole almonds, skin on
- 1 tablespoon strawberry or raspberry jam (optional)
Instructions
- Cream the butter and sugar: In a large mixing bowl, beat the softened butter and granulated sugar together until light and fluffy, about 3-4 minutes. Scrape down the sides of the bowl halfway through.
- Add the wet ingredients: Beat in the egg, vanilla extract, and almond extract until fully combined. Add green gel food coloring starting with 1/4 teaspoon and mix well. Add more coloring a tiny bit at a time until you reach a pale, sickly green.
- Mix the dry ingredients: In a separate bowl, whisk together the all-purpose flour and salt. Gradually add to the wet mixture, mixing on low speed until a soft dough forms. Do not overmix.
- Preheat and prep: Preheat your oven to 350°F (175°C). Line baking sheets with parchment paper or silicone mats.
- Shape the fingers: Take about 1 tablespoon of dough and roll it into a log about 3 inches long. Slightly taper one end to create the fingertip and make the other end slightly wider. Place on prepared baking sheet, spacing about 2 inches apart.
- Create the knuckles: Using a small paring knife, gently press 2-3 horizontal lines into each finger to simulate knuckles. Press gently at the joint areas to create slight bulges. Also press a small indent at the tip for the fingernail.
- Add the fingernails: Take a whole almond and press it firmly into the indent at the tip of each finger, pointed end facing outward. The almond should sit flush with the dough.
- Bake: Bake for 12-15 minutes, until the cookies are set and the edges are just barely starting to turn golden. Let cool on the baking sheet for 5 minutes, then transfer to a cooling rack.
- Add the finishing touch (optional): Warm 1 tablespoon of strawberry or raspberry jam in the microwave for 10 seconds. Dab a tiny amount at the base of each almond fingernail where it meets the cookie.
Notes
Don’t skip the almond extract—it bridges the flavor between the cookie and the almond fingernail. Keep your hands slightly cool to prevent the dough from getting too sticky. For realistic knuckles, make them asymmetrical. Press the almond about halfway into the dough so it doesn’t sink or fall off. Don’t overbake; shortbread should be tender and slightly crumbly.
Nutrition
- Serving Size: 1 cookie
- Calories: 145
- Sugar: 8
- Sodium: 55
- Fat: 8
- Saturated Fat: 5
- Carbohydrates: 17
- Fiber: 1
- Protein: 2
Keywords: witch finger cookies, Halloween cookies, shortbread cookies, spooky cookies, almond cookies, easy Halloween recipe


