The way that first layer sets — firm but with just a little give when you press the back of a spoon against it — that’s the moment everything changes. It’s not the gingersnap crumbs toasting in the oven or the cream cheese softening on the counter that tells you these bars are going to work. It’s that specific resistance, the way the crust holds together without crumbling into a million sandy pieces when you cut into it later. That’s the detail I’ve learned to watch for over the years of making these, and honestly, it’s the thing I still get a little nervous about every single time.
I first made these perfect pumpkin cheesecake bars with gingersnap crust for a Friendsgiving gathering that almost didn’t happen. My friend had texted the group chat at 9 PM the night before saying she’d “accidentally” volunteered to host and now needed desserts. I had a can of pumpkin puree in the pantry, a block of cream cheese in the fridge, and a bag of gingersnaps I’d bought on a whim because they were on sale. It felt like the kind of scrappy combination that either works beautifully or ends up in the trash. (Spoiler: it worked.)
The thing about these bars is that they don’t pretend to be something they’re not. They’re not fussy or layered with complicated techniques. They’re just honest — creamy where they should be creamy, spiced where they should be spiced, and that gingersnap crust adds exactly the kind of snappy, molasses-forward base that pumpkin needs to feel complete. Every time I make them now, I think about that last-minute gathering and how sometimes the best recipes come from not having a backup plan.
Why You’ll Love This Recipe
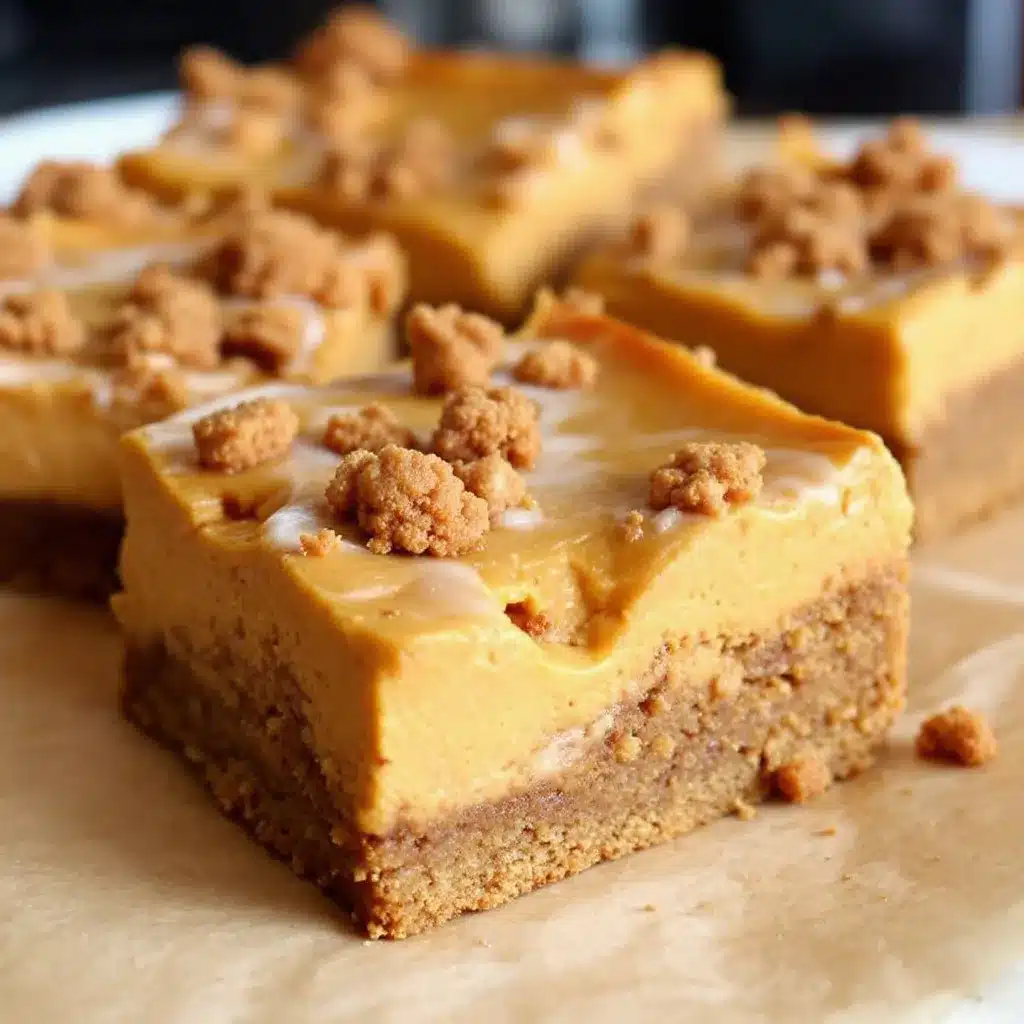
After testing this recipe more times than I care to count, I can tell you exactly why it’s become my go-to fall dessert. First off, it’s the texture combination that gets everyone. The crust has that deep, spiced crunch from the gingersnaps, and the cheesecake layer is so smooth and creamy it practically melts. Then the pumpkin layer sits right on top with this velvety richness that ties everything together. It’s like three desserts in one, but somehow it’s even better than the sum of its parts.
- Simple Ingredients : You probably already have most of these in your kitchen right now. No weird specialty items or expensive extracts that you’ll use once and forget about.
- No Water Bath Needed : Unlike traditional cheesecake, these bars don’t require a water bath. That alone saves you about twenty minutes of hassle and the anxiety of wondering if your springform pan is truly waterproof.
- Perfect for Fall Gatherings : Whether it’s Thanksgiving, a Friendsgiving, or just a cozy Sunday when you want something that smells like autumn, these bars deliver. They travel well too, which is huge if you’re bringing them somewhere.
- Crowd-Pleaser : I’ve served these to people who “don’t like pumpkin desserts” and watched them go back for seconds. The cheesecake layer balances out the pumpkin flavor in a way that feels familiar but different.
- Make-Ahead Friendly : These bars actually taste better the next day. The flavors meld together overnight, and the texture firms up perfectly. You can make them two days ahead without any issues.
What makes this version different from other pumpkin cheesecake bars is the crust. Most recipes use graham crackers or shortbread, but gingersnaps bring this warm, spicy complexity that ordinary crusts just can’t match. The molasses in the cookies plays off the pumpkin spice in a way that feels intentional, not accidental. It’s the kind of detail that makes people ask, “Wait, what’s in the crust?” and then nod appreciatively when you tell them.
These bars are the kind of dessert that makes you close your eyes after the first bite. It’s comfort food reimagined — familiar enough to feel nostalgic, but different enough to feel special. Perfect for impressing guests without the stress of a full cheesecake, or turning a simple fall evening into something memorable.
What Ingredients You Will Need
This recipe uses simple, wholesome ingredients that come together to create something truly special. Most of these are pantry staples, especially if you do any fall baking. Here’s what you’ll need and why each ingredient matters.
For the Gingersnap Crust
- 2 cups (about 8 ounces) gingersnap cookies, finely crushed — I prefer Nabisco or Anna’s brand for consistent texture. You want them crushed into fine crumbs, not chunks. A food processor works great for this, but a zip-top bag and rolling pin work too.
- 6 tablespoons (85 grams) unsalted butter, melted — Use real butter here, not margarine. The butter helps the crust hold together and adds richness that complements the ginger flavor.
- 2 tablespoons (25 grams) granulated sugar — Just a little extra sweetness to balance the spices in the cookies.
- Pinch of salt — Don’t skip this. Salt enhances all the other flavors and keeps the crust from tasting flat.
For the Cheesecake Layer
- 16 ounces (450 grams) cream cheese, softened to room temperature — This is crucial. Cold cream cheese will leave you with lumpy cheesecake. Let it sit on the counter for at least an hour before you start. I use Philadelphia brand for consistent results.
- ½ cup (100 grams) granulated sugar — Just enough sweetness without overwhelming the tanginess of the cream cheese.
- 2 large eggs, room temperature — Room temperature eggs incorporate more smoothly into the batter. If you forget to take them out early, place them in a bowl of warm water for 5 minutes.
- 1 teaspoon vanilla extract — Pure vanilla extract makes a difference here. The artificial stuff has a chemical aftertaste that stands out in a simple recipe like this.
For the Pumpkin Layer
- 1 cup (245 grams) pumpkin puree — Make sure you’re using pure pumpkin puree, not pumpkin pie filling. They’re very different, and pie filling has added sugar and spices that will throw off the balance. Libby’s is my go-to brand.
- ¼ cup (50 grams) granulated sugar — The pumpkin layer needs a little sweetness to complement the earthy flavor of the squash.
- ¼ cup (55 grams) packed light brown sugar — Brown sugar adds moisture and a subtle molasses flavor that works beautifully with the spices.
- 1 large egg, room temperature — Helps bind the pumpkin layer and gives it structure.
- 1 teaspoon pumpkin pie spice — You can use store-bought or make your own with ½ teaspoon cinnamon, ¼ teaspoon ginger, ¼ teaspoon nutmeg, and a pinch of cloves.
- ½ teaspoon ground cinnamon — Extra cinnamon because I’ve never met a pumpkin dessert that couldn’t use more of it.
- ¼ teaspoon salt — Balances the sweetness and brings out the pumpkin flavor.
If you’re looking for a dairy-free option, you can substitute the cream cheese with a good-quality dairy-free version. Just make sure it’s softened to room temperature before mixing. For a gluten-free version, use gluten-free gingersnap cookies. The rest of the ingredients are naturally gluten-free, so you’re mostly just swapping out the crust.
Equipment Needed
You don’t need a ton of fancy equipment for these bars, which is part of why I love making them. Here’s what you’ll need:
- 9×9-inch baking pan — This is the perfect size for these bars. You can use an 8×8 pan, but the bars will be slightly thicker and may need a few extra minutes of baking time. A metal pan works better than glass for even baking.
- Parchment paper — Line your pan with parchment paper, leaving some overhang on two sides. This makes lifting the bars out so much easier. Trust me on this one.
- Food processor or zip-top bag and rolling pin — For crushing the gingersnaps. A food processor gives you the most consistent texture, but a bag and rolling pin work in a pinch. (I’ve done both, and honestly, the bag method is kind of therapeutic.)
- Electric hand mixer or stand mixer — For the cheesecake and pumpkin layers. You can mix by hand if you really want to, but an electric mixer gives you a smoother, creamier texture with less effort.
- Large mixing bowls — You’ll need at least two: one for the cheesecake layer and one for the pumpkin layer.
- Spatula — For scraping down the sides of the bowl and spreading the layers evenly.
- Measuring cups and spoons — Accurate measurements matter in baking, so use proper measuring tools rather than estimating.
If you don’t have a 9×9 pan, you can use a 9-inch round cake pan or even a springform pan. Just adjust your baking time slightly and keep an eye on it. I’ve also made these in disposable aluminum pans when I needed to bring them somewhere — they work perfectly and save you from worrying about getting your pan back.
Preparation Method
Let me walk you through this step by step. I’ve made these bars dozens of times, and these are the exact steps I follow every single time. The total time is about 4 hours, but most of that is chilling time. Active prep is only about 30 minutes.
Step 1: Prepare the Crust
Preheat your oven to 350°F (175°C). Line your 9×9 baking pan with parchment paper, leaving about 2 inches of overhang on two opposite sides. This will be your “handle” for lifting the bars out later.
In a food processor, pulse the gingersnap cookies until they become fine crumbs. You should have about 2 cups of crumbs. If you’re using the bag method, place the cookies in a zip-top bag, seal it, and go to town with a rolling pin. (I won’t lie — this is oddly satisfying.)
Transfer the crumbs to a medium bowl. Add the melted butter, 2 tablespoons of sugar, and a pinch of salt. Stir with a fork until the crumbs are evenly moistened. The mixture should look like wet sand and hold together when you squeeze it in your fist.
Press the mixture firmly into the bottom of your prepared pan. Use the bottom of a measuring cup or a flat-bottomed glass to press it down evenly. This is important — a loosely packed crust will fall apart when you cut the bars. Bake for 10 minutes, then set aside to cool while you prepare the fillings.
Step 2: Make the Cheesecake Layer
In a large bowl, beat the softened cream cheese with an electric mixer on medium speed until smooth and creamy. This takes about 2 minutes. Scrape down the sides and bottom of the bowl with a spatula.
Add the ½ cup of granulated sugar and beat until combined, about 1 minute. Add the eggs one at a time, beating on low speed after each addition until just incorporated. Overmixing at this stage can incorporate too much air, which leads to cracks in your cheesecake layer. Stir in the vanilla extract.
Pour the cheesecake mixture over the cooled crust and spread it evenly with a spatula. Set aside while you make the pumpkin layer.
Step 3: Make the Pumpkin Layer
In a separate bowl, whisk together the pumpkin puree, ¼ cup granulated sugar, and the brown sugar until smooth. Add the egg and whisk until combined. Then add the pumpkin pie spice, cinnamon, and salt. Whisk until everything is evenly incorporated.
The mixture should be smooth and slightly thick, like a thin pudding. If it looks separated or watery, your pumpkin puree might have too much moisture. Don’t worry — it’ll still work, but the texture might be slightly softer.
Step 4: Layer and Swirl
Carefully spoon the pumpkin mixture over the cheesecake layer. Use a spatula to spread it evenly, being gentle so you don’t disturb the cheesecake layer underneath.
Here’s where the magic happens: take a butter knife or a skewer and gently swirl it through the two layers. Don’t overdo it — just 5 or 6 figure-eight motions will create a beautiful marbled effect. If you swirl too much, the layers will blend together completely, and you’ll lose that distinct separation.
Step 5: Bake
Bake at 350°F (175°C) for 35-40 minutes. The edges should be set and slightly puffed, but the center should still have a slight jiggle when you gently shake the pan. This jiggle is important — if the center is completely firm, the cheesecake will be overbaked and might crack as it cools.
Let the bars cool at room temperature for about 1 hour. Then transfer to the refrigerator and chill for at least 3 hours, preferably overnight. This chilling time is non-negotiable. The bars need to set completely before you cut them, or they’ll be a mess.
Step 6: Cut and Serve
Once the bars are fully chilled, use the parchment paper overhang to lift them out of the pan. Place them on a cutting board and use a sharp knife to cut into squares. Wipe the knife clean between cuts for the cleanest edges. I like to cut them into 9 large bars or 16 smaller ones, depending on the occasion.
Cooking Tips & Techniques
I’ve made every mistake you can imagine with these bars, so let me save you the trouble. Here are the things I’ve learned the hard way.
Don’t overmix the cheesecake batter. This was my biggest mistake early on. I thought more mixing meant smoother texture, but it actually incorporates too much air. That air expands during baking and then collapses, leaving you with cracks. Mix just until everything is combined, then stop.
Room temperature ingredients matter more than you think. Cold cream cheese creates lumps that won’t smooth out no matter how long you beat them. Cold eggs can cause the batter to separate. Trust me, I’ve tried to rush this step, and it never ends well. Give yourself an hour for the cream cheese and eggs to come to room temperature.
The jiggle test is your friend. When you take the bars out of the oven, the center should wobble slightly when you shake the pan. If it’s completely firm, they’re overbaked. If it’s liquidy, they need more time. That gentle jiggle in the center is exactly what you’re looking for.
Let them cool gradually. I used to put hot bars directly in the fridge, and they always cracked. Now I let them cool on the counter for a full hour first. The gradual temperature change prevents the sudden contraction that causes cracks.
Use a sharp knife for clean cuts. A dull knife will drag through the bars and mess up the layers. Run your knife under hot water, wipe it dry, then make your cut. Repeat for each cut. It takes an extra minute, but the results are worth it.
Variations & Adaptations
One of the best things about this recipe is how adaptable it is. Here are some variations I’ve tried and loved.
Gluten-Free Version: Swap the regular gingersnaps for gluten-free ones. Most other ingredients are naturally gluten-free, so this is an easy adaptation. I’ve tested this with Schär brand gluten-free gingersnaps, and they work perfectly.
Dairy-Free Version: Use dairy-free cream cheese and a plant-based butter substitute. Miyoko’s and Violife both make excellent dairy-free cream cheeses that behave similarly to the real thing. Just make sure they’re softened before mixing.
Maple Pumpkin Version: Replace the granulated sugar in the pumpkin layer with maple syrup. Reduce the other liquid slightly to compensate. This gives the bars a deeper, more complex sweetness that’s absolutely gorgeous in the fall.
Extra Spiced Version: Add ¼ teaspoon of cardamom and a pinch of black pepper to the pumpkin layer. The cardamom adds an aromatic warmth, and the black pepper enhances the other spices without making it spicy. It’s subtle but noticeable.
Nutty Crust Version: Replace half the gingersnap crumbs with finely chopped pecans or walnuts. Toast the nuts first for extra flavor. This adds a nice crunch and a buttery richness that pairs beautifully with the pumpkin.
Serving & Storage Suggestions
These bars are best served cold, straight from the fridge. The texture is firm and creamy, and the flavors are at their peak. If you prefer a softer texture, let them sit at room temperature for about 10 minutes before serving.
For presentation, I like to top each bar with a small dollop of whipped cream and a light dusting of cinnamon. A few candied pecans on top add a nice crunch and make them look extra special for guests. If you’re serving them at a holiday gathering, arrange them on a platter with fresh rosemary sprigs and cranberries for a festive touch.
These bars pair beautifully with a cup of hot coffee or a spiced chai latte. For a dessert spread, they go well with gluten-free cornbread muffins or a simple apple crisp. The combination of warm, spiced flavors is pure autumn comfort.
Storage: Store the bars in an airtight container in the refrigerator for up to 5 days. They actually taste better on day 2 or 3 as the flavors continue to meld. I like to place a sheet of parchment paper between layers to prevent sticking.
Freezing: These bars freeze beautifully. Wrap individual bars tightly in plastic wrap, then place them in a freezer-safe bag or container. They’ll keep for up to 3 months. To thaw, transfer them to the refrigerator overnight. Don’t thaw at room temperature — they’ll get too soft and might become watery.
Reheating: I don’t recommend reheating these bars. They’re meant to be served cold. If you absolutely want a warm dessert, microwave a single bar for about 10 seconds, but be aware that the texture will be softer and less defined.
Nutritional Information & Benefits
Here’s the nutritional breakdown for one bar (based on 9 servings):
| Nutrient | Amount per Serving |
|---|---|
| Calories | 385 |
| Total Fat | 24g |
| Saturated Fat | 14g |
| Cholesterol | 110mg |
| Sodium | 320mg |
| Total Carbohydrates | 38g |
| Dietary Fiber | 2g |
| Sugars | 26g |
| Protein | 6g |
Pumpkin is packed with vitamin A, which supports eye health and immune function. It’s also a good source of fiber and antioxidants. The cream cheese provides calcium and protein, while the eggs add B vitamins and healthy fats. Of course, this is still a dessert, so enjoy it in moderation. But it’s nice to know there’s some nutritional value hidden in that creamy, spiced goodness.
For those watching their sugar intake, you can reduce the sugar by about 25% without significantly affecting the texture. The bars will be slightly less sweet, but the pumpkin and spice flavors will shine through more clearly.
Conclusion
These perfect pumpkin cheesecake bars with gingersnap crust have become my signature fall dessert, and I think they’ll become yours too. They’re the kind of recipe that looks impressive but is secretly simple — the kind you can whip up on a Tuesday night and still feel like you’ve accomplished something special.
The combination of that crunchy, spiced crust with the silky cheesecake and the velvety pumpkin layer is just unbeatable. Every time I make them, I’m reminded of that first batch I threw together for a last-minute gathering. Sometimes the best recipes come from not overthinking things.
I’d love to hear how these turn out for you. Let me know in the comments if you tried any variations or if you discovered a new favorite way to serve them. And if you’re looking for more easy, crowd-pleasing desserts, check out my healthy diabetic-friendly lemon cake or these soft gluten-free pretzel bites for another treat. Happy baking, friends!
Frequently Asked Questions
Can I use canned pumpkin pie filling instead of pumpkin puree?
No, I wouldn’t recommend it. Pumpkin pie filling already has sugar and spices added, which will throw off the balance of the recipe. Stick with pure pumpkin puree for the best results. The texture and flavor will be much more predictable.
Why did my cheesecake layer crack?
Cracks usually happen from overbaking or overmixing. Make sure you’re not mixing the cheesecake batter longer than necessary, and take the bars out of the oven while the center still has a slight jiggle. Cooling them gradually at room temperature before refrigerating also helps prevent cracks.
Can I make these bars gluten-free?
Absolutely! Just use gluten-free gingersnap cookies for the crust. Most other ingredients in this recipe are naturally gluten-free, so that’s really the only swap you need to make. I’ve tested this with several brands, and they all work well.
How far in advance can I make these bars?
You can make them up to 3 days ahead and store them in the refrigerator. They actually taste better after a day or two because the flavors have time to meld together. You can also freeze them for up to 3 months if you need to prepare even further in advance.
Can I use a different type of cookie for the crust?
You can, but the flavor will be different. Graham crackers or shortbread cookies work in a pinch, but you’ll lose that spicy, molasses-forward flavor that makes these bars so special. If you do substitute, consider adding a teaspoon of ground ginger and a pinch of cinnamon to the crust mixture to compensate.
Pin This Recipe!
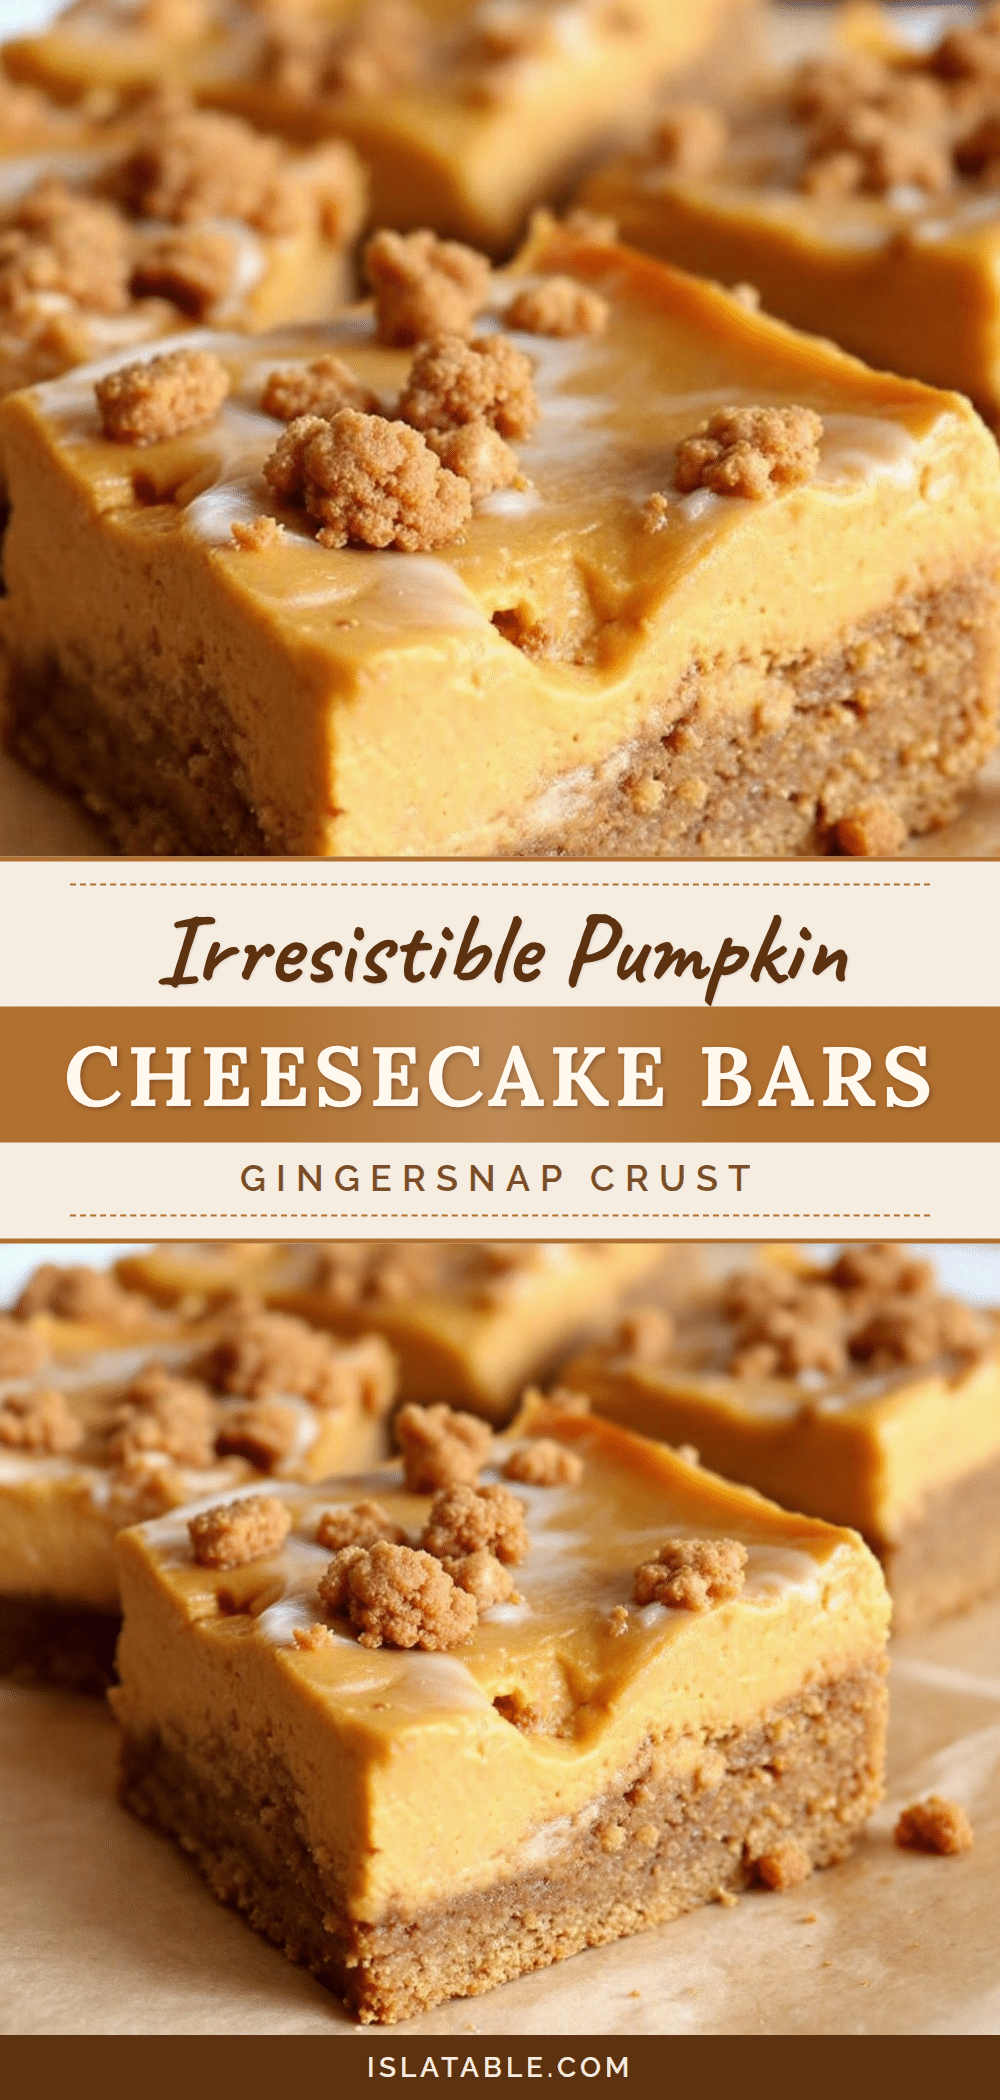
Perfect Pumpkin Cheesecake Bars with Gingersnap Crust
These pumpkin cheesecake bars feature a crunchy gingersnap crust, a creamy cheesecake layer, and a velvety pumpkin layer. They’re easy to make, require no water bath, and are perfect for fall gatherings.
- Prep Time: 30 minutes
- Cook Time: 40 minutes
- Total Time: 4 hours 10 minutes (includes chilling)
- Yield: 9 servings 1x
- Category: Dessert
- Cuisine: American
Ingredients
- 2 cups (about 8 ounces) gingersnap cookies, finely crushed
- 6 tablespoons (85 grams) unsalted butter, melted
- 2 tablespoons (25 grams) granulated sugar
- Pinch of salt
- 16 ounces (450 grams) cream cheese, softened to room temperature
- ½ cup (100 grams) granulated sugar
- 2 large eggs, room temperature
- 1 teaspoon vanilla extract
- 1 cup (245 grams) pumpkin puree
- ¼ cup (50 grams) granulated sugar
- ¼ cup (55 grams) packed light brown sugar
- 1 large egg, room temperature
- 1 teaspoon pumpkin pie spice
- ½ teaspoon ground cinnamon
- ¼ teaspoon salt
Instructions
- Preheat oven to 350°F (175°C). Line a 9×9-inch baking pan with parchment paper, leaving overhang on two sides.
- In a food processor, pulse gingersnap cookies into fine crumbs. Transfer to a bowl and mix with melted butter, 2 tablespoons sugar, and a pinch of salt until moistened. Press firmly into the bottom of the prepared pan. Bake for 10 minutes, then set aside to cool.
- In a large bowl, beat softened cream cheese with an electric mixer on medium speed until smooth. Add ½ cup granulated sugar and beat until combined. Add eggs one at a time, beating on low after each. Stir in vanilla extract. Pour over cooled crust and spread evenly.
- In a separate bowl, whisk together pumpkin puree, ¼ cup granulated sugar, and brown sugar until smooth. Add egg and whisk. Add pumpkin pie spice, cinnamon, and salt; whisk until combined.
- Spoon pumpkin mixture over cheesecake layer and spread gently. Use a butter knife or skewer to swirl the layers with 5-6 figure-eight motions.
- Bake for 35-40 minutes, until edges are set and center has a slight jiggle. Cool at room temperature for 1 hour, then refrigerate for at least 3 hours or overnight.
- Use parchment overhang to lift bars out of pan. Cut into squares with a sharp knife, wiping clean between cuts.
Notes
Room temperature ingredients are crucial for a smooth texture. Don’t overmix the cheesecake batter to avoid cracks. The jiggle test ensures proper doneness. Chill thoroughly before cutting for clean slices. Bars can be made up to 3 days ahead and taste even better the next day.
Nutrition
- Serving Size: 1 bar
- Calories: 385
- Sugar: 26
- Sodium: 320
- Fat: 24
- Saturated Fat: 14
- Carbohydrates: 38
- Fiber: 2
- Protein: 6
Keywords: pumpkin cheesecake bars, gingersnap crust, fall dessert, Thanksgiving dessert, no water bath cheesecake


