I ruined pumpkin roll four Thanksgivings in a row before I finally figured out what I was doing wrong. Not a little wrong, either. I am talking about cracks so deep you could see the filling through them, rolls that fell apart the second I tried to move them, and one particularly sad attempt that looked less like a spiral and more like a geological disaster. The worst part? I kept making the same mistakes because I was too stubborn to actually read why my cake was breaking. It took a burnt wrist, a lot of cream cheese on my kitchen floor, and one honest conversation with a pastry chef friend to realize the problem was never the recipe. It was me. Or more specifically, it was my impatience with the cooling process and my complete disregard for how delicate a fully baked sponge actually is.
Here is the thing about a truly best pumpkin roll with cream cheese filling—it should look effortless. That tight spiral, the way the cream cheese filling peeks out from each end, the soft cake that bends without breaking. It looks like magic, but it is really just timing and a few non-negotiable tricks. I learned them the hard way so you do not have to.
This version is the one I finally landed on after all those failures. It is the recipe I now bring to every fall gathering, the one people ask for by name, and the one that made my mother-in-law finally stop asking if I needed help in the kitchen. That felt good, not gonna lie.
Why You Will Love This Recipe
Let me tell you why this particular pumpkin roll is different from the dozens of other versions floating around the internet. I tested this thing seven times before I published it. Seven. My neighbors started hiding when they saw me coming with another foil-wrapped log. But every single test taught me something, and the result is a recipe that actually works for home cooks without a pastry degree.
- Foolproof Sponge : This cake is forgiving. It does not deflate the second you look away, and it rolls without cracking when you follow the timing. I promise you this.
- Perfect Cream Cheese Filling : Not too sweet, not too runny, and it stays put when you slice. No oozing disaster at the dinner table.
- Make-Ahead Friendly : This roll actually tastes better after a night in the fridge. The flavors meld, the texture sets, and slicing becomes effortless.
- No Special Equipment : You do not need a stand mixer or a fancy jelly roll pan. A hand mixer and a rimmed baking sheet work perfectly.
- Crowd-Pleasing Flavor : The pumpkin is present but not overwhelming, the spices are warm without being aggressive, and that cream cheese filling is pure comfort.
What makes this the best pumpkin roll with cream cheese filling is the texture. The cake stays tender even after refrigeration, the filling stays creamy without getting greasy, and the whole thing slices cleanly into those beautiful spirals that make people think you spent hours on it. You did not. You spent about 45 minutes of active work, and the oven did the rest.
I have made this for Thanksgiving, Christmas brunch, random Tuesday nights when I needed a pumpkin fix, and even a baby shower where someone asked if I catered. I do not cater. I just know how to make this one thing really, really well.
What Ingredients You Will Need
This recipe uses mostly pantry staples, but there are a few specific choices that make a real difference. I have learned through trial and error which ingredients matter and which ones you can swap without stress. Here is what you need and why each one matters.
For the Pumpkin Cake
- 3/4 cup all-purpose flour (90g) — Standard all-purpose flour works best here. Do not use bread flour, the extra protein makes the cake tough. If you need a gluten-free option, a good 1:1 gluten-free flour blend works, but sift it first.
- 1 teaspoon baking powder — Make sure it is fresh. Old baking powder is the number one reason pumpkin rolls deflate. If you are not sure, test it by dropping a pinch into hot water. If it fizzes, it is fine.
- 1/2 teaspoon baking soda — This reacts with the brown sugar and pumpkin to give the cake lift. Do not skip it.
- 1/2 teaspoon salt — Fine sea salt or table salt. Salt balances the sweetness and enhances the pumpkin flavor.
- 2 teaspoons pumpkin pie spice — I use store-bought for convenience, but you can make your own with 1 teaspoon cinnamon, 1/2 teaspoon ginger, 1/4 teaspoon nutmeg, 1/4 teaspoon allspice, and a pinch of cloves.
- 1 teaspoon ground cinnamon — Yes, even though the pumpkin pie spice already has cinnamon. Extra cinnamon makes the flavor pop.
- 3 large eggs, room temperature — Room temperature eggs incorporate more air into the batter, which gives you a lighter sponge. If you forgot to take them out, place them in a bowl of warm water for 5 minutes.
- 1 cup granulated sugar (200g) — White sugar keeps the cake light. Brown sugar would make it too dense and sticky for rolling.
- 2/3 cup pumpkin puree (160g) — Use pure pumpkin puree, not pumpkin pie filling. I prefer Libby’s brand because it has a consistent texture and lower water content. If your puree looks watery, blot it with paper towels before using.
- 1 teaspoon vanilla extract — Pure vanilla extract is worth it here. The flavor stands out against the pumpkin.
- Powdered sugar for dusting (about 1/4 cup) — This is not optional. The powdered sugar prevents the cake from sticking to the towel when you roll it.
For the Cream Cheese Filling
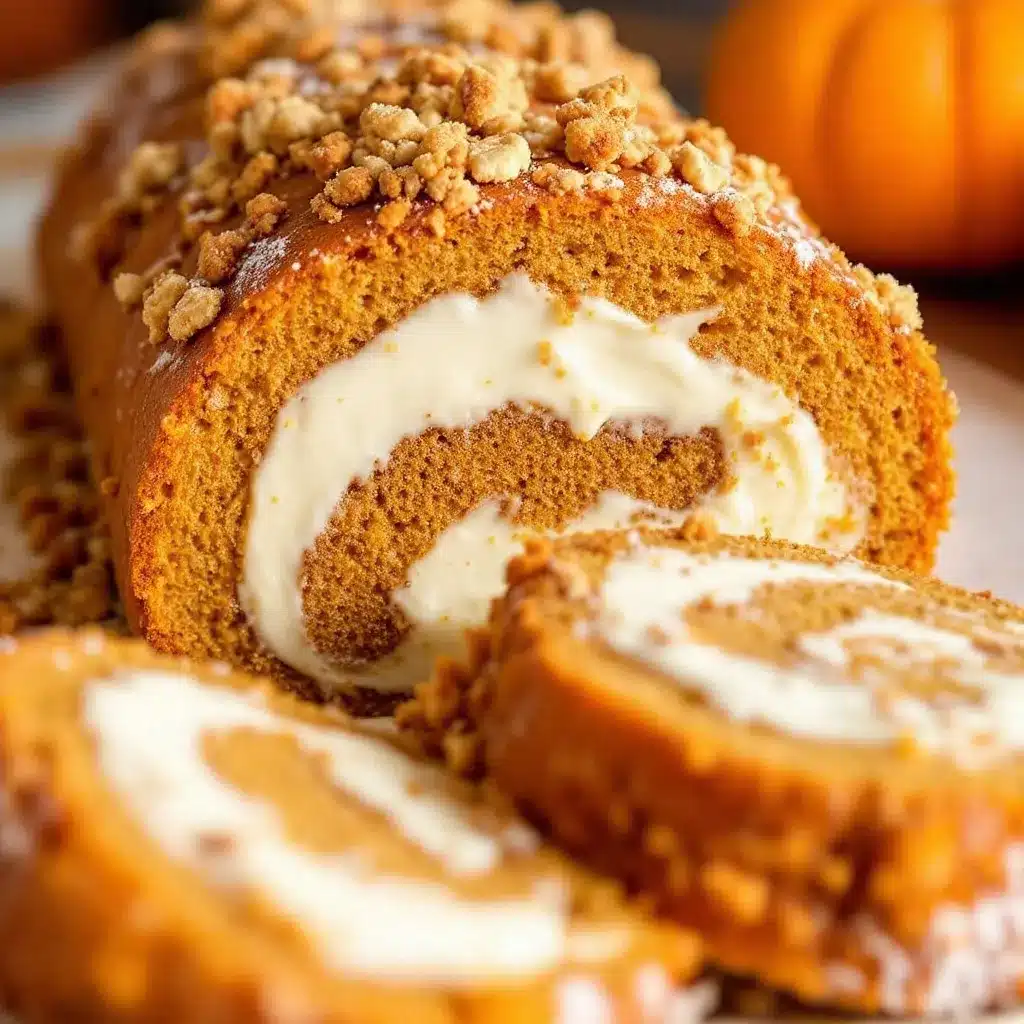
- 8 ounces cream cheese, softened (226g) — Full-fat block cream cheese is non-negotiable. Do not use the spreadable kind in a tub, it has too much water and will make your filling runny. Philadelphia is my go-to.
- 1/4 cup unsalted butter, softened (57g) — European-style butter like Kerrygold adds richness, but any unsalted butter works. Salted butter will make the filling taste off, so stick with unsalted.
- 1 cup powdered sugar (120g) — Sift it if it is lumpy. Nobody wants crunchy filling from clumpy sugar.
- 1 teaspoon vanilla extract — Same rule applies. Use the good stuff.
- Pinch of salt — Just a tiny pinch. It cuts the sweetness and makes the cream cheese flavor pop.
Ingredient Tips I Learned the Hard Way
The pumpkin puree thing is a big deal. I used a generic brand once that was way too watery, and my cake turned into a soggy mess that would not bake through. Blotting the puree with a paper towel before mixing removes excess moisture and prevents that sad outcome. Also, make sure your cream cheese is actually softened, not just out of the fridge for five minutes. Cold cream cheese creates lumpy filling that will never smooth out no matter how long you beat it.
Equipment Needed
You do not need much for this recipe, which is one of the reasons I love it. Here is what you will need and a few alternatives if you are working with a limited kitchen.
- 15×10-inch jelly roll pan — This is the standard size for a pumpkin roll. If you do not have one, a 13×9-inch pan works, but the cake will be thicker and harder to roll. You can also use a half-sheet pan lined with parchment, just spread the batter to the right dimensions.
- Parchment paper — Do not skip this. The cake will stick to the pan without it. I also recommend greasing the parchment lightly with cooking spray for extra insurance.
- Clean kitchen towel — A thin, lint-free towel works best. I use a flour sack towel. Do not use a terry cloth towel, the texture will imprint on the cake. If you are worried about lint, use a thin cotton napkin instead.
- Hand mixer or stand mixer — A hand mixer works perfectly. You do not need a stand mixer for this recipe. I actually prefer a hand mixer because it is easier to control when folding in the flour.
- Rubber spatula — For spreading the batter evenly and folding in dry ingredients.
- Wire cooling rack — Essential for cooling the cake properly. If you cool it on the counter, the bottom will steam and get soggy.
- Sharp knife or serrated knife — For clean slices. A dull knife will squish the roll.
I have made this recipe with a cheap hand mixer that cost fifteen dollars and a baking sheet that was slightly warped. It still worked. Do not let equipment hold you back. The most important tool is your patience during the cooling process, which I will talk about in the method section.
Preparation Method
Okay, here is where the magic happens. Follow these steps carefully, and you will get that beautiful spiral every time. I have broken this down into clear stages with time estimates and sensory cues so you know exactly what to look for.
Step 1: Preheat and Prepare (5 minutes)
Preheat your oven to 350°F (175°C). Line your 15×10-inch jelly roll pan with parchment paper, leaving a little overhang on the long sides for easy lifting. Lightly grease the parchment with cooking spray. This extra step prevents sticking and makes removing the cake effortless.
Step 2: Mix the Dry Ingredients (3 minutes)
In a medium bowl, whisk together the flour, baking powder, baking soda, salt, pumpkin pie spice, and cinnamon. Whisking aerates the flour and distributes the leavening agents evenly. Set this aside.
Step 3: Beat the Eggs and Sugar (5 minutes)
In a large bowl, beat the eggs and granulated sugar together with your hand mixer on medium-high speed for about 3 to 4 minutes. You are looking for a thick, pale mixture that falls in ribbons when you lift the beaters. This step is crucial. The eggs and sugar need to be thick enough to support the pumpkin and flour without deflating. If you stop too early, your cake will be flat.
Step 4: Add Pumpkin and Vanilla (2 minutes)
Reduce the mixer speed to low and add the pumpkin puree and vanilla extract. Mix just until combined. Do not overmix here. You want the pumpkin incorporated, but you do not want to deflate all the air you just beat into the eggs. The batter will look slightly thinner now. That is normal.
Step 5: Fold in the Dry Ingredients (3 minutes)
Add the dry ingredients to the wet mixture in two additions, folding gently with a rubber spatula. Use a cut-and-fold motion, scraping the bottom of the bowl and turning the batter over itself. Stop as soon as you no longer see streaks of flour. Overmixing at this stage develops gluten and makes the cake tough. Lumps are okay. Actually, a few small lumps are better than a perfectly smooth batter that has been overmixed.
Step 6: Bake the Cake (12 to 15 minutes)
Pour the batter into the prepared pan and spread it evenly with your spatula. It will be a thin layer. That is correct. Bake for 12 to 15 minutes, or until the cake springs back when you gently touch the center. The edges should pull away from the parchment slightly. Do not overbake. An overbaked cake will crack when you roll it. The top should be golden brown and the cake should feel firm but still springy.
Step 7: The First Roll (5 minutes)
While the cake is baking, lay your clean kitchen towel flat on the counter and dust it generously with powdered sugar. As soon as the cake comes out of the oven, run a knife around the edges to loosen it. Carefully invert the cake onto the sugared towel. Peel off the parchment paper slowly. If any cake sticks, just press it back into place. Starting from a short end, roll the cake and towel together into a tight log. Let it cool completely on a wire rack, seam side down. This takes about 45 minutes to 1 hour. Do not rush this. I have tried cooling it in the fridge, cooling it in front of a fan, and cooling it impatiently while holding it. None of those work. Let it sit.
Step 8: Make the Filling (5 minutes)
While the cake cools, make the filling. In a medium bowl, beat the softened cream cheese and butter together until smooth and creamy, about 2 minutes. Add the powdered sugar, vanilla extract, and pinch of salt. Beat on low speed until combined, then increase to medium speed and beat for 1 more minute until fluffy. Do not overbeat or the filling will become too thin. Cover and refrigerate until the cake is completely cool.
Step 9: Assemble the Roll (10 minutes)
Once the cake is completely cool, carefully unroll it. It will want to curl back up a little. That is fine. Spread the cream cheese filling evenly over the cake, leaving a 1/2-inch border around the edges. Using the towel to help you, roll the cake back up tightly but gently. Do not squeeze. Wrap the finished roll tightly in plastic wrap and refrigerate for at least 1 hour before serving. Overnight is even better.
Step 10: Slice and Serve (5 minutes)
When you are ready to serve, unwrap the roll and trim the ends for a clean look. Use a sharp serrated knife to slice into 1-inch rounds. Wipe the knife clean between slices for the neatest cuts. Dust with powdered sugar right before serving if you want that bakery-style finish.
Cooking Tips and Techniques
I have made every mistake possible with this recipe, so let me save you the trouble. Here are the most important things I learned.
The cooling process is everything. I cannot stress this enough. If you try to fill the cake while it is still warm, the cream cheese filling will melt and turn into a greasy mess. If you try to rush the cooling by putting it in the fridge, the cake will sweat and become sticky. Room temperature cooling on a wire rack for a full hour is the way. Trust the process.
Roll the cake while it is warm. This is the trick that changed everything for me. The cake needs to be warm when you do the first roll with the towel. If you let it cool flat, it will crack the second you try to bend it. The heat makes the cake pliable. Once it cools in that rolled shape, it remembers how to bend.
Do not skip the powdered sugar on the towel. I tried once because I thought it was wasteful. The cake stuck to the towel and ripped apart. The powdered sugar creates a non-stick barrier that also adds a tiny bit of sweetness to the outside of the cake. It is not optional.
Use room temperature dairy. Cold cream cheese and cold butter will not blend smoothly. You will end up with lumpy filling that looks unappealing and feels grainy. Set them out at least 30 minutes before you start. If you forgot, microwave the cream cheese in 10-second bursts until soft but not melted.
Sift your powdered sugar. I know it seems fussy, but lumpy powdered sugar creates lumpy filling. A quick sift takes thirty seconds and makes a noticeable difference in the texture.
Slice with a serrated knife. A straight blade squishes the roll and smears the filling. A serrated knife cuts cleanly through the cake and filling without compressing it. Use a gentle sawing motion and wipe the blade between cuts.
Variations and Adaptations
This recipe is flexible, and I have tried several variations over the years. Here are my favorites.
Gluten-Free Version : Substitute the all-purpose flour with a good 1:1 gluten-free flour blend that contains xanthan gum. I have used Bob’s Red Mill 1-to-1 Baking Flour successfully. The texture is slightly more delicate, so be extra gentle when rolling. Add an extra tablespoon of flour to the batter if it looks too thin.
Dairy-Free Version : Use dairy-free cream cheese and vegan butter for the filling. I like Miyoko’s cream cheese and Country Crock plant-based butter. The filling will be slightly softer, so refrigerate the assembled roll for at least 2 hours before slicing. The cake itself is naturally dairy-free since it uses no butter or milk.
Spice Variations : If you want a different flavor profile, try swapping the pumpkin pie spice for chai spice blend or apple pie spice. I made a version with cardamom and ginger that was incredible for holiday brunch. You could also add a teaspoon of orange zest to the batter for a bright citrus note.
Nutty Addition : Sprinkle 1/4 cup of finely chopped pecans or walnuts over the cream cheese filling before rolling. Toast the nuts first for deeper flavor. This adds a lovely crunch and makes the roll feel extra special.
Chocolate Pumpkin Roll : Replace 2 tablespoons of the flour with unsweetened cocoa powder for a chocolate version. The chocolate pairs beautifully with the pumpkin spice. Reduce the cinnamon to 1/2 teaspoon so the chocolate flavor shines.
Keto-Friendly Option : If you are watching your carbs, you might enjoy my healthy keto Mexican cauliflower rice bowl for a savory alternative, but for a dessert treat, you can try a low-carb pumpkin roll using almond flour and a sugar substitute like allulose. The texture will be different, but the flavor is still fantastic.
Serving and Storage Suggestions
This pumpkin roll is best served chilled. The cold filling firms up and the flavors have time to meld together. I always make it the day before I plan to serve it. It tastes better on day two, honestly.
Serving Temperature : Take the roll out of the refrigerator about 15 minutes before slicing. This takes the chill off without letting the filling get soft. Slice and arrange on a platter, then dust with powdered sugar right before serving so it does not dissolve.
Presentation Ideas : Arrange the slices on a long wooden board or a white platter for contrast. Add a few fresh cranberries and rosemary sprigs around the edges for a holiday look. A drizzle of caramel sauce over the top is never a bad idea.
Complementary Dishes : This roll pairs beautifully with a hot cup of coffee or spiced apple cider. For a full fall dessert spread, serve it alongside my healthy diabetic-friendly lemon cake for a nice contrast of flavors. The citrus cuts through the richness of the pumpkin and cream cheese.
Storage Instructions : Wrap the unsliced roll tightly in plastic wrap and store in the refrigerator for up to 5 days. The flavors actually improve over the first 2 days. To freeze, wrap the roll in plastic wrap, then a layer of aluminum foil, and freeze for up to 3 months. Thaw overnight in the refrigerator before serving. Do not freeze the roll after it has been sliced, the exposed edges will dry out.
Reheating : This is a cold dessert, so no reheating is needed. If you prefer it slightly warm, microwave individual slices for 10 seconds. The filling will soften and the cake will become tender. It is a different experience, but some people love it that way.
If you are meal prepping for a busy week, this roll is perfect. Make it on Sunday, slice it as needed, and enjoy pumpkin dessert all week without any extra work. I have also brought it to potlucks and dinner parties where it disappeared before the main course even started.
Nutritional Information and Benefits
Here is the estimated nutritional breakdown for one slice of this pumpkin roll, based on 10 slices per roll. Values are approximate and will vary based on specific ingredients used.
| Nutrient | Amount Per Slice |
|---|---|
| Calories | 285 |
| Total Fat | 14g |
| Saturated Fat | 8g |
| Cholesterol | 85mg |
| Sodium | 220mg |
| Total Carbohydrates | 36g |
| Dietary Fiber | 1g |
| Sugars | 27g |
| Protein | 5g |
| Vitamin A | 180% DV |
| Calcium | 6% DV |
| Iron | 6% DV |
Pumpkin is packed with vitamin A, which supports eye health and immune function. The eggs add high-quality protein, and the cream cheese provides calcium. This is not a health food, but it is not a nutritional disaster either. It is a dessert made with real ingredients that you can feel good about serving to your family.
For a lighter option, you could use reduced-fat cream cheese in the filling, but I do not recommend it. The texture changes significantly and the filling becomes less stable. I would rather have a smaller slice of the real thing than a larger slice of something mediocre.
Conclusion
This pumpkin roll is the dessert I turn to when I need something that looks impressive but does not require a culinary degree. It is the recipe I failed at repeatedly until I finally understood what the cake needed from me. Patience, mostly. And a good towel.
I hope you make this for your family, your friends, or just for yourself on a quiet fall evening. I hope you slice into it and see that perfect spiral and feel proud of what you made. And I hope you eat the end pieces while standing in front of the fridge because those are the baker’s tax and nobody gets to judge you for it.
If you try this recipe, come back and let me know how it turned out. Did you add anything? Change the spices? Accidentally eat the whole roll in one sitting? I want to hear about it. Leave a comment below or tag me in your photos. Nothing makes my day like seeing someone else succeed at the thing I struggled with for so long.
And if you are looking for another dessert that travels well and feeds a crowd, check out my easy dairy-free star spangled fruit pizza for a completely different but equally show-stopping option. Happy baking, friends.
Frequently Asked Questions
Why did my pumpkin roll crack when I rolled it?
The most common reason is overbaking. If the cake bakes too long, it loses moisture and becomes brittle. Check it at 12 minutes and pull it out the second it springs back to the touch. Another reason is cooling the cake flat instead of rolling it while warm. Always roll the cake in the towel immediately after baking.
Can I use pumpkin pie filling instead of pumpkin puree?
No. Pumpkin pie filling contains added sugar, spices, and thickeners that will throw off the chemistry of this recipe. The cake will be too sweet, too dense, and may not set properly. Stick with 100% pure pumpkin puree for reliable results.
How do I get clean slices without smearing the filling?
Use a sharp serrated knife and wipe it clean between each slice. Chilling the roll for at least 1 hour before slicing firms up the filling so it does not squish out. A gentle sawing motion works better than pressing straight down.
Can I make this recipe without a jelly roll pan?
Yes, but the dimensions matter. You need a pan that allows the batter to spread thinly. A 13×9-inch pan works, but the cake will be thicker and harder to roll. Reduce the baking time by a minute or two and watch it closely. A half-sheet pan also works if you draw a 15×10-inch rectangle in parchment and spread the batter within those lines.
How far in advance can I make this pumpkin roll?
You can make it up to 2 days ahead and it will taste even better. The flavors meld and the texture improves. Store it tightly wrapped in the refrigerator. You can also freeze it for up to 3 months. Thaw overnight in the fridge before serving.
Pin This Recipe!
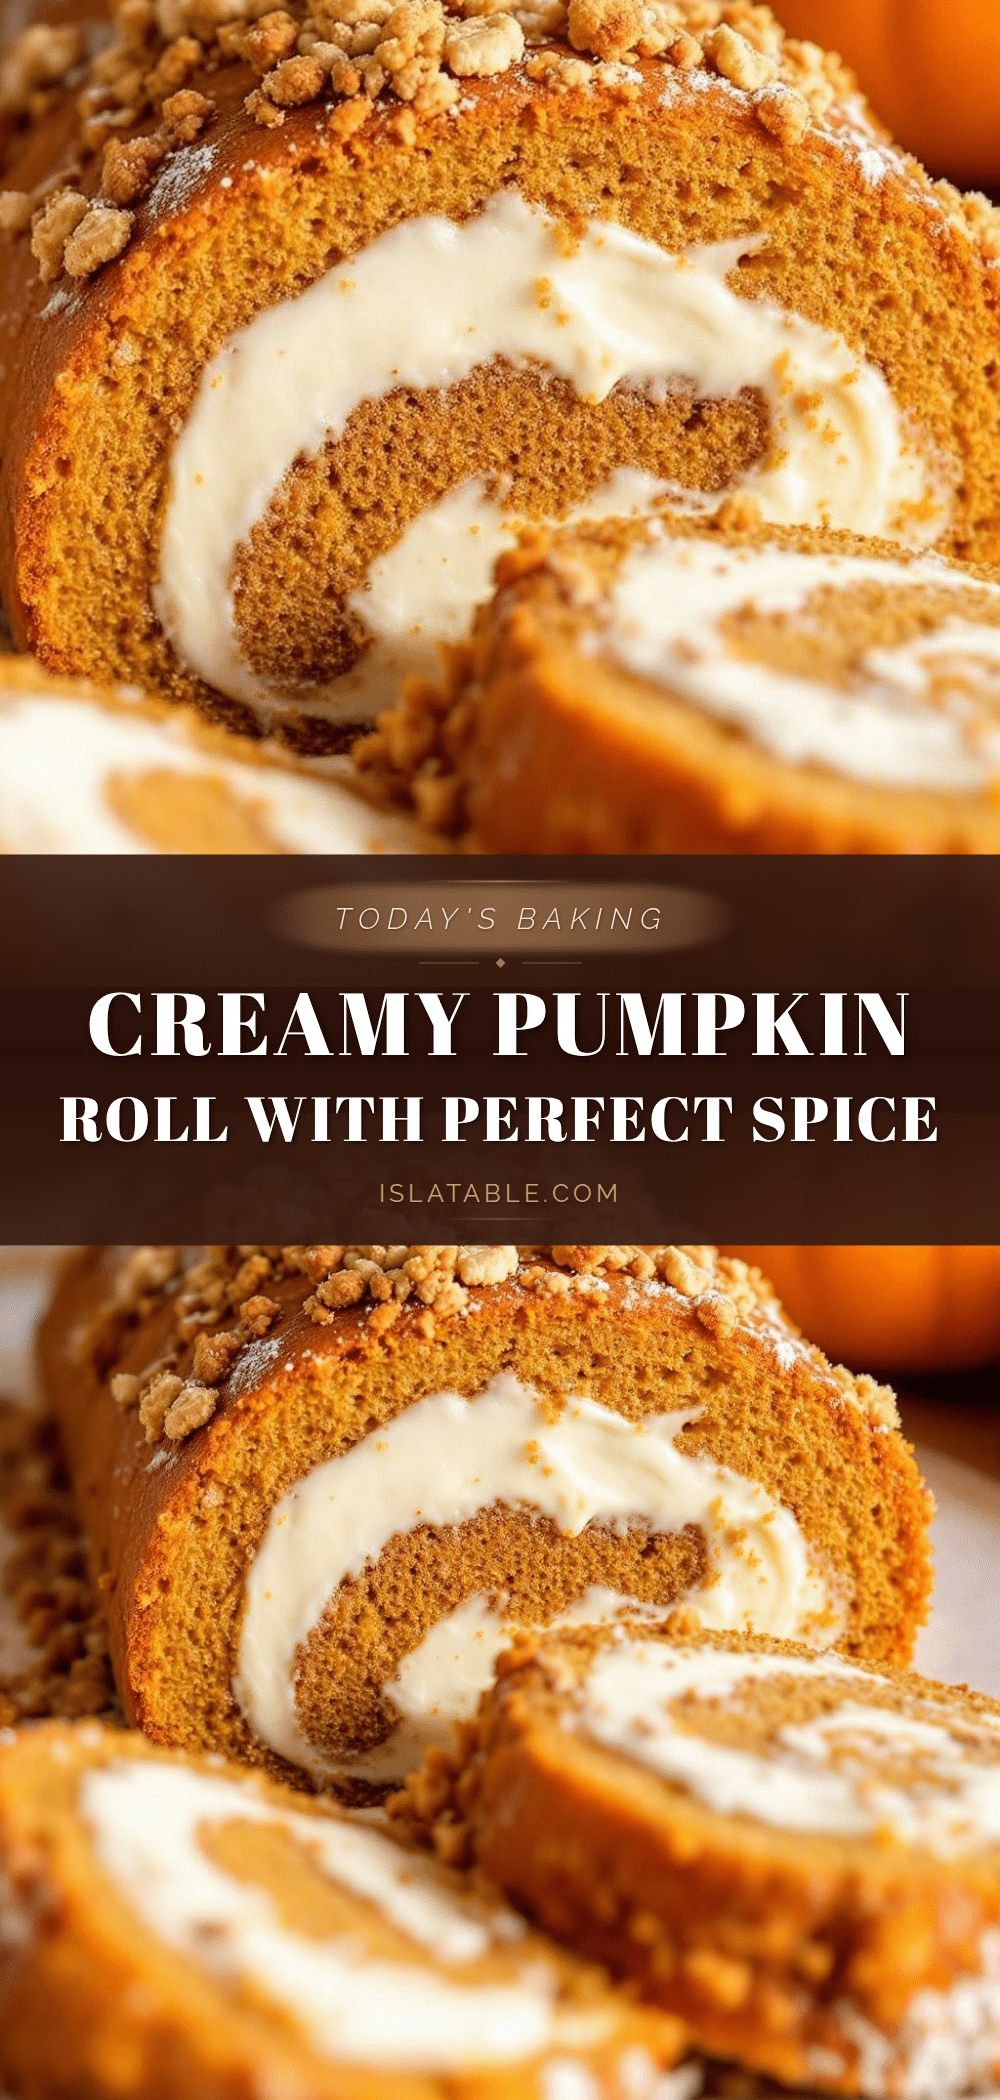
Best Pumpkin Roll with Cream Cheese Filling
A foolproof pumpkin roll with a tender, crack-free sponge and a perfectly creamy filling. This recipe delivers beautiful spirals every time, making it the ultimate fall dessert.
- Prep Time: 15 minutes
- Cook Time: 15 minutes
- Total Time: 1 hour 30 minutes (includes cooling and chilling)
- Yield: 10 servings 1x
- Category: Dessert
- Cuisine: American
Ingredients
- 3/4 cup all-purpose flour (90g)
- 1 teaspoon baking powder
- 1/2 teaspoon baking soda
- 1/2 teaspoon salt
- 2 teaspoons pumpkin pie spice
- 1 teaspoon ground cinnamon
- 3 large eggs, room temperature
- 1 cup granulated sugar (200g)
- 2/3 cup pumpkin puree (160g)
- 1 teaspoon vanilla extract
- 1/4 cup powdered sugar for dusting
- 8 ounces cream cheese, softened (226g)
- 1/4 cup unsalted butter, softened (57g)
- 1 cup powdered sugar (120g)
- 1 teaspoon vanilla extract
- Pinch of salt
Instructions
- Preheat oven to 350°F (175°C). Line a 15×10-inch jelly roll pan with parchment paper, leaving overhang on the long sides. Lightly grease the parchment with cooking spray.
- In a medium bowl, whisk together flour, baking powder, baking soda, salt, pumpkin pie spice, and cinnamon. Set aside.
- In a large bowl, beat eggs and granulated sugar with a hand mixer on medium-high speed for 3-4 minutes until thick and pale, and the mixture falls in ribbons.
- Reduce mixer speed to low and add pumpkin puree and vanilla extract. Mix just until combined.
- Add dry ingredients in two additions, folding gently with a rubber spatula using a cut-and-fold motion until no streaks of flour remain. Do not overmix.
- Pour batter into prepared pan and spread evenly. Bake for 12-15 minutes, until the cake springs back when touched and edges pull away from parchment.
- While cake bakes, lay a clean kitchen towel flat and dust generously with powdered sugar. As soon as cake is out of the oven, loosen edges, invert onto the sugared towel, and peel off parchment. Starting from a short end, roll cake and towel together into a tight log. Cool completely on a wire rack, seam side down (about 45 minutes to 1 hour).
- For the filling: In a medium bowl, beat softened cream cheese and butter until smooth and creamy, about 2 minutes. Add powdered sugar, vanilla extract, and pinch of salt. Beat on low until combined, then on medium for 1 minute until fluffy. Do not overbeat. Cover and refrigerate until cake is cool.
- Once cake is completely cool, carefully unroll it. Spread cream cheese filling evenly over cake, leaving a 1/2-inch border around edges. Using the towel, roll cake back up tightly but gently. Wrap in plastic wrap and refrigerate for at least 1 hour (overnight is better).
- To serve, unwrap roll, trim ends, and slice into 1-inch rounds with a sharp serrated knife. Wipe knife clean between slices. Dust with powdered sugar before serving.
Notes
Roll the cake while it is warm to prevent cracking. Do not skip the powdered sugar on the towel. Use room temperature dairy for the filling. For best results, refrigerate overnight before slicing.
Nutrition
- Serving Size: 1 slice
- Calories: 285
- Sugar: 27
- Sodium: 220
- Fat: 14
- Saturated Fat: 8
- Carbohydrates: 36
- Fiber: 1
- Protein: 5
Keywords: pumpkin roll, cream cheese filling, pumpkin dessert, fall dessert, Thanksgiving dessert, pumpkin cake roll


