That first little giggle—the kind that bubbles up before they even take a bite. It hit me right in the kitchen, watching my five-year-old niece spear a chunk of watermelon onto a skewer like she’d just discovered fire. I wasn’t trying to be clever that Tuesday afternoon. I was just trying to survive the post-school meltdown with something that wasn’t another pouch of applesauce. And honestly? The Easy Rainbow Fruit Kabobs for After-School Snacks I threw together on a whim became the only thing she talked about for a week.
It started with a half-empty pineapple and a bag of grapes that were about to turn. I sliced, she stacked, and somewhere between the blueberry and the strawberry, I realized we weren’t just making snacks—we were making a moment. No sugar, no stress, no fancy gadgets. Just a cutting board, some wooden skewers, and a kid who felt like a chef.
That’s the thing about these kabobs. They aren’t about precision. They’re about letting little hands take the lead while you sip your coffee and pretend you planned it all along. The colors do the heavy lifting—red, orange, yellow, green, blue, purple—and suddenly, fruit that usually sits untouched on the plate becomes the star of the show.
So if you’re staring down another afternoon of hangry kids and empty snack drawers, I get it. This is the kind of recipe that doesn’t ask much of you. It just asks for a few minutes and a little trust. And honestly? That first bite of a berry-and-melon kabob, still cold from the fridge, is worth every second.
Why You’ll Love This Recipe
Let’s be real—most after-school snacks are either a battle or a bore. These rainbow fruit kabobs are neither. They’re the kind of snack that feels like a treat without being one, and they come together faster than you can argue about screen time.
- Quick & Easy: From fridge to table in under 15 minutes. No cooking, no measuring cups to wash, no excuses.
- Simple Ingredients: Everything comes from the produce aisle. No weird additives, no hidden sugars, just real fruit doing its thing.
- Perfect for After-School Chaos: Whether you’ve got one kid or a whole carpool, these kabobs scale up without a fuss. They’re also great for playdates, birthday parties, or that 4 p.m. slump when everyone’s running on fumes.
- Crowd-Pleaser: I’ve watched picky eaters demolish these. Something about eating fruit off a stick makes it infinitely more exciting—even for adults who swear they don’t like fruit.
- Unbelievably Delicious: The combo of sweet, tart, and juicy in one bite is pure magic. And when you chill the skewers for a few minutes? The texture is next-level refreshing.
What makes this recipe different from the usual fruit platter is the presentation. There’s something about the rainbow order that clicks with kids—it’s like eating art. Plus, you can sneak in fruits they’d normally ignore (kiwi, anyone?) just by tucking them between strawberries. It’s not just a snack; it’s a tiny victory.
Honestly, this is the kind of snack that makes you feel like a good mom or dad without actually doing much. And after a long day of homework and meetings? That’s exactly what we all need.
What Ingredients You Will Need
This recipe uses simple, wholesome ingredients to deliver bold color and satisfying crunch without the fuss. Most of these are probably already in your fridge or fruit bowl—no specialty stores required.
- Strawberries (1 cup, hulled and halved): Look for bright red berries that smell sweet. If they’re a little soft, that’s fine—they’ll still taste great. (Pro tip: slice them in half so they sit flat on the skewer.)
- Oranges (1 large, peeled and segmented): Mandarin or navel oranges work best. If you’re short on time, canned mandarin oranges in juice (drained) are a solid backup. I personally love the fresh pop of a Cara Cara orange when they’re in season.
- Pineapple (1 cup, cubed): Fresh pineapple is ideal, but canned chunks in juice (drained) save a step. Just pat them dry so the skewer doesn’t slide around. The sweetness here balances the tart fruits perfectly.
- Kiwi (2, peeled and sliced into rounds): Look for kiwis that give slightly when pressed—they’re at peak sweetness. Slice them into thick rounds, then halve each round for easier skewering. (I’ve learned the hard way that thin slices fall apart.)
- Green Grapes (1 cup, seedless): These add that satisfying pop and a mild sweetness. Red grapes work too, but green keeps the rainbow order cleaner. Rinse and pat dry before using.
- Blueberries (1 cup): No prep needed—just rinse and let them shine. They’re the perfect size for little fingers to thread on. If you can find wild blueberries, they’re smaller and even sweeter.
- Purple Grapes or Blackberries (1 cup): Either works for the purple layer. Blackberries add a nice tart contrast, while purple grapes keep things simple. I usually grab whichever looks best at the store.
- Wooden Skewers (8-10, 8-inch): Standard kabob skewers are perfect. Soak them in water for 10 minutes if you’re worried about splinters, but honestly, for a no-cook snack, it’s not necessary. (If you’re serving toddlers, you can snap the skewers in half for shorter, safer kabobs.)
That’s it. Seven fruits and a stick. No hidden ingredients, no fancy syrups. Just nature’s candy, arranged in order. If you want to swap something, go for it—mango instead of pineapple, raspberries instead of strawberries. The rainbow is flexible.
Equipment Needed
You don’t need much for this one, which is exactly why I love it. Here’s what you’ll want on hand:
- Cutting board: A large, stable board makes prep faster. I use a bamboo one because it’s gentle on knives and easy to clean.
- Sharp knife: A good chef’s knife or paring knife for slicing fruit. Dull knives are more dangerous than sharp ones—trust me, I’ve learned this the hard way after a close call with a pineapple.
- Vegetable peeler: Only needed if you’re peeling kiwi. A standard Y-peeler works great.
- Wooden skewers: 8-inch skewers are the sweet spot for kid-sized kabobs. If you only have long skewers, just snap them in half.
- Large platter or baking sheet: For arranging the finished kabobs. A white platter makes the colors pop beautifully for photos.
- Paper towels: For patting fruit dry. Wet fruit makes the skewers slippery and messy.
- Small bowl of water: Optional, for soaking skewers if you’re worried about splinters. I skip this step 90% of the time and it’s always fine.
That’s it. No food processor, no mandoline, no special gadgets. If you’ve got a knife and a cutting board, you’re golden. (And if you don’t have skewers? Toothpicks work for mini kabobs—perfect for toddlers.)
Preparation Method
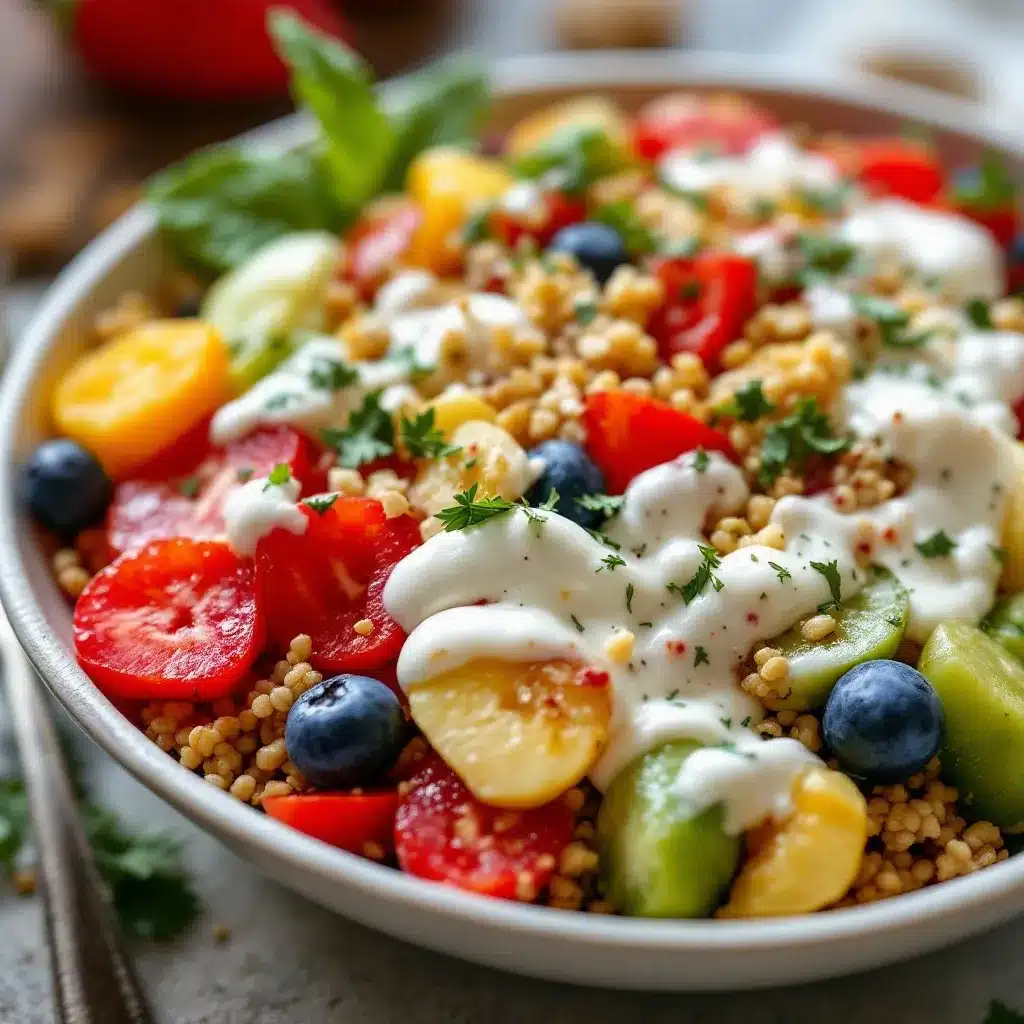
This is the fun part. The whole process takes about 15 minutes from start to finish, and most of that is just slicing. Here’s how I do it:
- Wash and dry all fruit. Rinse strawberries, grapes, blueberries, and blackberries under cool water. Pat everything dry with paper towels. Wet fruit = slippery skewers, so don’t skip this step.
- Prep the fruit. Hull the strawberries and slice them in half lengthwise. Peel the kiwi and cut into thick rounds (about ½-inch), then halve each round. Peel the orange and separate into segments—if the segments are huge, cut them in half crosswise. Cube the pineapple into 1-inch chunks. Leave the grapes and blueberries whole.
- Arrange your assembly line. Lay out all the prepped fruit in rainbow order on your cutting board: red (strawberries), orange (oranges), yellow (pineapple), green (kiwi and green grapes), blue (blueberries), purple (purple grapes or blackberries). This makes assembly faster and keeps the pattern consistent.
- Start skewering. Take a wooden skewer and thread the fruit in rainbow order. I like to start with a strawberry (flat side down) so the kabob has a solid base. Then add an orange segment, a pineapple chunk, a kiwi slice, a green grape, a blueberry, and finish with a purple grape or blackberry. Leave about ½ inch of space at the bottom of the skewer so little hands can hold it easily.
- Repeat. Continue until all fruit is used. You should get 8-10 kabobs depending on how full you pack them. Don’t worry if they’re not perfect—kids don’t care about symmetry.
- Chill (optional but recommended). Place the finished kabobs on a platter and refrigerate for 10-15 minutes. This firms up the fruit and makes the flavors pop. (If you’re in a rush, skip it—they’re still delicious.)
- Serve and watch them disappear. Arrange the kabobs on a platter in a fan pattern or stand them upright in a tall glass for maximum visual impact. Serve immediately.
One thing I’ve learned: let the kids help with the skewering. My niece loves threading the blueberries, even though she eats half of them before they hit the stick. It’s messy, it’s slow, and it’s totally worth it. The pride on their faces when they eat something they “made” is unbeatable.
Cooking Tips & Techniques
After making these kabobs more times than I can count, I’ve picked up a few tricks that make the process smoother and the results prettier. Here’s what I wish someone had told me:
- Keep fruit pieces uniform. Aim for 1-inch chunks across the board. If one piece is way bigger than the rest, the kabob looks lopsided and is harder to eat. I use a ruler the first time—now I just eyeball it.
- Pat fruit dry. This is non-negotiable. Wet fruit makes the skewer slide around, and the kabobs end up looking sad. A quick pat with a paper towel changes everything.
- Soak skewers if using for toddlers. While I skip soaking for older kids, little ones might get splinters from dry wood. A 10-minute soak in water prevents that. Or just use plastic straws cut in half—they’re safer and come in fun colors.
- Don’t over-pack the skewer. Leave a tiny gap between each piece of fruit. This makes the kabob easier to bite into and prevents the fruit from squishing together. Plus, it looks more intentional.
- Make extra for yourself. I’m not kidding. Every time I make these, I end up eating two before they even hit the platter. The combination of cold, juicy fruit on a stick is dangerously addictive.
- Prep fruit ahead of time. If you’re short on time in the afternoon, wash and slice the fruit in the morning and store it in separate containers in the fridge. Then assembly takes 5 minutes flat.
One mistake I made early on: using overripe fruit. Mushy strawberries and squishy bananas (yes, I tried bananas once) make for sad kabobs. Stick with firm, ripe fruit and you’ll be golden.
Variations & Adaptations
The beauty of rainbow fruit kabobs is how flexible they are. Here are some of my favorite twists:
- Dairy-Free Yogurt Dip: Serve the kabobs with a side of dairy-free yogurt (coconut or almond-based) mixed with a drizzle of honey. It’s like a healthy dessert. (I actually love this combo for summer parties—it feels fancy without any effort.)
- Chocolate Drizzle: Melt dark chocolate chips with a teaspoon of coconut oil and drizzle over the kabobs. Refrigerate for 10 minutes to set. This turns them into a treat that rivals any candy bar. (Pro tip: use sugar-free chocolate for a lower-sugar option.)
- Seasonal Swaps: In summer, swap in mango, peaches, or cherries. In fall, try apple chunks (tossed in lemon juice to prevent browning) and pears. Winter calls for pomegranate arils and blood oranges. The rainbow stays intact, just with different hues.
- Protein Boost: Thread small cubes of cheese (like cheddar or mozzarella) between the fruit for a more filling snack. My nephew loves the “cheese surprise” in the middle of his kabob.
- Frozen Fruit Version: Use frozen fruit for a slushy-like texture. Just let it thaw for 5 minutes before skewering so the pieces aren’t rock-hard. This is a lifesaver in hot weather.
- Allergen-Friendly: No common allergens here—no nuts, no dairy, no gluten, no eggs. If you’re serving at a school event, it’s one of the safest options around.
I once made a “monster” version for Halloween using green grapes for eyes and strawberries for fangs. The kids lost their minds. Honestly, the only limit is your imagination—and whatever fruit is in your fridge.
Serving & Storage Suggestions
These kabobs are best served cold, right out of the fridge. The contrast between the chilly fruit and the room-temperature air is part of the magic. Here’s how to make them shine:
- Serving temperature: Serve straight from the fridge for maximum refreshment. If you’re taking them to a picnic or potluck, pack them in a cooler with an ice pack.
- Presentation ideas: Arrange the kabobs in a fan pattern on a white platter for a stunning visual. Or stand them upright in a tall glass (like a mason jar) for a fun, party-ready look. I’ve even threaded them through the holes of a colander for a “porcupine” effect—the kids went wild.
- Complementary dishes: Pair with our Easy Dairy-Free Star-Spangled Fruit Pizza for a full fruit-themed spread. Or serve alongside Easy Gluten-Free Red, White & Blueberry Parfaits for a patriotic twist. For a savory balance, try our Easy Nut-Free Protein Balls—they’re the perfect protein-packed sidekick.
- Storage instructions: Store leftover kabobs in an airtight container in the refrigerator for up to 24 hours. After that, the fruit starts to release juice and gets soggy. (Honestly, they rarely last that long in my house.)
- Reheating: Don’t. These are meant to be eaten cold. If you want a warm fruit treat, try grilling the kabobs for 2 minutes per side—it caramelizes the sugars and is amazing. But that’s a whole different recipe.
- Flavor development: The flavors actually meld together a bit after an hour in the fridge. The pineapple gets sweeter, the berries soften, and everything becomes more cohesive. If you can wait that long, it’s worth it.
One thing I’ve noticed: the kabobs look best within the first hour of assembly. After that, the fruit starts to weep a little. So if you’re serving them for a party, assemble them no more than 2 hours ahead.
Nutritional Information & Benefits
Let’s be honest—these kabobs are basically vitamins on a stick. Here’s what you’re getting in each serving (per kabob, assuming 8 kabobs total):
- Calories: Approximately 85-100 calories per kabob (depending on fruit choices)
- Carbohydrates: 22-25g (mostly natural sugars from fruit)
- Fiber: 3-4g (thanks to berries and kiwi)
- Vitamin C: 60-80mg (over 100% of daily needs from strawberries, kiwi, and oranges)
- Potassium: 250-300mg (from bananas and oranges, if used)
- Antioxidants: High (blueberries and blackberries are antioxidant powerhouses)
Health benefits: The rainbow of fruits provides a wide range of phytonutrients. Strawberries support heart health, kiwi aids digestion, blueberries boost brain function, and oranges strengthen the immune system. It’s like a multivitamin that tastes good.
Dietary considerations: This recipe is naturally gluten-free, dairy-free, nut-free, egg-free, and vegan. It’s also low in fat and sodium. If you’re watching sugar intake, the natural sugars are balanced by fiber, which slows absorption.
Potential allergens: None from the fruit itself. The only concern would be cross-contamination if you use a cutting board that previously handled allergens. Wash everything thoroughly if you’re serving someone with severe allergies.
I personally love that this snack doesn’t come with a side of guilt. It’s just fruit—pure, simple, and good for you. And when my niece asks for “rainbow sticks” instead of cookies, I feel like I’m winning at parenting.
Conclusion
So there you have it—Easy Rainbow Fruit Kabobs for After-School Snacks that are as fun to make as they are to eat. They’re quick, colorful, and packed with real food that kids actually want to eat. No hidden ingredients, no complicated steps, no stress.
I love this recipe because it turns a simple snack into a moment. It’s the kind of thing that makes after-school time feel special, even when you’re running on empty. And honestly? Watching a kid light up over a skewer of fruit is one of those small joys that makes the whole day better.
Try it this week. Let the kids help. Make a mess. Eat a few blueberries off the cutting board. And then come back and tell me how it went—I’d love to hear your rainbow stories. Leave a comment below, share a photo, or tag me in your creation. Because this snack isn’t just about feeding kids. It’s about making memories, one colorful bite at a time.
Frequently Asked Questions
Can I make these fruit kabobs ahead of time?
Yes! Assemble them up to 24 hours in advance and store in an airtight container in the fridge. Just know that the fruit will release some juice over time, so they’re best within 2-4 hours of assembly for peak freshness.
What if I don’t have wooden skewers?
No problem! Use plastic straws cut in half, sturdy toothpicks (for mini kabobs), or even pretzel sticks for a salty-sweet twist. Just make sure whatever you use is safe for kids to handle.
Can I use frozen fruit for these kabobs?
Absolutely. Let frozen fruit thaw for 5-10 minutes before skewering so it’s not rock-hard. The texture will be softer, but the flavor is still great—especially in summer when you want something extra cold.
How do I keep the fruit from sliding off the skewers?
Pat the fruit dry before skewering, and don’t over-pack the kabob. Leaving a tiny gap between each piece helps them stay put. Starting with a flat piece (like a strawberry half) at the base also anchors everything.
Are these kabobs safe for toddlers?
Yes, with a few tweaks. Cut fruit into smaller pieces (blueberry-sized), use shorter skewers (snap wooden ones in half), and supervise closely. Or skip the skewers entirely and serve the fruit in a rainbow pattern on a plate—same concept, no choking risk.
Pin This Recipe!
Easy Rainbow Fruit Kabobs: Perfect After-School Snack
Quick, colorful, and packed with real fruit, these rainbow fruit kabobs are the perfect after-school snack that kids love to help make. No cooking required, just fresh fruit on a stick for a fun and healthy treat.
- Prep Time: 15 minutes
- Cook Time: 0 minutes
- Total Time: 15 minutes
- Yield: 8-10 kabobs 1x
- Category: Snack
- Cuisine: American
Ingredients
- 1 cup strawberries, hulled and halved
- 1 large orange, peeled and segmented
- 1 cup pineapple, cubed
- 2 kiwi, peeled and sliced into rounds
- 1 cup green grapes, seedless
- 1 cup blueberries
- 1 cup purple grapes or blackberries
- 8–10 wooden skewers (8-inch)
Instructions
- Wash and dry all fruit thoroughly with paper towels.
- Hull strawberries and slice in half lengthwise. Peel kiwi and cut into thick rounds (about ½-inch), then halve each round. Peel orange and separate into segments; cut large segments in half crosswise. Cube pineapple into 1-inch chunks. Leave grapes and blueberries whole.
- Arrange prepped fruit in rainbow order on a cutting board: red (strawberries), orange (oranges), yellow (pineapple), green (kiwi and green grapes), blue (blueberries), purple (purple grapes or blackberries).
- Thread fruit onto skewers in rainbow order, starting with a strawberry (flat side down) and ending with a purple grape or blackberry. Leave about ½ inch of space at the bottom of the skewer for easy holding.
- Repeat until all fruit is used, making 8-10 kabobs.
- Optional: Refrigerate kabobs for 10-15 minutes to chill and enhance flavors.
- Serve immediately, arranged on a platter or standing upright in a tall glass.
Notes
Let kids help with skewering for a fun activity. For toddlers, snap skewers in half or use plastic straws for safety. Pat fruit dry to prevent slipping. Prep fruit ahead of time and store in separate containers in the fridge for quick assembly. Use firm, ripe fruit for best results.
Nutrition
- Serving Size: 1 kabob
- Calories: 85100
- Sugar: 1518
- Sodium: 25
- Fat: 0.5
- Carbohydrates: 2225
- Fiber: 34
- Protein: 12
Keywords: fruit kabobs, rainbow fruit skewers, after-school snack, healthy kids snack, no-cook snack, fruit skewers, easy fruit recipe


